Author Topic: Revell Eindecker EIII 1/72  (Read 5493 times)

Offline Bluesman

  • Newbie
  • *
  • Posts: 40
Re: Revell Eindecker EIII 1/72
« Reply #15 on: May 08, 2017, 02:31:37 PM »
This is coming on nicely.
 The machined look on the cowlings is very tricky, especially in 1:72 - you've made a good effort at it, but it looks a little harsh. After many attempts (and failures) myself, I've found that steel, rather than gunmetal, over the aluminium gives a pretty good subtle effect.

Ian
I toned it down a bit by stimpling the cowling with a stiff brush. A little too much texture, but not as bold as what you see.

Offline Bluesman

  • Newbie
  • *
  • Posts: 40
Re: Revell Eindecker EIII 1/72
« Reply #16 on: May 08, 2017, 02:35:31 PM »
You've done a great job on this so far and the machined look on the nacelle looks excellent.  I made this kit a while back and when I did the nacelle I used aluminium and then lightly brushed in water to give it rippled effect. I prefer yours. Btw I managed to rig it using just one length of EZ Line. That was fun...sort of :)


That looks very nice!

Offline Bluesman

  • Newbie
  • *
  • Posts: 40
Re: Revell Eindecker EIII 1/72
« Reply #17 on: May 08, 2017, 02:51:59 PM »
All righty then...


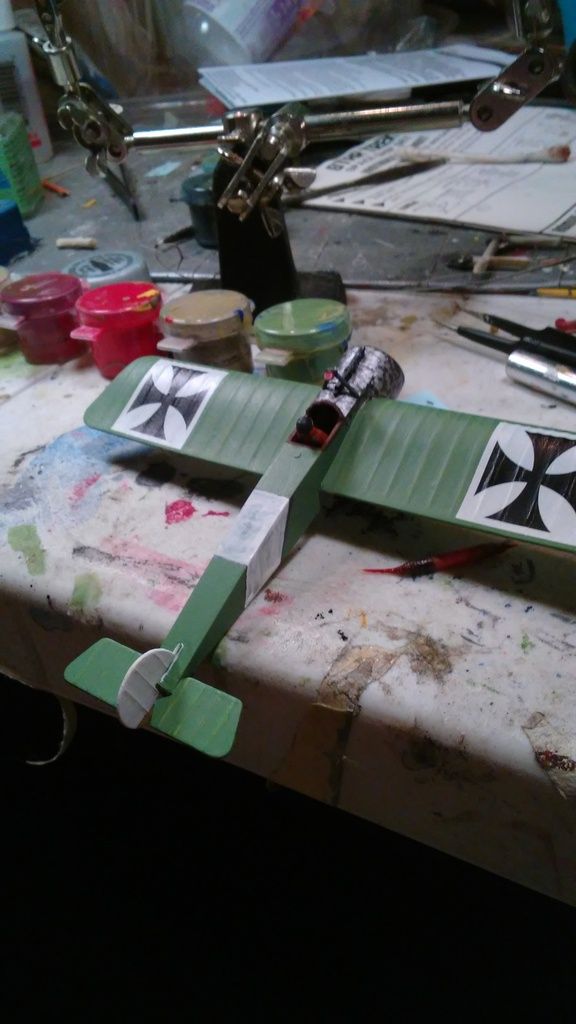
More work done on the Eindecker. Here I am adding the center stripe prior to adding the red and black stripe decals


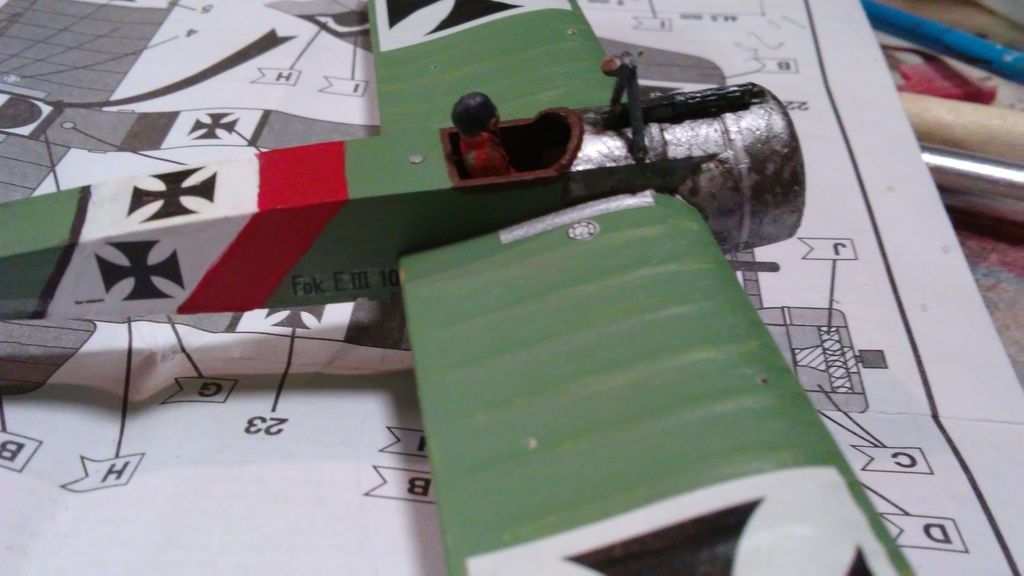
The wraparound decals for the striping were a major pain, grrrrr! I ended up free-handing the stripes for the center portion. I think the red strip is a little wide, but I didn't really notice until I started putting decals on, so no going back. I don't think it looks too bad. On the top portion of the wings I lightly drybrushed some light olive green for higlights on the internal spars and ribs.


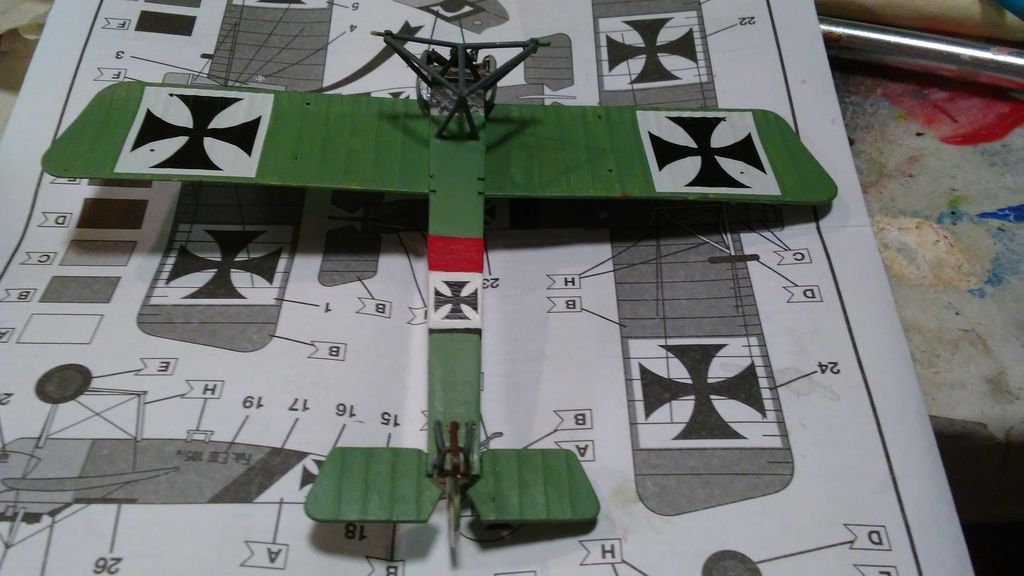
On the bottom, I did the opposite, I preshaded the ribs and used light olive green between the spars to sorta kinda simulate light shining through the wing. The effect is very subtle, probably too subtle.


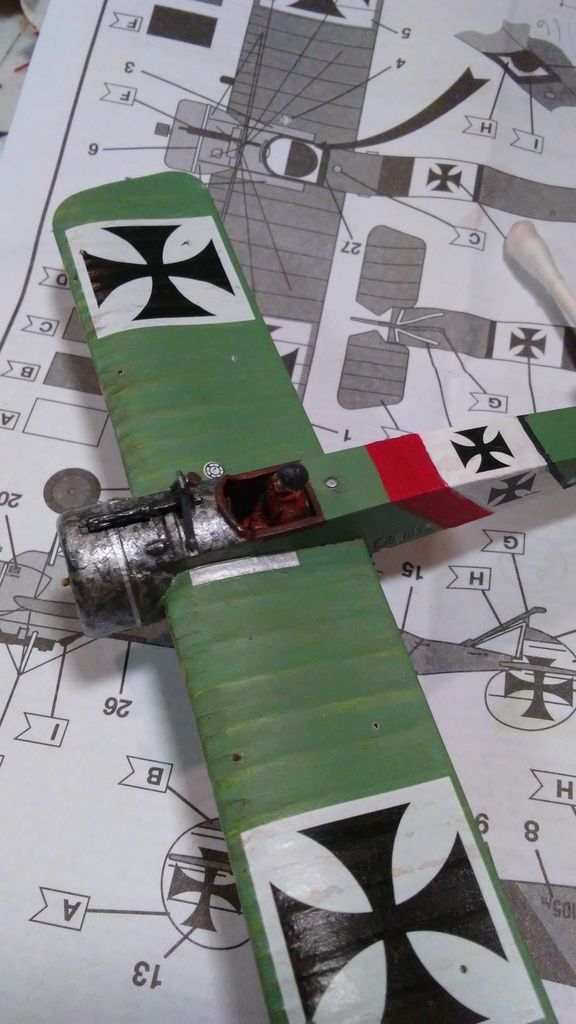
Here I'm doing some light weathering on the wings and I put a gas stain around the gas cap behind the pilot. I have found most of the weathering techniques used on larger scales don't look very good at 1/72, so I keep it to a minimum. It's not very noticeable, but I cut a piece of sprue to make a pully on the bars above the gun. The cowling has a rough texture, but is more subdued than my original efforts. I will need to sand that a bit. Next is rigging the plane and then putting on the last small parts
« Last Edit: May 08, 2017, 03:03:12 PM by Bluesman »

Offline Bluesman

  • Newbie
  • *
  • Posts: 40
Re: Revell Eindecker EIII 1/72
« Reply #18 on: May 08, 2017, 03:15:00 PM »
Sorry I haven't dropped by in a while! You have certainly made terrific progress on this OLD kit! Nice work on thinning the wings and working on the seat! I also like the overall color looks pleasing to my eye!
RAGIII

Thank you!

Offline Bluesman

  • Newbie
  • *
  • Posts: 40
Re: Revell Eindecker EIII 1/72
« Reply #19 on: May 08, 2017, 03:25:47 PM »
This is coming on nicely.
 The machined look on the cowlings is very tricky, especially in 1:72 - you've made a good effort at it, but it looks a little harsh. After many attempts (and failures) myself, I've found that steel, rather than gunmetal, over the aluminium gives a pretty good subtle effect.

Ian

I think your way is better. I need to expand my palette, All the metals I have right now are Sterling Silver, Gunmetal, and Copper. I usually change the tone of the paint with an undercoat. A Titanium white undercoat makes the silver look brighter, a flat black makes it duller. If I do anymore Eindeckers, I will try your method!

Offline RAGIII

  • Hero Member
  • *****
  • Posts: 18858
Re: Revell Eindecker EIII 1/72
« Reply #20 on: May 08, 2017, 08:23:04 PM »
Terrific progress! I have tried the swirl finish on ammo cans and such in 1/32nd. It is not easy to say the least. Admirable job on yours!
RAGIII
"A man has to know his limitations": Harry Callahan

"Don't slop it on" Lynda Geisler

Offline dr 1 ace

  • Hero Member
  • *****
  • Posts: 2340
Re: Revell Eindecker EIII 1/72
« Reply #21 on: May 09, 2017, 08:25:15 AM »
Terrific progress! I have tried the swirl finish on ammo cans and such in 1/32nd. It is not easy to say the least. Admirable job on yours!
RAGIII

Gotta agree with Rick !!

Ed
Life is short, enjoy it, nobody gets out alive.

Offline Cajun

  • Full Member
  • ***
  • Posts: 140
Re: Revell Eindecker EIII 1/72
« Reply #22 on: May 10, 2017, 10:52:15 AM »
Looking great so far... but is it my eyes or does the rudder looks sorta upside down?

Offline Bluesman

  • Newbie
  • *
  • Posts: 40
Re: Revell Eindecker EIII 1/72
« Reply #23 on: May 10, 2017, 04:33:25 PM »
Looking great so far... but is it my eyes or does the rudder looks sorta upside down?
I am rebel  :o

Offline Ian from Doncaster

  • Hero Member
  • *****
  • Posts: 1164
Re: Revell Eindecker EIII 1/72
« Reply #24 on: May 10, 2017, 10:54:55 PM »


In 1:72 I didn't attempt to paint swirls.  I sprayed chrome paint from a rattle tin - and even though it should be glossy metallic there is always some grainy texture.  Then I gently rubbed over this with fine micromesh.  That flattened out some of the raised areas, leaving a ever so slightly different effect to the raised and lower areas.  On close inspection it doesn't look like swirls too much, but for an accidental effect I was quite happy.

Offline KiwiZac

  • Global Moderator
  • Hero Member
  • *****
  • Posts: 2632
    • My Linktree
Re: Revell Eindecker EIII 1/72
« Reply #25 on: May 11, 2017, 08:36:15 AM »
I think that looks rather nice, personally!
Zac in NZ