Evening All,
Just at the moment modelling is having to take a bit of a back seat as life is taking a lot of time and energy at the moment, so I thought that I would post a blog on a kit which hitherto has not appeared on this site to the best of my knowledge. This build log is based on a project that I carried out in 2012. At the time I had recently started modelling again after a break of over 30 years and I knew little of internet sites and writing construction blogs for other modellers: in any event I had no intention of writing anything myself so I only took a limited number of photographs. In addition to that I was having problems with my camera so that close up photos were not practical, so this will be a rather general account with more words and fewer pictures than might be desirable. At the time I built this I had made a couple of simple kits from the box and was looking for a challenge via a kit that I had long wanted to build. It happened that I had an unbuilt 0/400 in the roof left over from my former modelling days, and I remembered building this model when it was first released in the late 1960's and making a mess of it. Many years later I had managed to improve the Frog Vickers Vimy so I decided that I should be able to make a half decent job of the 0/400. Considering its age this kit stands up well against modern offerings and it is reasonably accurate when compared with the drawings in the DataFile, but it needed some attention, especially the mould marks which required cleaning up before starting. It was a big kit - both in the number of parts (over 160), many of them quite small, and its physical size. The plastic was dark green and in my old kit was of good quality and had not gone brittle. Two sets of markings were provided but because of age mine had deteriorated and in any event the register was very poor so I discarded them all except for the "lift here" signs. I decided that I could hand paint the cockades and rudder stripes as I had done on the Vimy, and the individual aircraft letter would be painted freehand: that was the theory. The serial would come from a spare sheet of transfers that I had left over from my previous modelling career. I intended to base my model on the RNAS machine illustrated in Munson's Bombers 1914-1918.
The first thing that I did was to remove the over-heavy rib detail from the flying surfaces and checked the fit of various parts as I had read that in some cases these were not good. Once again I have to report that most of the parts fitted well - better than I had expected and a tribute to the mould makers of the 1960's. It reminded me that when this kit was released it set standards for others to follow: Airfix were then at the top of their game, much as they have strived to become in more recent years.
I did not start by assembling the wings as per the instructions as I knew from other modeller's experience that this could cause problems later and I wanted to try to avoid these by using a different assembly sequence. I started with the fuselage and after cleaning the mould marks cemented strips of plastic card to the sides to represent the missing framing in the cockpit areas.
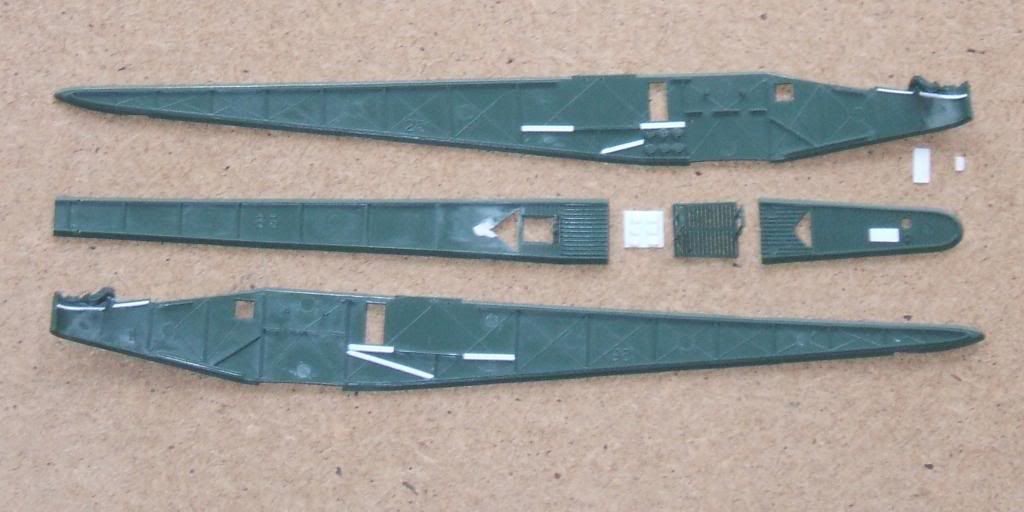
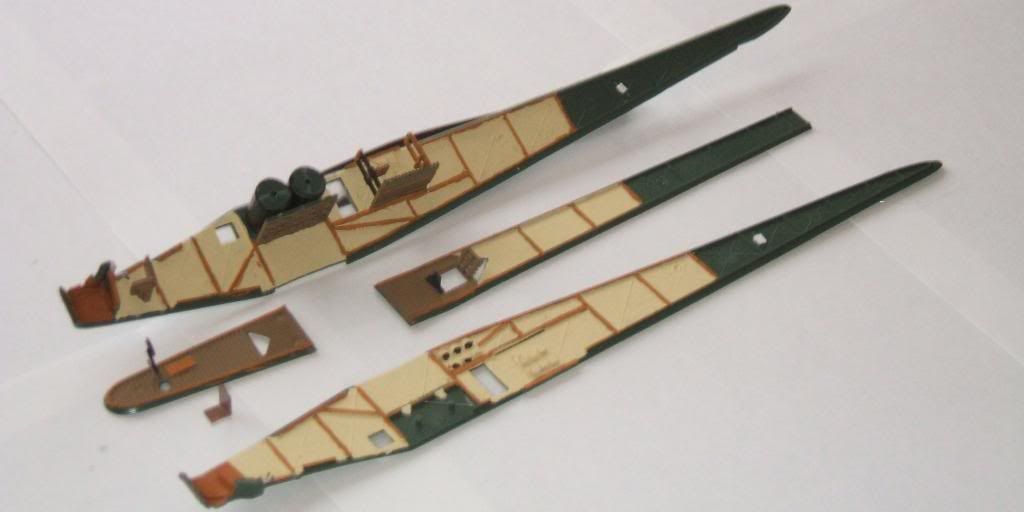
I replaced the small door between the pilot's and front gunner's cockpits, and added a small piece of card on the floor below the pilots' seat to represent a door there. I added a seat for the navigator/gunner next to the pilot (it folded up to the port - left - fuselage side), a rudder bar, a small instrument panel in the front cockpit, seat belts, other controls and ammunition holders for Lewis gun drums in the rear cockpit: these were made from small pieces of thin card and were glued to the fuselage sides: I used the mouldings in the kit as a guide for the size and shape of the drum holders. I cut a triangular aperture in the rear fuselage floor (part 63) just aft of the gunner's hatch and inserted a small piece of clear acetate to represent the window. I painted the interior clear doped linen which on reflection was probably wrong as the PC 10 dope would have made the inside of the linen seem much darker, but then everyone makes mistakes, light brown for the wood frames and dark wood for the slatted floors and gunner's hatch cover (part 64). The fuel tanks cannot be seen but they are needed because they help to keep the fuselage square - I painted them black. I replaced all the window transparencies with clear acetate sheet.
I will post more later when I have got my notes and photos sorted into a better order.
Thanks for looking.

