Author Topic: 1/32 Hansa-Brandenburg W.12  (Read 41940 times)

Offline KitRookie37

  • Sr. Member
  • ****
  • Posts: 489
Re: 1/32 Hansa-Brandenburg W.12
« Reply #120 on: January 08, 2015, 03:42:09 PM »
Hello to all,
Very nice effect on the wing. Excellent !
Best regards.
Alain.
Use the force, Luke.

Michael Scarborough

  • Guest
Re: 1/32 Hansa-Brandenburg W.12
« Reply #121 on: January 09, 2015, 12:30:53 AM »
Just went back and read this thread from the beginning. Really, really well thought out and inspirational stuff. Bravo.

Makes me want to tear into mine.

Cheers from NYC,
Michael

PS Warren, the point was not to burn the Disco clothes, the point was to burn up the dance floor wearing them.

Offline Gisbod

  • Hero Member
  • *****
  • Posts: 2438
Re: 1/32 Hansa-Brandenburg W.12
« Reply #122 on: January 11, 2015, 05:06:03 PM »
Thanks guys  ;)

Been away this week so a temporary pause in proceedings - but I have oiled up the fuse (pictures next week). Quite pleased with the results although the dreaded seam has suddenly reappeared having disappeared! I try to be sparing with the glue not to make a mess, but I think this is the wrong approach.. In future I'm going to apply the glue liberally and let it all ooze out - and sand that. The problem is it's not a gap but just a faint line that fillers/ super glue etc just don't adhere to. The sanding process just takes the filler away leaving the original line  ::) oh well...

Guy

“Oh! I have slipped the surly bonds of Earth -
Put out my hand, and touched the face of God.”

P.O. John Gillespie Magee 1941

Offline stefanbuss

  • Hero Member
  • *****
  • Posts: 976
Re: 1/32 Hansa-Brandenburg W.12
« Reply #123 on: January 12, 2015, 04:50:54 PM »
Good luck with your intended repair (at least this is how i understand your post, that you are trying to fix the reappeared seamline, no?)

Stefan

Offline Gisbod

  • Hero Member
  • *****
  • Posts: 2438
Re: 1/32 Hansa-Brandenburg W.12
« Reply #124 on: January 13, 2015, 12:49:27 AM »
Good luck with your intended repair (at least this is how i understand your post, that you are trying to fix the reappeared seamline, no?)

Stefan


Hi Stefan,

It was so faint I figured the lines of 'wood' grain would hide it so I went ahead - wrong!   :P

It's a shame because the finish is exactly how I pictured it - I've tried to capture it in the top photo but it only shows in certain lights. I'm now left with the dilemma of whether to leave it or not. I've got an eye on ScaleModelWorld this year and it seems pointless taking a model with a beginners seam on top  :-\ but I tried everything I could first time around and I just couldn't get it to go.... I've also had a little 'creep' of clear under the masking onto the metal areas which is causing me another headache.

Perhaps I could FedEx it to Bo?  ;)

Anyway, here are the pictures..


Guy

Ps I'm getting fed up with the dust in the macro shots so I've ordered an anti-static cloth - it's a vinyl record one but it should do the job, right?
“Oh! I have slipped the surly bonds of Earth -
Put out my hand, and touched the face of God.”

P.O. John Gillespie Magee 1941

Michael Scarborough

  • Guest
Re: 1/32 Hansa-Brandenburg W.12
« Reply #125 on: January 13, 2015, 01:20:24 AM »
Guy....take a deep breath.

In reverse order:

Dust: Yes, the LP anti-static cloth will do the job as will a tack cloth like those sold in paint stores.

Creep: Using a really good magnifier to carefully observe the progress, can you use a new scalpel to scrape away any of the color that bled under the masking tape?

Seam: Chris (Big Blue) had a similar re-occurring problem with the dorsal seam on his Eindecker but he eventually solved it.

Your woodwork on the fuselage is amazing. I can't wait to see what you do with the wood on the Felixstowe. Highest congratulations one what you've achieved. Stick with it and they will tremble when you set this beauty down at ScaleModelWorld.

Cheers from NYC,
Michael

Offline BigBlue

  • Hero Member
  • *****
  • Posts: 640
Re: 1/32 Hansa-Brandenburg W.12
« Reply #126 on: January 13, 2015, 01:29:23 AM »
The problem is it's not a gap but just a faint line that fillers/ super glue etc just don't adhere to. The sanding process just takes the filler away leaving the original line  ::) oh well...

Oh man do I feel your pain.  Virtually every fuselage seam I create goes through some version of this... join, fill, sand, dismay over the microscopic residual line.  I am going through some version of that right now on my D.VII.  Bo gave me a suggestion that I will pass along:

Regarding the seams, I find it helps to chamfer the edges of the seams prior to filling (I learned this doing auto body work. Also hanging drywall :) ).

Filler is softer than the plastic and will tend to erode into a trench as you feather it. The chamfered edge gives the filler something to hang onto as it tapers off. Seems counterintuitive to make an even bigger gap to fill, but it works.


I'll confess that I tried it on the aforementioned D.VII, but am still doomed to multiple cycles of fill & sand; perhaps I was too timid with my chamfering....

Regarding the potential for repair post painting: as Michael mentioned, I did manage to repair a re-appearing seam post painting... twice.  I applied and sanded multiple coats of clear to fill the gap, and then added a final light coat of paint to blend it in.  This may be a bit trickier with that lovely wood grain, but perhaps some version of clear coats with a bit of oil paint over the top will blend it in.

Good luck; I love what you have done so far and would hate for you to not feel completely happy with it.  I'll tell you that I can't see it in the pictures, but I know from experience that that is little comfort when you know it is there.

Chris

p.s. please share any solution you find!

Offline kornbeef

  • Hero Member
  • *****
  • Posts: 961
  • U.K. Carpet monster genocide squad leader.
Re: 1/32 Hansa-Brandenburg W.12
« Reply #127 on: January 13, 2015, 03:50:02 AM »
Guy.

Love what you're acheiving here.

Ref the seam, more for future ref really. I'm sure you know most this already so I don't want you to think I'm trying to teach *Grannie to blow eggs* as they say.
I found myself that seams have reappeared after time, I picked up from various places that sometimes the glue shrinks back as it dries, sometimes this takes weeks to finally dry.
Some over apply glue to the seam and let it bubble out like a weld cutting away the dry excess later.

Me I back the fuselage joint with some scrap stock (mainly for strength and stop resplitting while handling. Once the cement has dried and cut/sanded back and if it seems smooth  I tend to wipe everything over with thinners. Apply primer etc and let it settle while doing something else. Then sand and check again. I've found paint seems to shrink the seam sometimes when filled too.

If I've had reason to think a seam is going to be bothersome mask along its length each side and run a bead of thin Cyano along. Chamfering as Chris suggested is a fantastic idea. (now you have the opposite problem as once the Cyano is dry it is harder than the surrounding plastic so you sand/cut/adse it back carefully.)

Hope this helps.

Keith

Never too old to learn sumfink noo

Offline Gisbod

  • Hero Member
  • *****
  • Posts: 2438
Re: 1/32 Hansa-Brandenburg W.12
« Reply #128 on: January 13, 2015, 05:15:56 AM »
Thanks chaps,

That's all very helpful  ;) I think I'm going to leave it but keep dousing it in Klear until it disappears - it must do eventually?!

I still think that on reflection - having enough glue in the joint to ooze out - let thoroughly dry then sand should technically sort it out - but I'll have to experiment with what you've told me...

Metal cowlings are next on the list  :)

Guy
“Oh! I have slipped the surly bonds of Earth -
Put out my hand, and touched the face of God.”

P.O. John Gillespie Magee 1941

Offline radio

  • Hero Member
  • *****
  • Posts: 3952
Re: 1/32 Hansa-Brandenburg W.12
« Reply #129 on: January 13, 2015, 05:35:43 AM »
Very nice Guy.
Martin

Michael Scarborough

  • Guest
Re: 1/32 Hansa-Brandenburg W.12
« Reply #130 on: January 13, 2015, 06:32:47 AM »
I think that Keith has hit the nail on the head. (Except for the part about Granny and her eggs which doesn't translate into American English.)

FWIW, high end cabinet makers strive to use non-shrinking adhesives for this very reason. I have had art pieces show a seam fully six months after being finished. It's not cool when the piece has already been delivered to a collector.

I think a few factors are coming into play. I don't claim to be an expert but I wonder if:

1. The glue we use for styrene shrinks upon drying...and that it can, in fact, take a long time to fully cure, some people say months.
2. Filler on top of that glue will shrink as the glue below it shrinks leaving a visible gap. The paint follows suit.
3. As Bo pointed out, the filler is softer then the surrounding styrene and so the filled gap is deepened further as the softer filler is sanded away.
4. I wonder if all of the glue joints on our models experience this same shrinkage but that because of it's level of exposure, the problem with the dorsal seam on the fuselage is just more obvious?

I know some gents who will only use CA as a cement because of it's hardness. I wonder if it also has non-shrinking capacities?

Dousing it with more Klear may do the trick...or, not to be the voice of doom, it may just follow the same pattern.

I do not know if Klear is impervious to CA, but, if it is:

What if you fully seal the paint coat with Klear.......then run a bead of super thin CA along the seam and wipe it back across the grain so the excess remains in the seam......then sand it ever so lightly....then reapply more Klear. Apply the same number of Klear coats to all the similarly painted areas after giving them a very slight sanding to increase bonding ability. That will also help build the visual depth and increase the feeling of figure in the wood. Then wax the painted surfaces...doesn't Tamiya make wax for models? This will kill any orange peel or nubins of dust and give you a gorgeously flat clear finish which will look like in scale varnished wood. I just tried the waxing trick on the cockpit surround of my Pup and was amazed at what a difference it made in the scale look of the finish. Agreed, the materials are different but the concepts are no different than restoring the finish on a high-end piece of furniture.

Can you test this idea on an unexposed area? Maybe the bottom of one of the floats??

Between what you've done with the CDL and the wood, this is IMHO, an exceptional build you've got going.

Cheers

Offline Gisbod

  • Hero Member
  • *****
  • Posts: 2438
Re: 1/32 Hansa-Brandenburg W.12
« Reply #131 on: January 13, 2015, 07:16:49 AM »
Thanks Michael,

Lots of great ideas - I hadn't heard of a Tamiya wax?

It does seem to be getting slightly better with multiple thick coats of Klear - I would never have built up so many layers before but an interesting by product of this is, as you've mentioned, a great depth to the wood effect - looks a lot more realistic!  :D possibly over shiny now but period pictures of brand new aircraft were very shiny. Although it looks a bit more like a table now than an aircraft!  ;D I don't think the super glue will work because there's nothing for it to get into really - but again, I may experiment.

The curious thing for me is that sometimes I get a flawless join and others, a visible seam having not done anything different in the approach. But I do at least feel I have a better understanding now of 'joins'... Thanks  :)


Guy

Ps my worst joins to tackle are the flat fuselage ones like the undersides of the W.12 but frankly, I now cheat! I get some hyper thin plastic card and cut it roughly to shape - glue - trim - sand to blend in and, Voila! Perfect non seam  :D Just don't tell anyone   :-X
“Oh! I have slipped the surly bonds of Earth -
Put out my hand, and touched the face of God.”

P.O. John Gillespie Magee 1941

Michael Scarborough

  • Guest
Re: 1/32 Hansa-Brandenburg W.12
« Reply #132 on: January 13, 2015, 07:45:20 AM »
Here's what I just found on line:


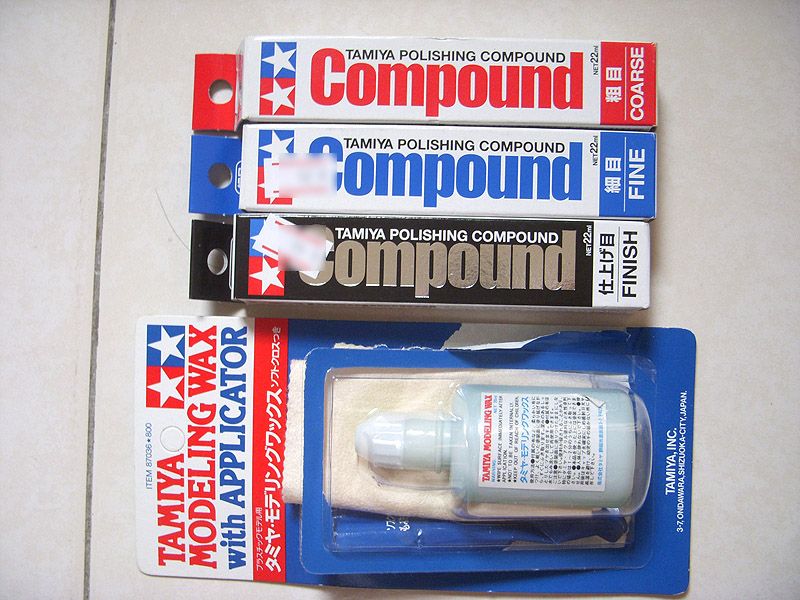
I did not realize that they made compound, as well. This is super news for anyone wanting to replicate the look of a gloss finish without the brassiness.

I know you are aware of "scale" shiny--ness. A lot of model builders are not and they put a gleaming glossy finish on a model car and it just does not look right, even if the real thing gleams like a diamond. The level of gloss is just as accountable to the effect of scale as the choice of paint colors; because of scale, a model 18" from one's eye has to look as if it's actually yards away and the atmosphere between the viewer and the object affects the level of color saturation, etc. Basically, a red shirt when viewed up close appears red-der than one down the street. In the same manner, a shiny Corvette right in your driveway appears shiny and glossier than one down the street.

I believe Klear is the same as Future....an acrylic floor polish. Therefore it produces a really hard finish and can be compounded and waxed. I would really encourage you to give it a try in a hidden area after the Klear has had a few days to really harden. Any finish will benefit from extra hardening time before being worked on. If I'm doing a varnish or French polish (shellac) finish on a table, I give it a full 200 hours to fully harden before I start polishing it. Certainly, acrylics, such as Klear, dry much, much faster than resin finishes, but they can still benefit from being allowed to really harden.

IMHO, your W. 12 is the perfect candidate for a glowing, but not glossy, finish.

I hope I don't sound like I'm preaching.

Cheers,
Michael

Offline Matt Parvis

  • Newbie
  • *
  • Posts: 45
Re: 1/32 Hansa-Brandenburg W.12
« Reply #133 on: January 13, 2015, 10:16:32 AM »
I can't add a great deal to this conversation as it relates to addressing the seam, but, it is my opinion that styrene cement joins do shrink when they dry.  My "evidence" comes from armour modelling.  With individual link tracks for an AFV my preferred method is to assemble the running gear, lay out the track with the links together and then glue the joints with Tamiya Extra thin.  The tracks then get left for 20-30 minutes.  At that time the joins will hold together but still be flexible enough to arrange around the running gear.  Once in place around the running gear you then leave that to dry for 24 hours.  I started leaving a little more slack than needed with this method because I found that after 24 hours the tracks were much tighter than they had been, indicating to me they had shrunk.  Others have mentioned the same thing happening to them as well. 


Matt 
We won't bring the muskets, we won't cause the pain,
But we're good for some headaches, and tough to clean stains.

WarrenD

  • Guest
Re: 1/32 Hansa-Brandenburg W.12
« Reply #134 on: January 13, 2015, 10:58:05 AM »
Guy,
       It's hard for me to find words to describe your painting and finish on this a/c, it's just beautiful, and like many build threads on here, I'm learning so much.

I'm sorry to hear of your seam issue. I had something similar, but somehow beat it on my first complete build a few years back. Funny thing about the chamfering: the first time I ever used putty as a kid, I chamfered the fuselage seams because, in my middle school mind, I couldn't see how I could get the putty in there without making a trench for it.

@ Michael, "Teaching Granny to suck eggs" translates perfectly well into American English. I've heard it my whole life. Man, I thought you grew up in the South for heaven's sake man!  :o ;D ;)

Warren