Author Topic: Airfix 1:12th scale Blower Bentley  (Read 21566 times)

Offline RAGIII

  • Hero Member
  • *****
  • Posts: 18858
Re: Airfix 1:12th scale Blower Bentley
« Reply #30 on: November 13, 2014, 11:47:17 AM »
Amazing work on those wheels Ian! The screen and leaf springs are also awesome!
RAGIII
"A man has to know his limitations": Harry Callahan

"Don't slop it on" Lynda Geisler

Offline Des

  • Administrator
  • Hero Member
  • ******
  • Posts: 9325
    • ww1aircraftmodels.com
Re: Airfix 1:12th scale Blower Bentley
« Reply #31 on: November 14, 2014, 06:46:45 AM »
Thank you Ian for the wheel lacing tutorial, this will be very helpful.

Des.
Late Founder of ww1aircraftmodels.com and forum.ww1aircraftmodels.com

Offline IanB

  • Hero Member
  • *****
  • Posts: 2441
Re: Airfix 1:12th scale Blower Bentley
« Reply #32 on: November 16, 2014, 10:28:46 AM »
A couple of notes to add to the earlier post:
You will need two jigs - the front wheels have a larger hole for the axle than do the rear and spare wheels. I found that .100" (2.5mm) rod with a couple of small strips of .010" (.25mm) strip on opposite sides kept the front wheels snug on the jig.
Don't glue the spokes into the rim until all spokes are fitted. Then add a dab of liquid CA to secure them in the rims, clamp them to the jig, and when it's dry, snip off the ends with end snips.

 For the outer set of spokes, I marked everything the same way.

The hubs are too big, so after marking, trimming and cleaning up, I glued them to the rear hubs and left them overnight to dry. They were then placed on the jigs I'd used for the rear set of spokes and sanded down to the same diameter as the rear hubs. They were then drilled for the spokes.

Hole number 700 is finished! No more drilling! (yes that is 700 - 70 spokes per wheel, 5 wheels!)


 Here is the set of 5 wheels, all drilled, with the front hubs fitted and sanded, and the front rims fitted. I will now play with some paint mixes, paint the wheels as they are, then fit the front row of spokes.


I need another beer....or two!  :o

Ian
« Last Edit: July 17, 2017, 12:54:07 AM by IanB »

Offline RAGIII

  • Hero Member
  • *****
  • Posts: 18858
Re: Airfix 1:12th scale Blower Bentley
« Reply #33 on: November 17, 2014, 01:51:49 AM »
WOW, Very impressive!!
RAGIII
"A man has to know his limitations": Harry Callahan

"Don't slop it on" Lynda Geisler

Offline IanB

  • Hero Member
  • *****
  • Posts: 2441
Re: Airfix 1:12th scale Blower Bentley
« Reply #34 on: November 20, 2014, 01:49:06 PM »
The biggest problem I'm coming up against with working on an unfamiliar subject, in an unfamiliar scale, is planning!
 I thought I was about ready to start getting some paint on this, but I then realised that I had more work to do on the firewall, steering column, and leaf springs. I added the nuts on the leaf spring shackles, and then decided that I needed a different approach to the firewall so that I didn't have an untreatable joint when I put it all together. I therefore cut the front part of the floor off, and attached it to the firewall, added some stock sheet to cover the joins, and filled and sanded as necessary. Much better!
 I then decided I wasn't happy with the part I'd added for the throttle bracket mounting, so I removed it and remade it, slightly bigger. I'm now happy with that and have redone the aluminium paintwork. Now I am not happy with the circular blanking plate for the fuel lines etc so I'll repaint that later!
 The petrol and oil header tanks have been added, as well as a new steering column mounting bracket on the rear of the firewall. The end bolts have been added to the steering column and a little more clean up done on that too.


 Finally I made up the remaining 140 spokes needed and have prepared them for painting...


 I'm hoping that by painting the spokes first, all that will be needed when the wheels are complete is a little touch up......we'll see.......

Thanks for watching....any pics or details of the fuel and oil lines and where they run would be more than welcome....

Ian
« Last Edit: July 17, 2017, 01:00:32 AM by IanB »

Offline RAGIII

  • Hero Member
  • *****
  • Posts: 18858
Re: Airfix 1:12th scale Blower Bentley
« Reply #35 on: November 21, 2014, 11:05:10 AM »
OK not politically correct but all I can say is Damn!, that's a lot of spokes!!
RAGIII
"A man has to know his limitations": Harry Callahan

"Don't slop it on" Lynda Geisler

Offline IanB

  • Hero Member
  • *****
  • Posts: 2441
Re: Airfix 1:12th scale Blower Bentley
« Reply #36 on: November 21, 2014, 12:08:19 PM »
It's more PC than the word I used!  ;)

Ian

Offline Rob Hart

  • Hero Member
  • *****
  • Posts: 696
Re: Airfix 1:12th scale Blower Bentley
« Reply #37 on: November 24, 2014, 06:27:02 AM »
I would have to do this one spoke at a time because if I viewed them all in a pile as your photo shows, it would probably kill my enthusiasm for the project.

Offline IanB

  • Hero Member
  • *****
  • Posts: 2441
Re: Airfix 1:12th scale Blower Bentley
« Reply #38 on: November 24, 2014, 07:27:19 AM »
Rob, that's the method I used for the inside of the wheels, which have 42 spokes each. I want to get a coat of paint on the front spokes (only 28 per wheel) so that  there are no shadows, so I cut and bent them all first.....it does look a little daunting!

Ian

Offline IanB

  • Hero Member
  • *****
  • Posts: 2441
Re: Airfix 1:12th scale Blower Bentley
« Reply #39 on: November 27, 2014, 11:35:50 AM »
Slow but steady.....
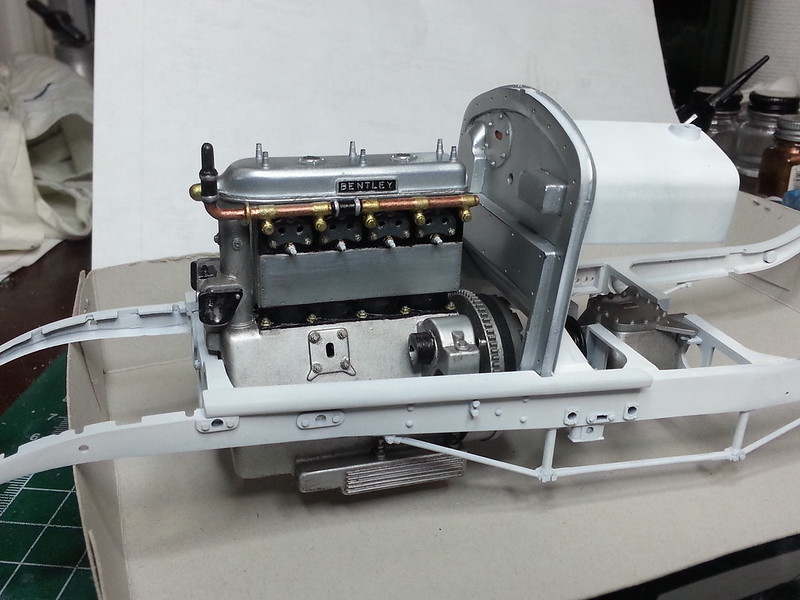
 I've put a wash on the engine to tone it down a bit and make it look a little more used - just some pastels applied with a damp brush and worked until there were no more streaks or brush marks. Also painted some of the ancillaries, (pipework and such), which still need a wash to weather them a little.
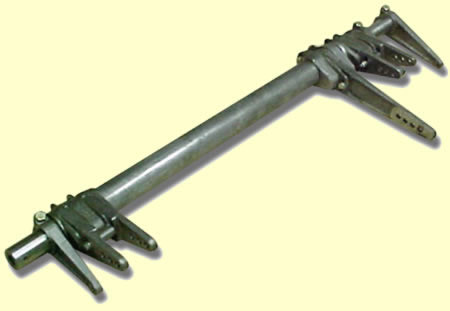
Here's one of the magnetos:


 I then decided that my interpretation of the water pump mount was wrong so pulled that off, cleaned the area up and made a new mount - which also meant I had to remake the pump outlet pipe as I'd shortened it to fit my modified mounting point...the inlet will have to wait until I have the radiator mounted and can figure out the shape and length.
 I also figured out (I think) how the oil pump is mounted and will work on constructing that next and adding it to the rear of the firewall before I paint that piece. The hole in the rear upper centre of the firewall (for wiring) has also been cut out.
 I did actually try to make a start on painting, and started masking the aluminium parts on the front firewall face but it peeled the aluminium paint off so I'll have to rethink that, too!
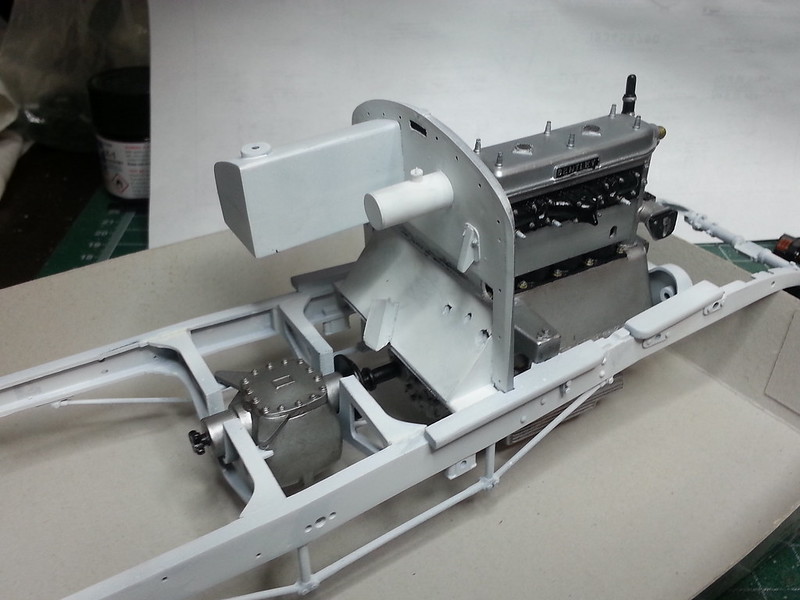
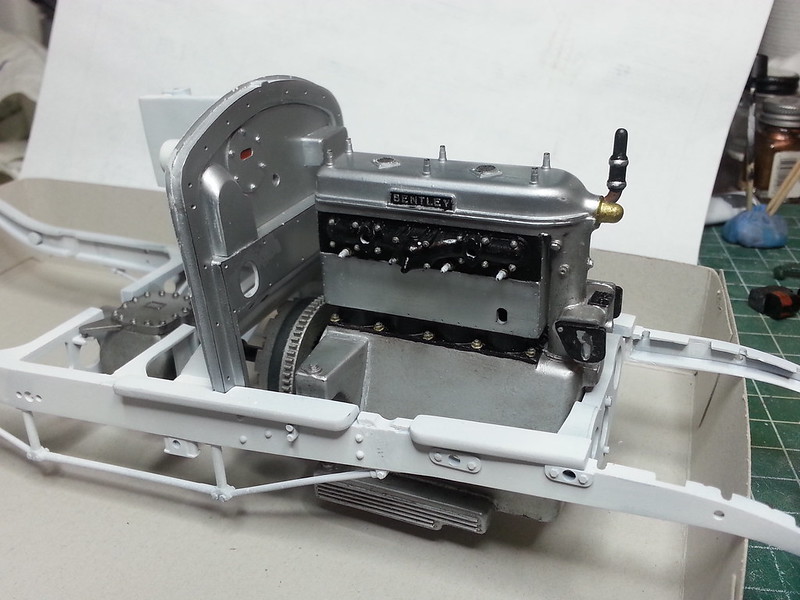
 Just to show myself that I have been making progress, I dry fitted the engine, gearbox and firewall.....the gearbox needs a shaft added to the side for the shift lever, which means a hole in the floor,  etc, etc.....


 Apart from that, I've spent a lot more time trying to find more pics and details. I came upon a goldmine of parts pics at Vintage Bentley Parts Ltd, which has helped a lot on figuring out how the pedals were mounted...


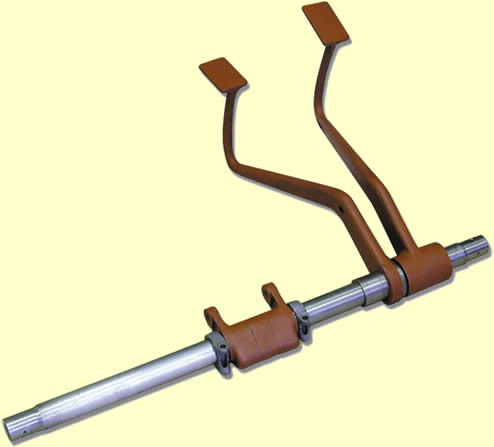
 So... the plan....make and fit the oil pump, brake compensator shaft, and brake pedals, and get some paint on it all!  We'll see how that pans out.....

Thanks for looking in!

Ian
« Last Edit: July 17, 2017, 01:16:50 AM by IanB »

Offline Rob Hart

  • Hero Member
  • *****
  • Posts: 696
Re: Airfix 1:12th scale Blower Bentley
« Reply #40 on: November 27, 2014, 12:03:09 PM »
It appears that you will have modified or replaced every single part of the kit before you finish the model. I do that too, but usually only in the process of correcting my own mistakes. Thanks for sharing your build notes and photos. I see Revell has announced a 1/24 scale kit of this car. I may have to get one.

Offline Des

  • Administrator
  • Hero Member
  • ******
  • Posts: 9325
    • ww1aircraftmodels.com
Re: Airfix 1:12th scale Blower Bentley
« Reply #41 on: November 27, 2014, 12:29:04 PM »
You are making some great progress with this one Ian, the magneto is superb and what you have done with the engine looks excellent, the pedals look amazing. Looking forward to seeing more progress with this great looking model.

Des.
Late Founder of ww1aircraftmodels.com and forum.ww1aircraftmodels.com

Offline IanB

  • Hero Member
  • *****
  • Posts: 2441
Re: Airfix 1:12th scale Blower Bentley
« Reply #42 on: November 28, 2014, 03:23:44 AM »
Thanks Des, but those pedals are the real thing - I can only hope mine come close!

Ian

Offline IanB

  • Hero Member
  • *****
  • Posts: 2441
Re: Airfix 1:12th scale Blower Bentley
« Reply #43 on: December 05, 2014, 01:42:54 PM »
A little more progress....as stated earlier, working with an unfamiliar subject leads to planning problems!
 I decided that because of the way the leaf springs and front cross member are attached (requiring a lot of filling and sanding), I should add those parts before spraying the chassis. So the last few days have been spent building new spring hangers, attaching the front cross member to the springs, and adding the remaining leaf spring shackles and nuts. I'm now debating whether to add the front wheel backing plates or not, as they are in two halves and will no doubt need a little fettling of the gaps too.....

 The front spring hanger brackets were carved out of 3mm x 6mm plastic rod. Those were then drilled and two pieces of 1.57mm aluminium tube, and .51mm brass rod were cut to fit as the central mounting pins. The hangers are brass strip, drilled at one end for the mounting pins, filed round at that end, and cut to length. Slits were cut in the leaf spring ends and the brass hangers were CA'd in place. I then added the rear part of the hanger brackets from plastic card cut to shape.


Slow progress, but it's coming on....I hope to get the suspension attached and all the filling and cleaning up done over the next couple of days, then finally I should be able to start putting some paint on!

Ian
« Last Edit: July 17, 2017, 01:31:37 AM by IanB »

Offline Ian from Doncaster

  • Hero Member
  • *****
  • Posts: 1164
Re: Airfix 1:12th scale Blower Bentley
« Reply #44 on: December 05, 2014, 06:12:46 PM »
Excellent treatment of those leaf springs Ian.  I did not have the patience to make similar refinements.  The seam/flash down the middle of the leaf spring is a pain to remove as that by default takes away the detail on the wrappings!  I won't even start on the ejector pin marks, nor the components where the two mold halves don't match up precisely.

I'm interested to see how you treat the chromed components - apologies if this has been covered before?