Now where was I? Ah yes...
First, thank you Rick, Lance, Ernie, Martin & Gary for your kind comments; they are much appreciated. I thought I'd have an update to share, and therefore would wait to respond until it was ready.... sadly it has taken me longer than I expected.
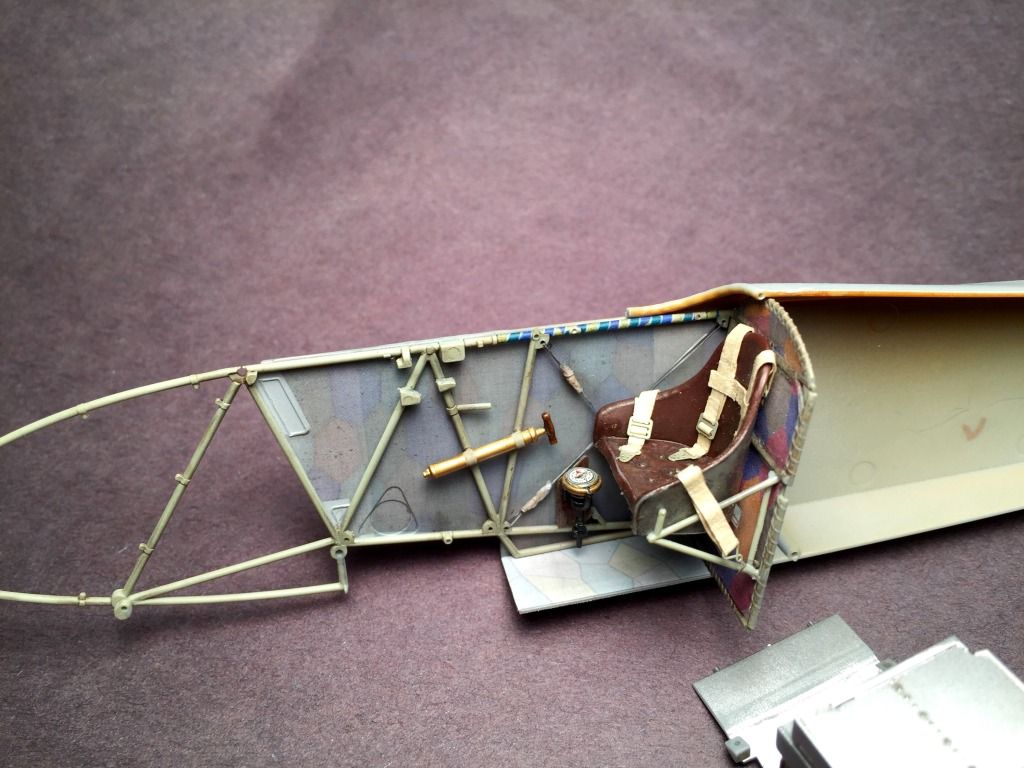
I have made further progress on the interior, and think I am now ready to assemble the cockpit structure and move towards closing the fuselage up. I have added the wiring and linkage rod-a-ma-thingies to the throttle and spark levers, and put the sample of interior lozenge from Richard to good use:
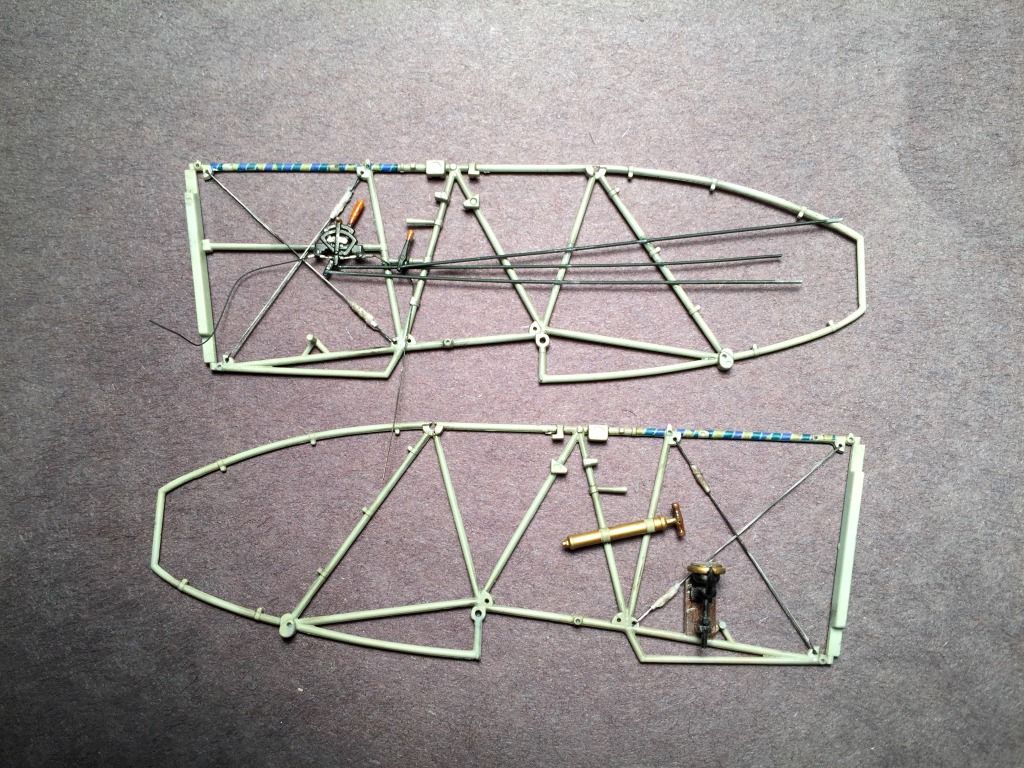
The throttle wiring is made from cut aluminum tubing and bits of fine wire. Other than the C/A glue's random decision to bind or not, there isn't much to tell here. The linkage rods (I apologize if my terminology is erroneous) are stretched sprue. I have left the rods long (as you can see) but plan on cutting them back as I assemble the interior.
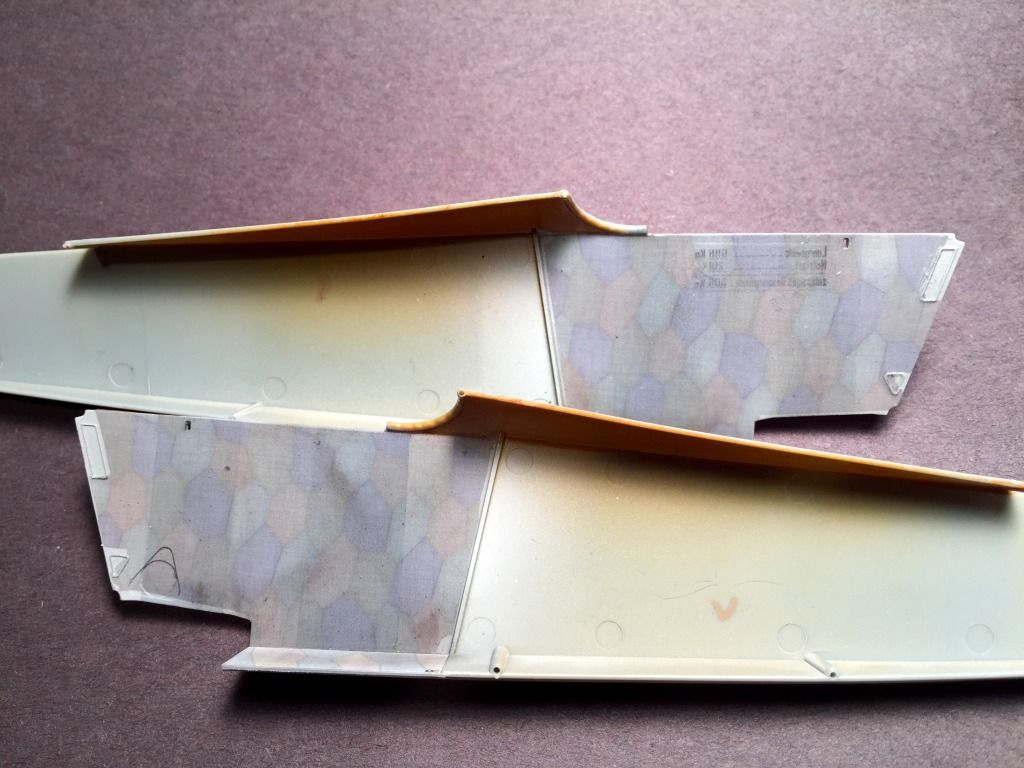
Moving on to the fuselage walls, I decided that I wanted to allow the both the exterior stripes and the weight table to be visible through the linen. I started with an undercoat of light gray (rather than white) and slightly darker gray stripes thinking the painted exterior would limit the light transmission through the fabric walls, and thus darken the colors. Strictly realistic or not, I wanted the black stripes to be perceptible from the inside. Additionally, I used a bit of earth colored pigment to add some dirt and staining prior to adding a gloss coat. For the weight table, I scanned the original decal, opened up the image in Photoshop, flipped it, and then lightened the intensity in a somewhat haphazard fashion to simulate the uneven transmission of the paint/ink through the linen.

My assumption is that the weight table would have been applied at the factory, and I made the leap that it was applied prior to the dope coating, and thus would come through the linen. Again, accurate or not, I wanted to add a little visual interest. I printed the modified table on inkjet decal paper, and applied it to the painted fuselage.
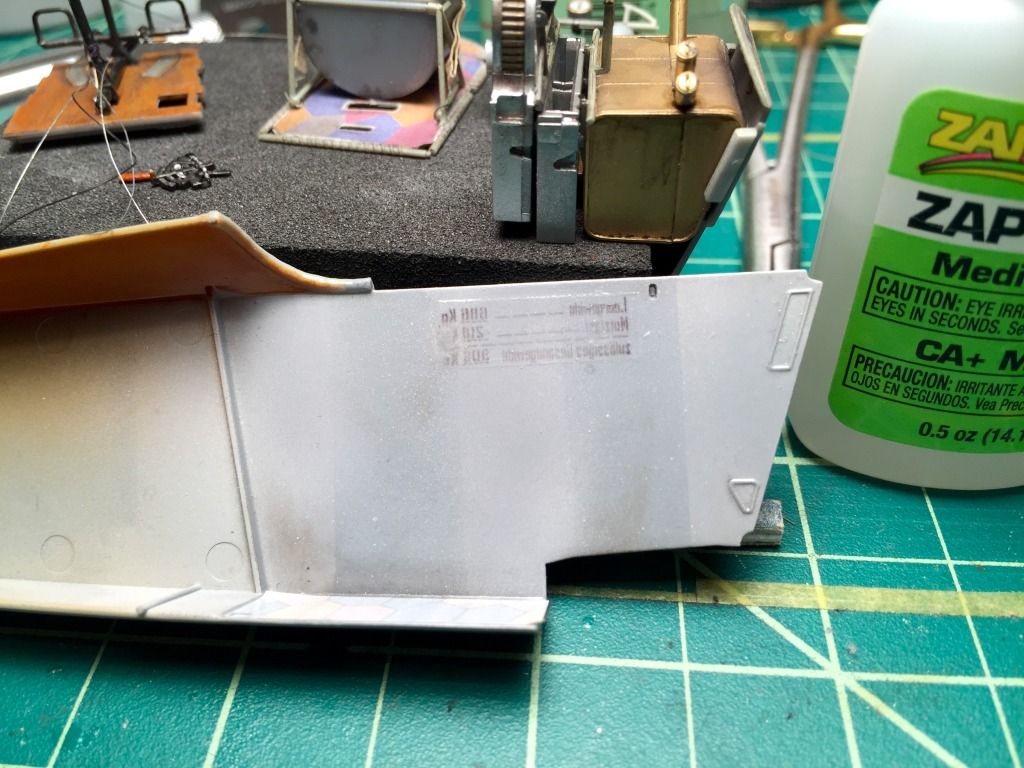
The Aviattic interior lozenge was a pleasure to use and I am happy with how the transparency allowed the undercoat and pre-staining to come through. It could just be my brain playing tricks on me, but I do think that the pigments under the decal are somehow more convincing than the reverse would be. The thickness of the extra table decal is apparent in certain angles, but happily is not visible when viewed from above, particularly when tucked behind the framing and rigging. With the framing in place, all of the effects are very subtle, which is good.
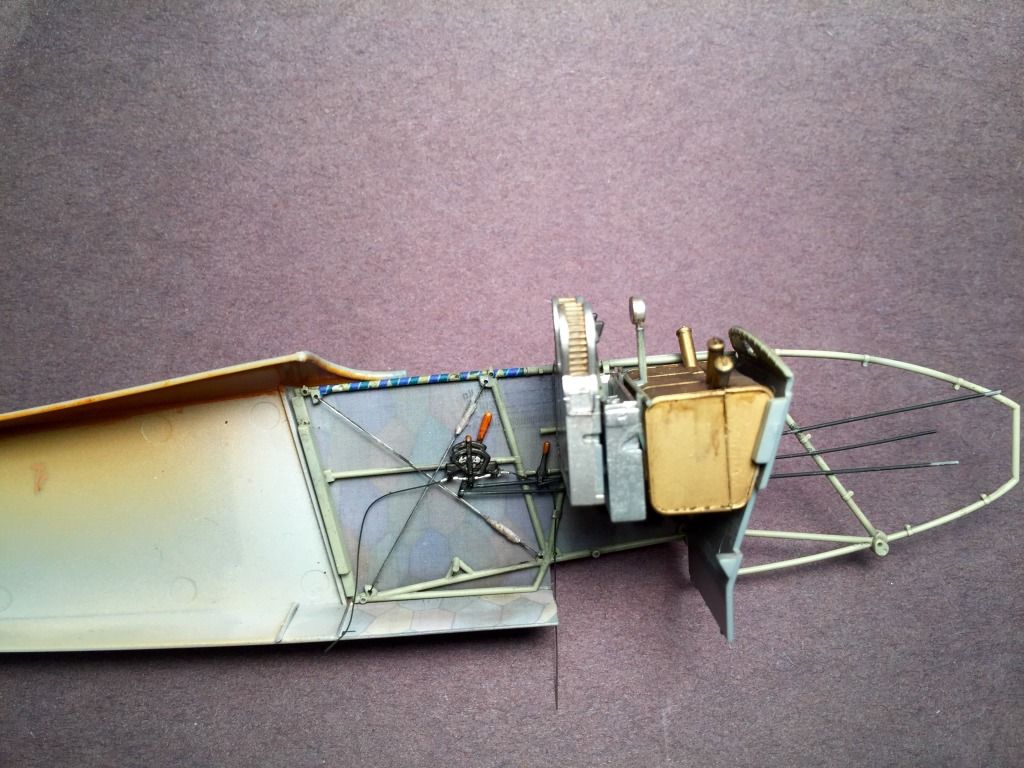
That's what I've got for now. Next step is to assemble the internal structure from the parts that have been waiting patiently on my desk for the last few weeks. I would love to be spraying paint on the fuselage over the weekend.... well, its a reasonable goal at least.
Thanks for looking in,
Chris

