Author Topic: (Another) WNW Canadian Fokker DVII  (Read 10799 times)

Online lcarroll

  • Administrator
  • Hero Member
  • ******
  • Posts: 8558
Re: (Another) WNW Canadian Fokker DVII
« Reply #30 on: April 23, 2014, 09:04:58 AM »
Mark and Dave, Thanks for looking in and for your comments. Progress is very slow (read almost none!) as real life continues to get in the way of recreation..........Need to re-arrange the priorities around here! ;)
Cheers,
Lance

Offline Des

  • Administrator
  • Hero Member
  • ******
  • Posts: 9325
    • ww1aircraftmodels.com
Re: (Another) WNW Canadian Fokker DVII
« Reply #31 on: April 23, 2014, 09:25:55 AM »
Absolutely brilliant work on the cockpit Lance, and your decal application is superb, extremely well done and shaping up to be a show stopper.

Des.

List of priorities - Modeling
                          Modeling
                          Modeling
                          outside work
                          Modeling
                          Modeling
                          shopping
                          Modelling

You get my drift  :) ;)
                         
Late Founder of ww1aircraftmodels.com and forum.ww1aircraftmodels.com

Online lcarroll

  • Administrator
  • Hero Member
  • ******
  • Posts: 8558
Re: (Another) WNW Canadian Fokker DVII
« Reply #32 on: April 23, 2014, 12:10:32 PM »
  Thank you Des. I WON'T pass on your suggested priorities to SWMBO, so far she thinks everyone here is wonderful! ;)
Cheers,
Lance

Offline KONG

  • Hero Member
  • *****
  • Posts: 715
  • A day without sunshine is like...night
Re: (Another) WNW Canadian Fokker DVII
« Reply #33 on: April 29, 2014, 08:19:33 AM »
Looks real Lance

Good one  ;) Awesome job, very impressed  8)

Take care

Dave
"If I could only have brought him down alive..."

Online lcarroll

  • Administrator
  • Hero Member
  • ******
  • Posts: 8558
Re: (Another) WNW Canadian Fokker DVII
« Reply #34 on: April 29, 2014, 08:57:16 AM »
Thanks Dave. I've managed a bit of progress; got the fuselage closed up and have started the seemingly endless "lozenging" again. Also have the nose cowling panels with aluminum, hairspray X 2 coats, and a base coat of lilac in that order. I'll be masking and spraying the olive green around the OAW "hexagons" on those, then do a little "chipping " for some wear on them. Pictures in the next day or two.........
Cheers,
Lance

Offline jknaus

  • Hero Member
  • *****
  • Posts: 1121
Re: (Another) WNW Canadian Fokker DVII
« Reply #35 on: April 29, 2014, 10:48:58 AM »
Something just caught my attention. I was doing another Fokker DVII and had painted splotches on the nose. You mention OAW Hexagons. So did all OAW birds with the cammed nose use hexagons? Are they hard or soft hexagons if so? Thanks in advance.
James

Online lcarroll

  • Administrator
  • Hero Member
  • ******
  • Posts: 8558
Re: (Another) WNW Canadian Fokker DVII
« Reply #36 on: April 29, 2014, 12:22:44 PM »
James,
   I use the term "hexagon" as a convenience. The lilac/purple on Olive or dark green patterns were a standard OAW finish item. There's a wonderful photo in the Albatros Publications Fokker DVII Anthology 2 of a production line at Romorantin at the end of the War showing a 3/4 front view of seven nearly completed DVII's, the cowlings all have the mauve / green camouflage segments and each is in a different pattern. There was, apparently, no rule or pattern. All of the references I've seen show a very stark (maybe just slightly soft sprayed edge occasionally) hard edged pattern. Colour scheme A in the OAW version's Instruction Booklet and the photos of 8425/18 on page 31 of same illustrate the points made here as well. The only standard or rule appears to be there were no standards nor rules in this regard! I'm going with a slightly subtle border, not the hand brushed edge but a "tightly" masked but still sprayed one and using the Kit Instructions' side view of "Scheme A" along with the photos of 8425/18 as a guide.
   Hope this answers your question.
Cheers,
Lance
   

Offline jknaus

  • Hero Member
  • *****
  • Posts: 1121
Re: (Another) WNW Canadian Fokker DVII
« Reply #37 on: April 29, 2014, 01:38:09 PM »
Yes, thanks.
James

Offline mc65

  • Full Member
  • ***
  • Posts: 216
Re: (Another) WNW Canadian Fokker DVII
« Reply #38 on: May 02, 2014, 11:59:44 PM »
wow, what a beauty!

greta work, indeed!! ;)

Online lcarroll

  • Administrator
  • Hero Member
  • ******
  • Posts: 8558
Re: (Another) WNW Canadian Fokker DVII
« Reply #39 on: May 03, 2014, 03:11:22 AM »
    Thanks for your kind comment, MC65! :)

   Another update, I've made a bit of progress in the bit of time available between Spring yard clean up and the normal real life interruptions.
   Here's some quick work bench photos from this morning; I hope to get back to some work on this later today. I started the completion of the fuselage by installing the three cables from the control stick (throttle and two gun cables) but didn't get a photo before closing her up. The last task completed was to taper and enlarge the rudder and elevator control wire fairleads on the rear fuselage.


   The fuselage was then closed up; only minor filling was required as the fit was very good.
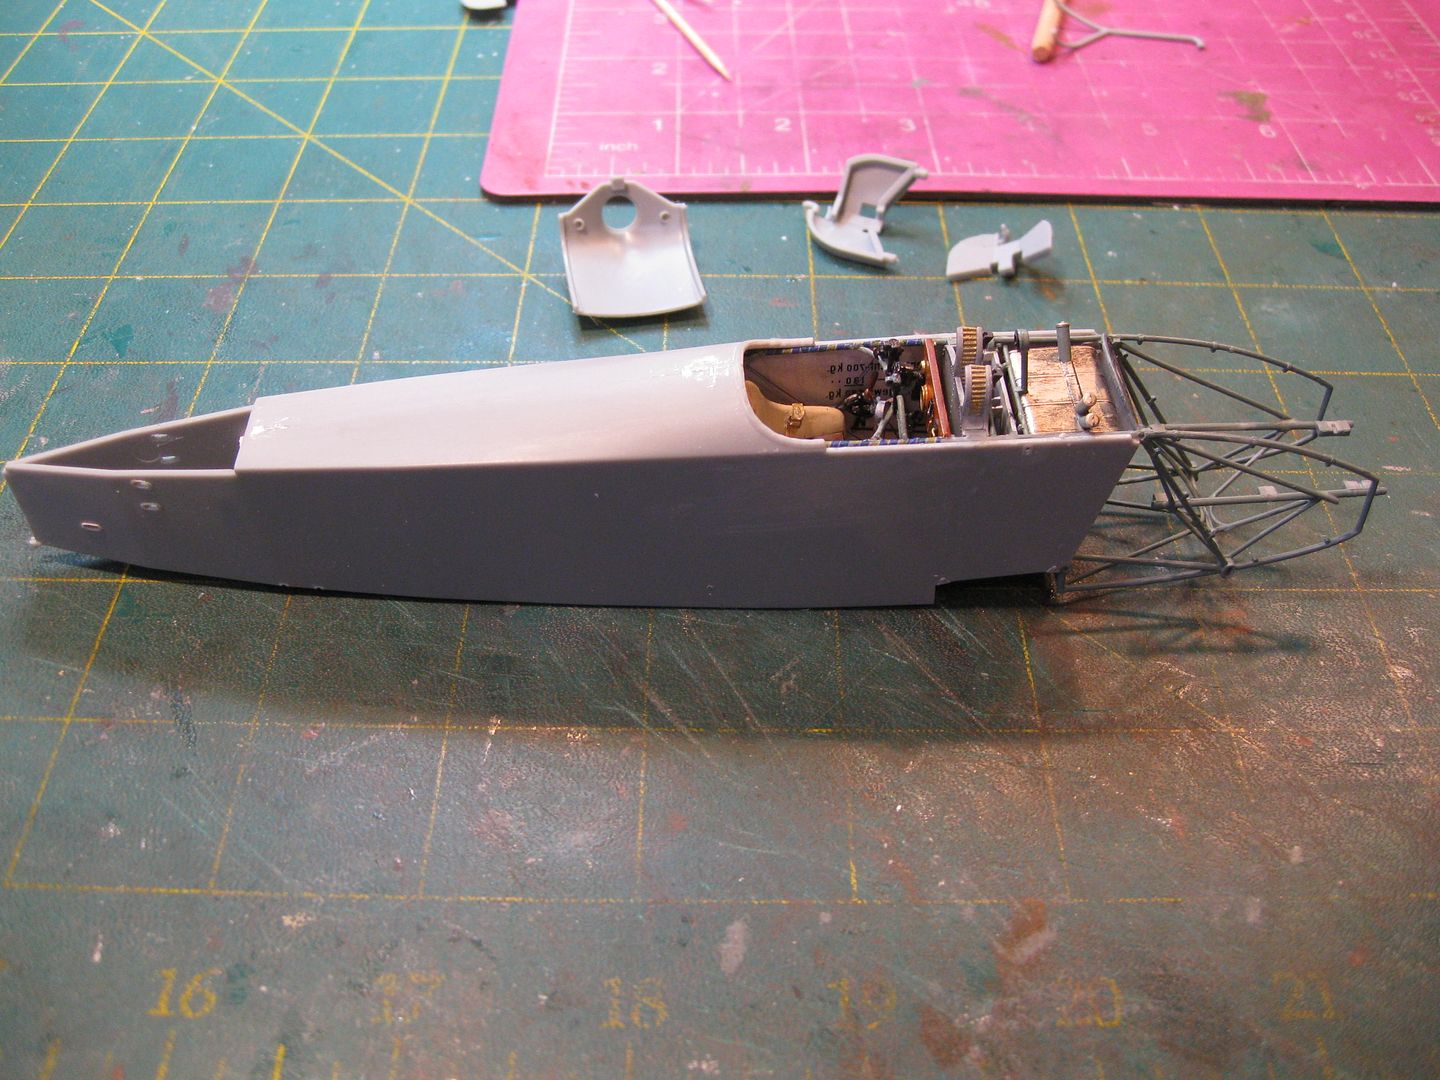


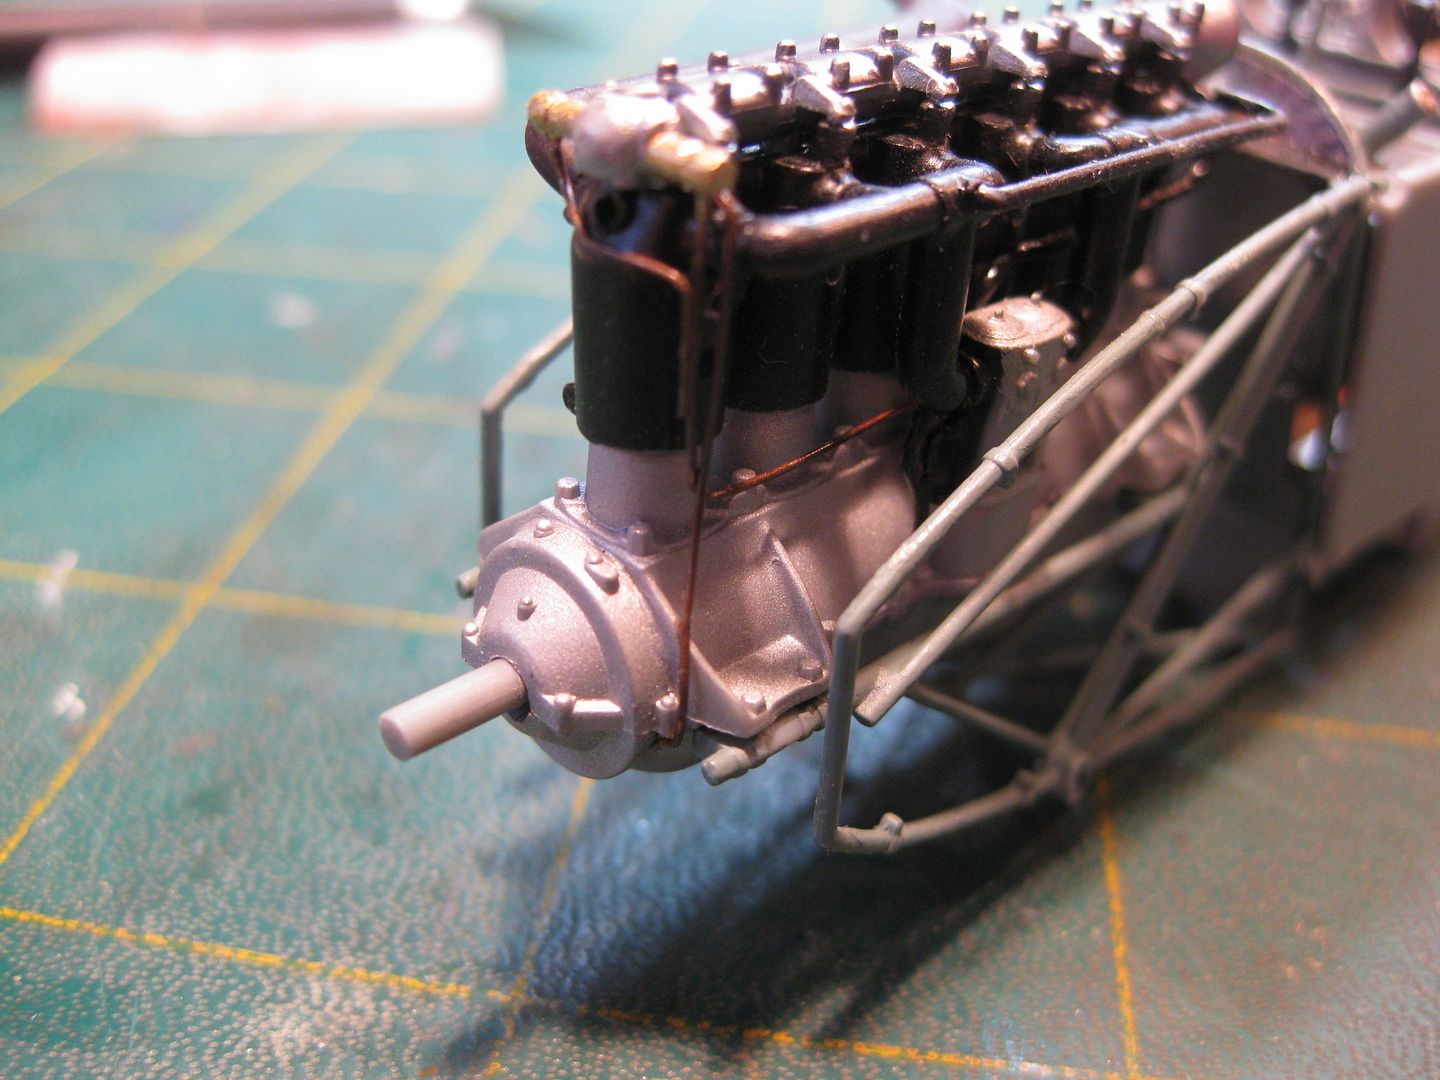
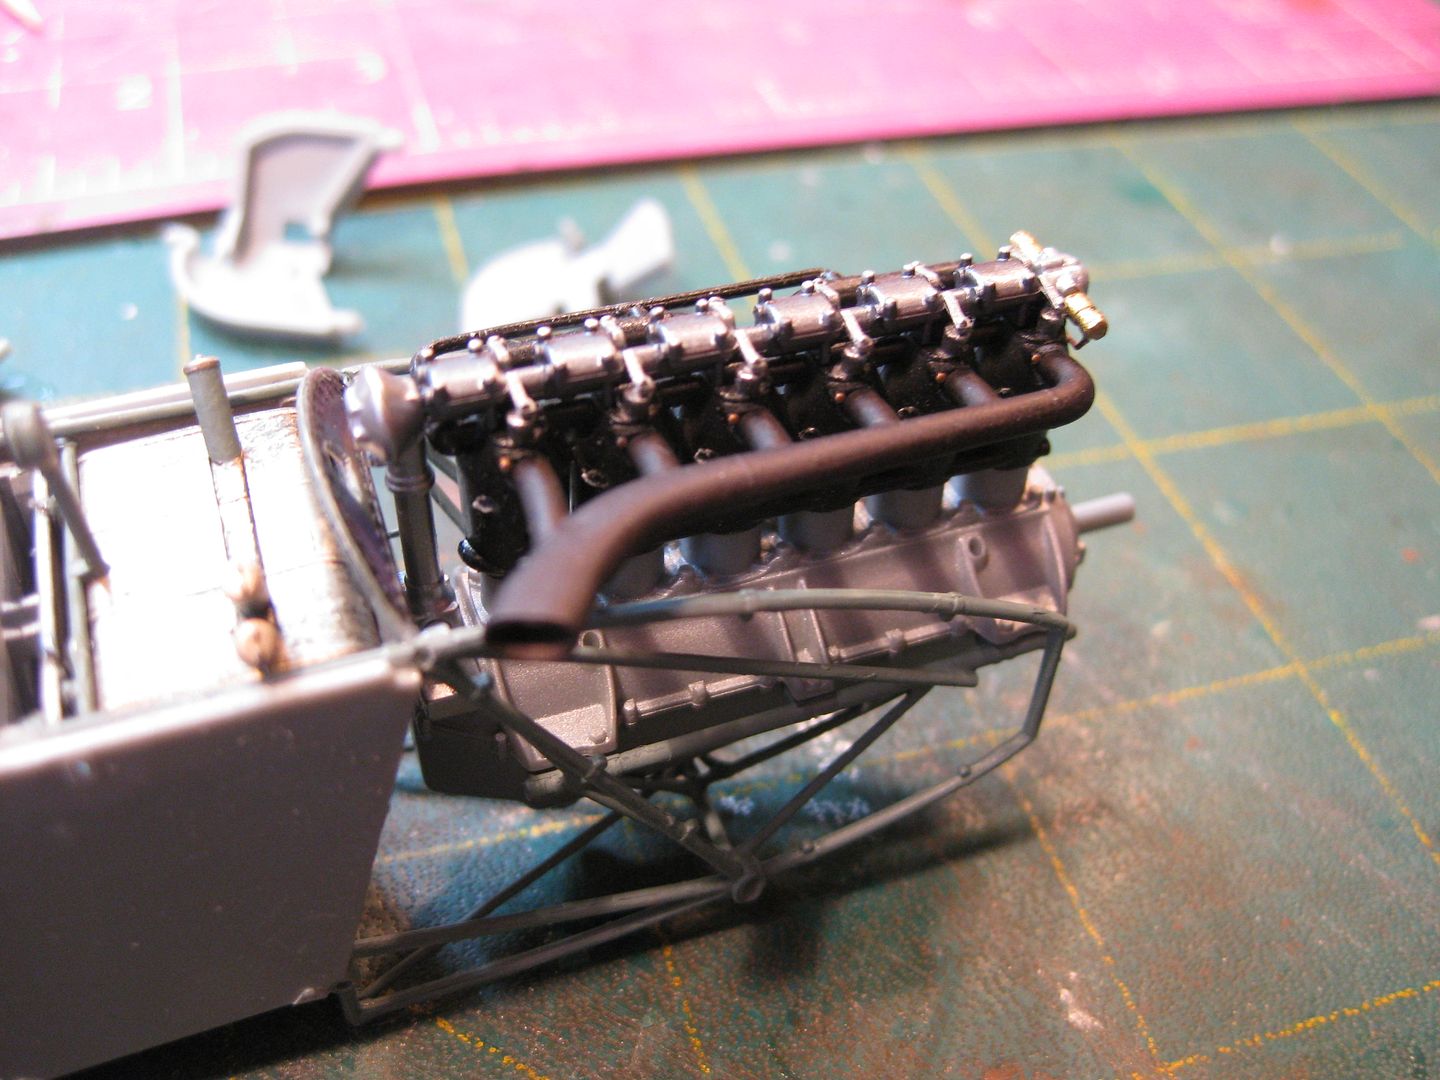
   Next done was the engine, the 200 HP DIII au version. I elected to do only the top part as most of it will be fully enclosed by the cowlings and further covered by the Spandau's flash guards. The exhaust was done with Alclad II "Exhaust Manifold".


   Next completed were the various engine cowlings with the standard OAW lilac and olive green pattern. (with the exception of the "Cheek" panels which were black on this aircraft) The cowlings were given a coat of Alclad II Dull Aluminum, two coats of hairspray, sprayed with a lightened version of Tamiya X16 Purple, and then with the pattern masked with Tamiya Tape filled in with Tamiya XF81 Dark Green. Only two of the many masked sections required some minor touch up from the base purple coat lifting. I haven't much experience with acrylics and got a very slight pebbled effect. (Note to self, more thinner and less air pressure in future!) Both colors were thinned with Tamiya Lacquer Thinner. All the panels were then "chipped" with the usual hairspray technique.
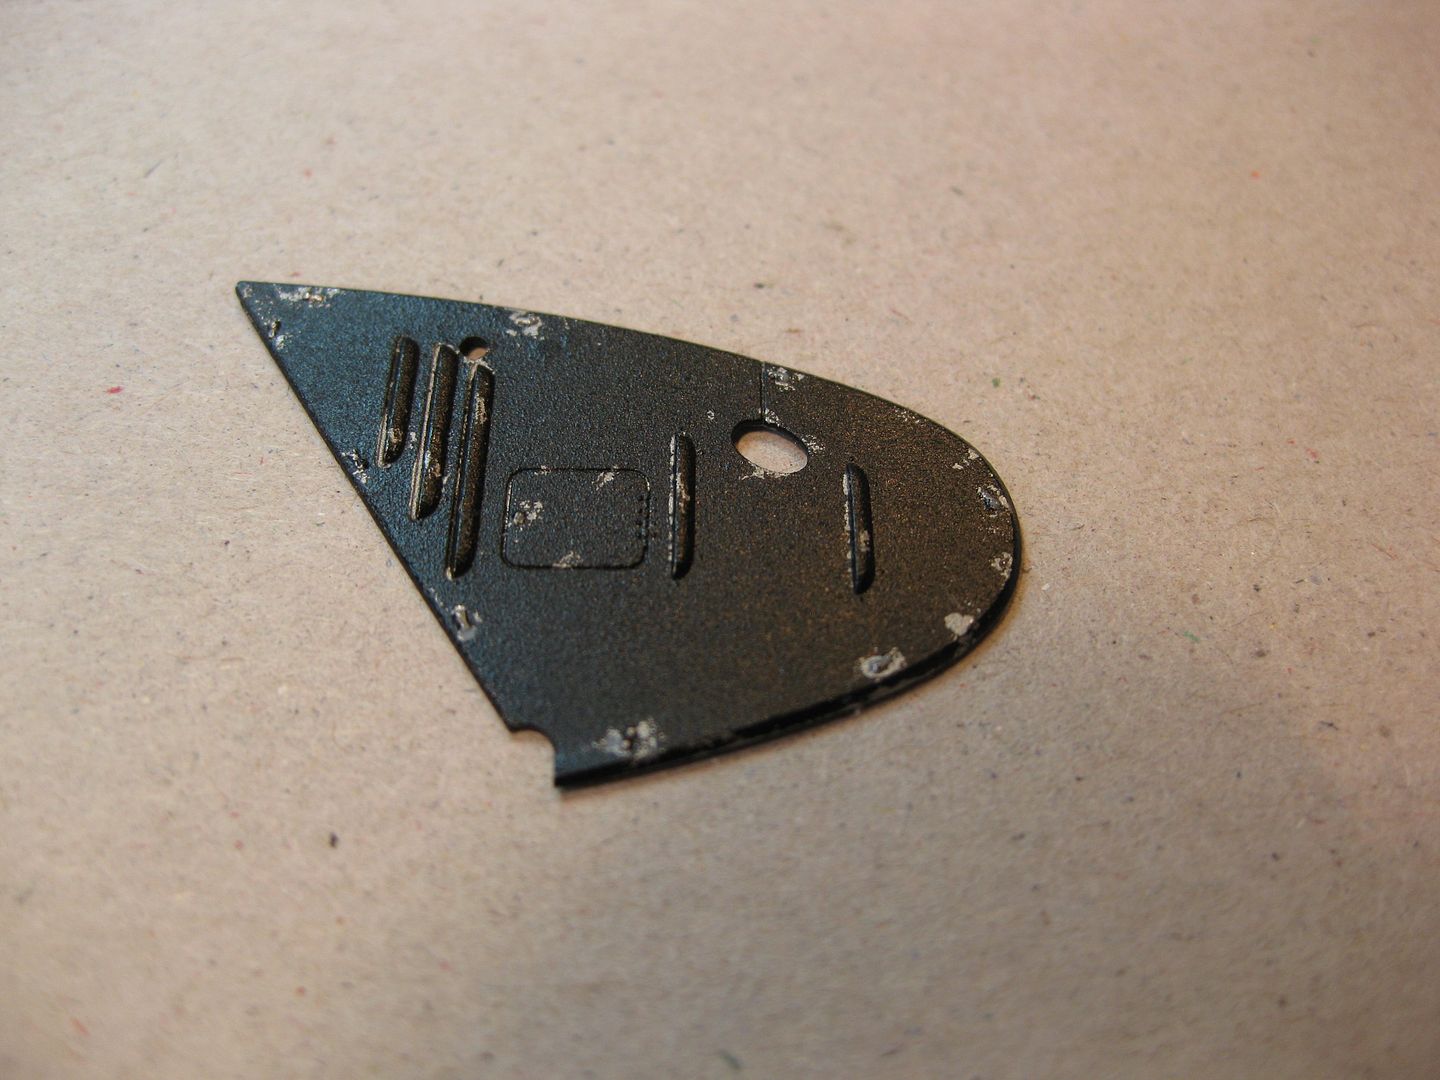
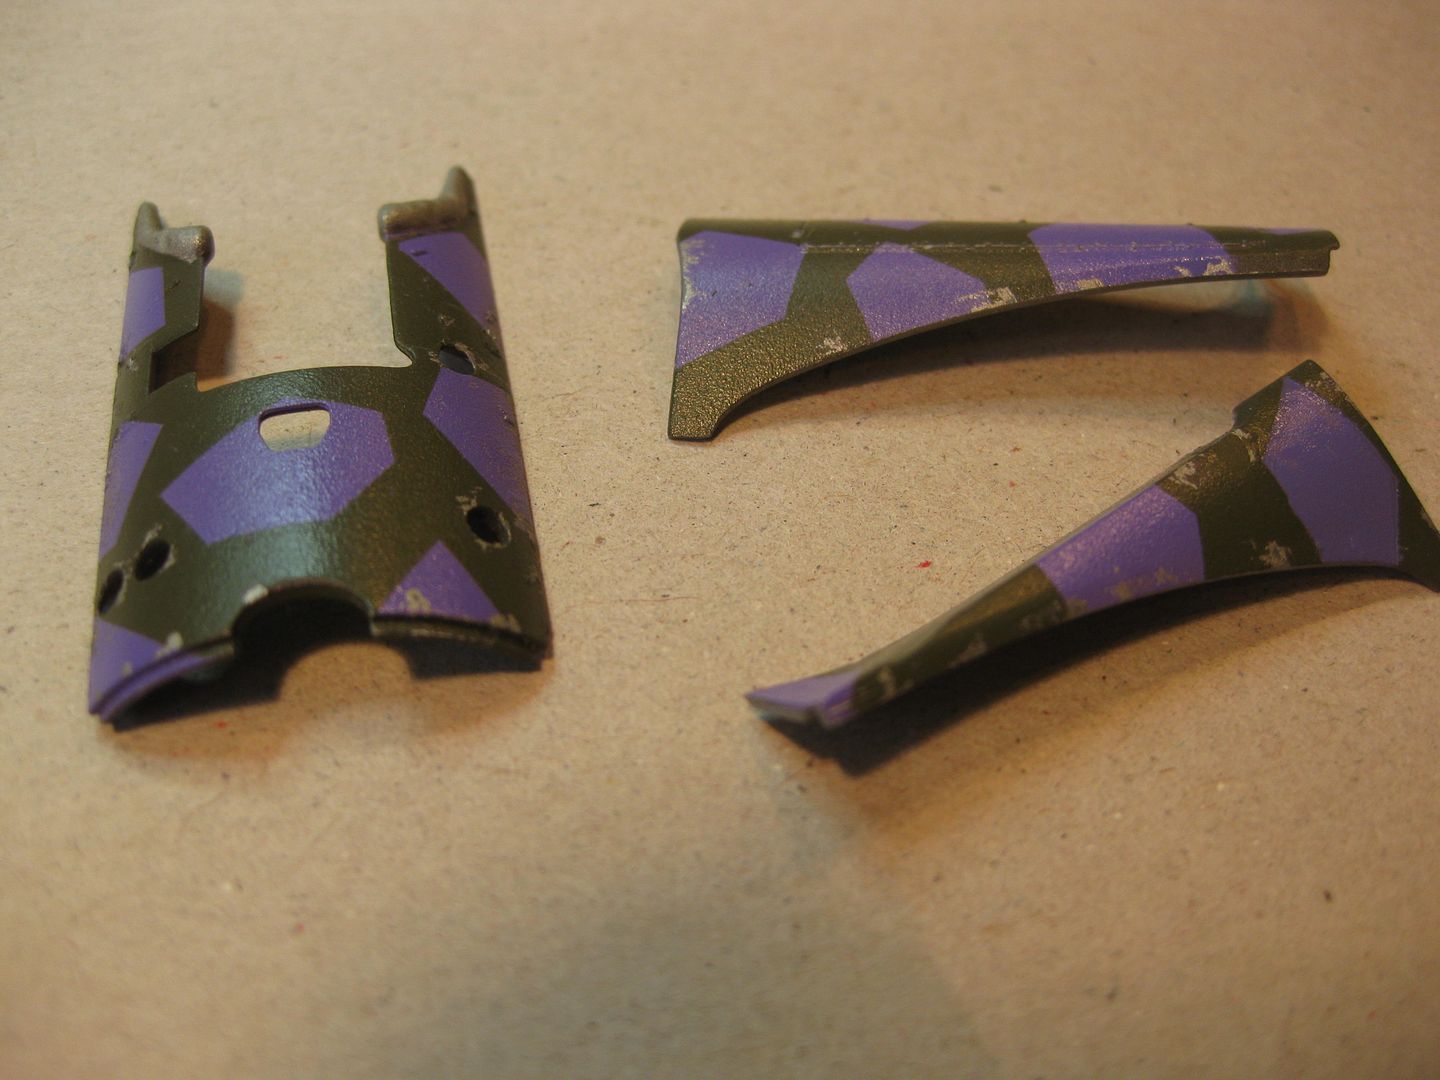


I also included the flash guards using Alclad II Burnt Metal and a touch of Exhaust manifold. In between I also got the lozenge on the ailerons; unlike the larger flying and control surfaces the fit was not great, the decals being somewhat over sized so a little touch up will be required here as well.


   Next and last completed was the Aviattic Lozenge on the fuselage. The fuselage was first given two coats of Model Master Gloss white which I left to dry for 3 days. I used the kit lozenge decals as templates and cut Aviattics' Faded 4 Colour top and bottom sheets to match the Cookie Cutter Wings and Flight Control Decals done earlier. Not a "cake walk" by any means; careful sizing/trimming was required to ensure no overlap occurred as it comes off very dark as can be seen on the small repair areas on the underside. I found the "old fashioned razor blade" suggested by someone earlier made the trimming of the decals much easier however I "nicked' the white undercoat in a few places and have some minor touch ups and repairs to do...........

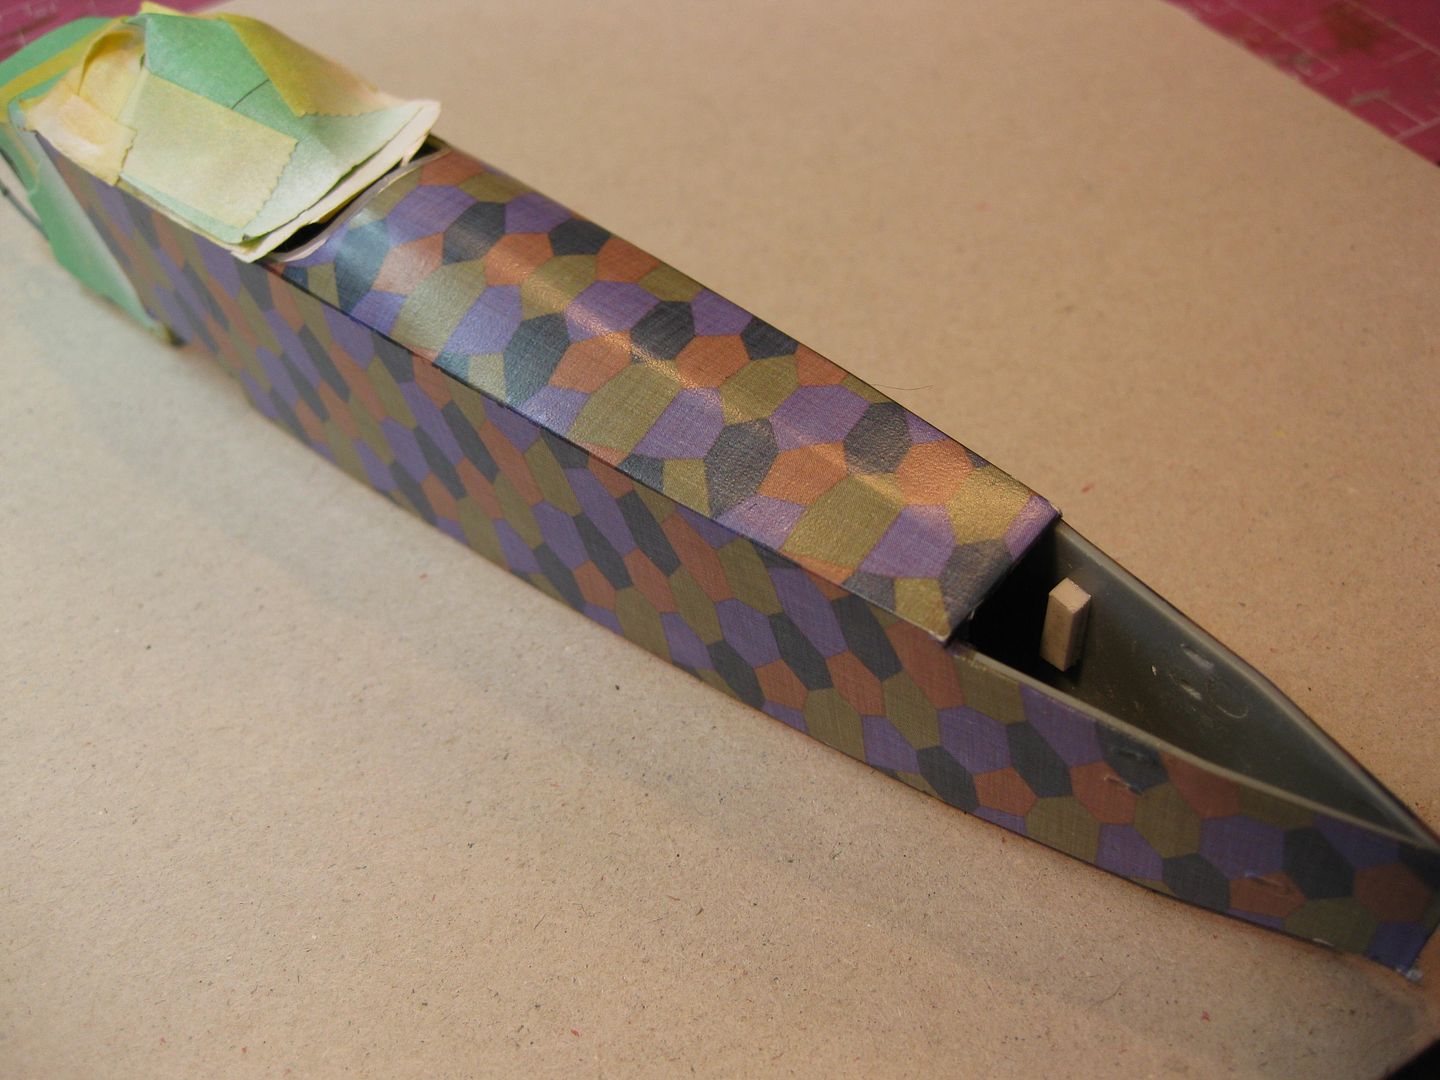


   Once the fuselage lozenge is touched up I"ll be giving everything a good coat of Future in preparation for the markings. The next construction steps are the Guns and the usual hand carved wooden prop. Thus far a great Kit however the framework around the engine takes a lot of care and I have the prospect of fitting the cowlings and rad yet to rear their ugly little heads! Since I have the Fokker and Albatros Kit versions I hope to have mastered this little devil by the time I complete those...........
   I believe it will progress quickly from here as long as the weather stays crappy and I can justify leaving the outside work until later.....life is good! ;)

Cheers,
Lance
« Last Edit: May 03, 2014, 03:16:32 AM by lcarroll »

Offline mgunns

  • Hero Member
  • *****
  • Posts: 2255
Re: (Another) WNW Canadian Fokker DVII
« Reply #40 on: May 03, 2014, 03:45:31 AM »
HI Lance:

Looking good.  I know what you mean about the aileron decals being too large, but the overall effect is really nice.  I always fix the radiator and the underside of the fusleage and then attach everything else to it.  It seemed to be the most prudent and I think the instructions call out for that as well.  It isn't too bad.  You have the worst behind you with the engine compartment framing.  Wasn't that a fun test of your manual dexterity in small places?  I am looking forward to your next update and seeing how you accomplished the cowling and cheek panels.
Best

Mark
Mark

We few, we happy few.....

Offline rhallinger

  • Hero Member
  • *****
  • Posts: 1976
Re: (Another) WNW Canadian Fokker DVII
« Reply #41 on: May 03, 2014, 04:50:18 AM »
Looking very smart indeed, Lance!  I love the look of the Aviattic faded lozenge on the fuselage. ;D  Well done.

Cheers,

Bob

Offline Nigel Jackson

  • Hero Member
  • *****
  • Posts: 2608
Re: (Another) WNW Canadian Fokker DVII
« Reply #42 on: May 03, 2014, 07:00:19 AM »
Lovely work Lance, but then what else might we expect from you!

Best wishes
Nigel

Offline uncletony

  • Hero Member
  • *****
  • Posts: 4349
    • Aircraft In Pixels
Re: (Another) WNW Canadian Fokker DVII
« Reply #43 on: May 03, 2014, 08:08:34 AM »
ooh that's pretty!

Offline jknaus

  • Hero Member
  • *****
  • Posts: 1121
Re: (Another) WNW Canadian Fokker DVII
« Reply #44 on: May 03, 2014, 09:14:20 AM »
Beautiful work. Really enjoying this. I never thought to do chipping, but it makes sense. Must try that.
James