Author Topic: Sopwith Pup - RNAS : WNW's 1/32  (Read 13843 times)

Offline lcarroll

  • Administrator
  • Hero Member
  • ******
  • Posts: 8660
Re: Sopwith Pup - RNAS : WNW's 1/32
« Reply #30 on: February 02, 2014, 02:24:50 AM »
Andi,
    Like Lindsay I painted first, then assembled on this and the Tripe, which is near identical in this area. Just be sure you have the fit you want before painting and watch the edges, it'll work just fine!
Cheers,
Lance

Offline FokkerFodder

  • Sr. Member
  • ****
  • Posts: 394
Re: Sopwith Pup - RNAS : WNW's 1/32
« Reply #31 on: February 02, 2014, 04:08:10 PM »
Hi Andi

Pre-painting (and weathering) also worked well for me on 'Betty'. 

cheers

FF

Offline Ian from Doncaster

  • Hero Member
  • *****
  • Posts: 1164
Re: Sopwith Pup - RNAS : WNW's 1/32
« Reply #32 on: February 02, 2014, 08:03:48 PM »
I would paint the panels and cowlings separately.  This takes away any issues with masking for the different paint and effects on what would be metal parts up against the canvas.  I try and paint before assembly wherever I can.

Offline Pete Nottingham

  • Hero Member
  • *****
  • Posts: 906
  • I chose the wrong week to stop sniffing glue
Re: Sopwith Pup - RNAS : WNW's 1/32
« Reply #33 on: February 02, 2014, 08:17:41 PM »
Hi Andi;

I built the RFC Pup yonks ago and as far as I remember I did the panels separately, also the same when I build the DV and DVa's so it would appear as the others have said that this seems to be the way to go, just go careful when you mask over the interior.

Good luck.

Cheers

Pete.

Offline Andi Little

  • Full Member
  • ***
  • Posts: 182
Re: Sopwith Pup - RNAS : WNW's 1/32
« Reply #34 on: February 07, 2014, 01:26:11 AM »
Thanks for your input chaps - I appreciate it and decided to go with the collective wisdom. Just goes to show, that's one more example where I would of happily strayed from the beaten path!!

A little bit like I've done here? .........................

This is something I've done on previous builds [non-aircraft] and wondered if it would make the transition? I know this is all old hat to you guys, but I'm kind of on the ragged edge here ... and absolutely nothing does as its told: or works out the way it should!!!!...............


First piccie then...................


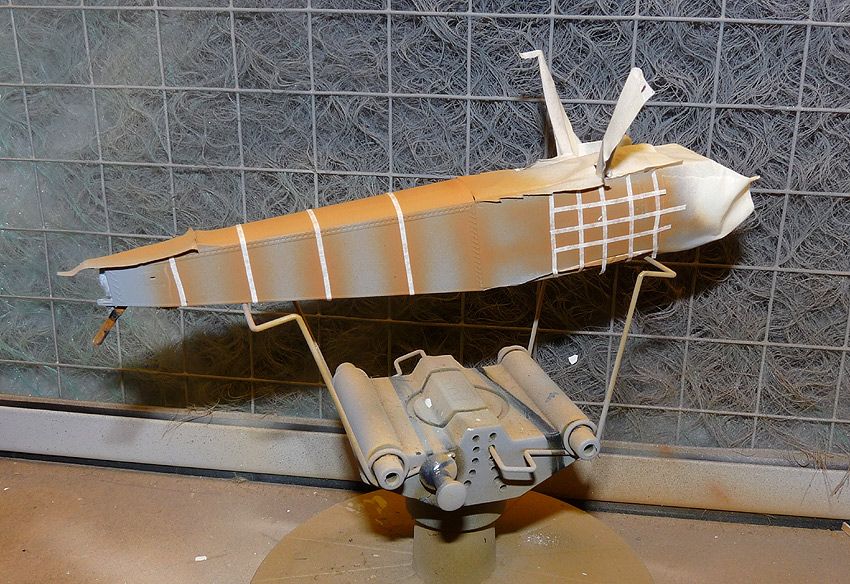
Primed with Halfords best grey primer [an auto store acrylic for those not residing in blighty] ... mixed up some colour that looked vaguely woody and then masked off the inside timber work.


The tape and colour goes over the top just for reasons of "keeping things all lined up", I then blew over the majority of the fuselage with my CDL colour "Lifecolours pale stone", I chose this because I wanted a less "creamy" look to this aircraft and thought the colder blue tone would represent the extensive weathering and the maritime nature of the aircraft?


I know - I know? I is pencilled all over it - I'm sure I saw something like this round these here parts, regardless - it stuck with me as a pretty nifty idea, although probably wasted on me as I was already getting a build up of paint and these lines are more embossed than drawn!


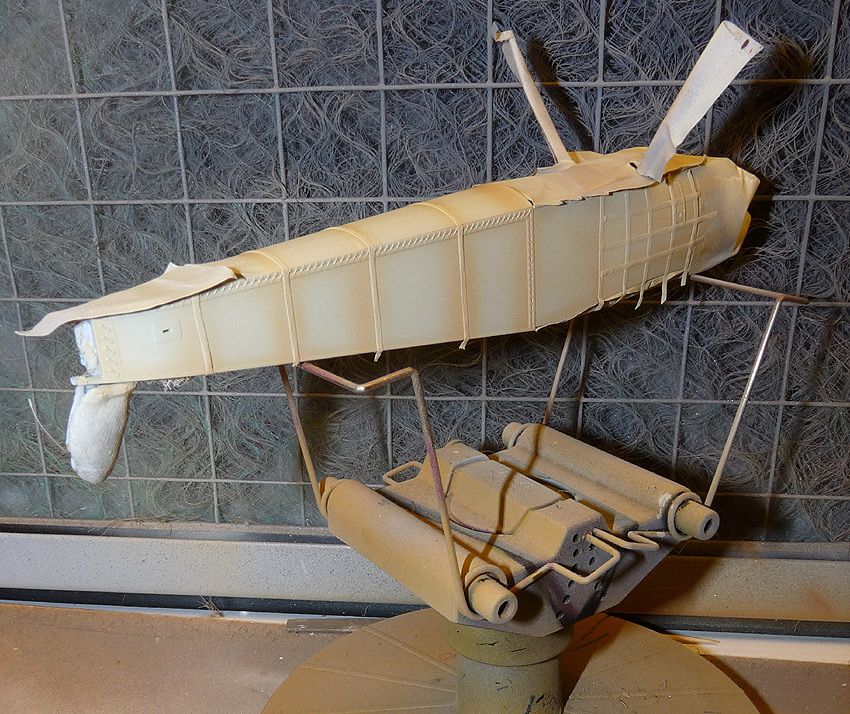
A bit rough and ready, and I'm a bit down cast as my paint has spat bits of clag all over the job. It's all sitting like a layer of cream cheese and I keep gouging lumps out of it with my nails ........ But having said that! .... I really like the effect. Rather than the lightness of the canvas as is usually depicted I really rather enjoy the colour of the timber frame showing through: same with the wires. I'm hoping [guessing], that as the build progresses this will just sink into the background of the build and and become a means of endorsing the kind of heavy wet weathering I'm hoping to achieve - I do have the RFC version which I will probably do a cleaner sweeter version of at some point.


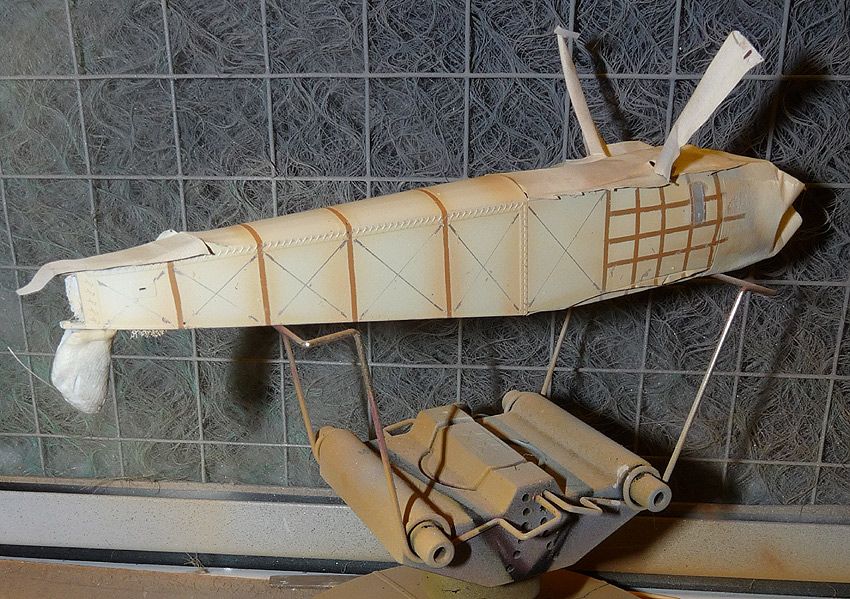
Here's a better look at the job. I've removed all the tape - "that was a nightmare" even though I pre-stuck all the tape to the bench and my forehead it was still a bit too sticky to come off without causing some sort of chaos!! grrr!
Anyhoo, smoothed out the "snots" in my paintwork - "highly technical number one finger"! I painted the little hatch thingy, but YET AGAIN that Tamiya paint was just a pain to use, I've stripped it off and a coat of Mister Metalcote looks much better - so far!
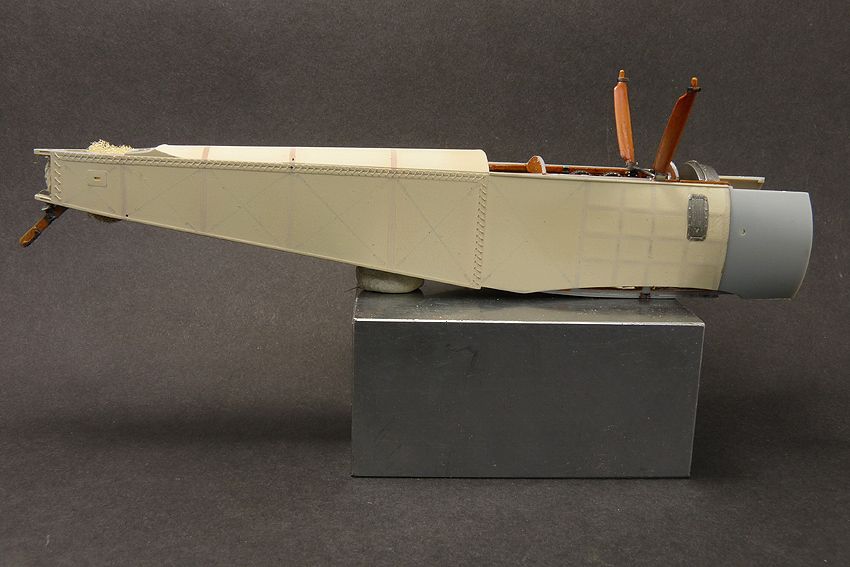
I hate the colour of the Aluminium nose panels by the way - and have yet to decide what to do with them - used the Flat Aluminium XF16 you see, logic, and lack of experience said that was the way to go - NOT!! It just looked for the world like a supermarket shelf toy... ugh!
Tried dulling it down with "metallic grey XF56" it took the brightness down alright but the mica or flake is still way too coarse to my taste. ........................ Curses!

Anyhoo ................ that's where I is, and I'm sure I'll stagger forwards with the build, but I can't shake off the feeling that I'm always going to be crashing along the edge of disaster, at least for a little while yet?

Laters.....................
KBO ............. Andi.

Offline RAGIII

  • Hero Member
  • *****
  • Posts: 19694
Re: Sopwith Pup - RNAS : WNW's 1/32
« Reply #35 on: February 07, 2014, 02:12:57 AM »
Brilliant! The effect of the wood and wire see through looks terrific!
RAGIII
"A man has to know his limitations": Harry Callahan

"Don't slop it on" Lynda Geisler

Offline mgunns

  • Hero Member
  • *****
  • Posts: 2255
Re: Sopwith Pup - RNAS : WNW's 1/32
« Reply #36 on: February 07, 2014, 02:19:34 AM »
Hello Andi:

I think the penciled wires is billiant!  This really looks nice, and I like the wood tone of the ribs showing ever so slightly through the "canvas".  I like it a lot, adds a lot of interest to the model and the scheme is a nice alternative to the PC10!  I did something similar to the DVII using a sharpie to draw in the delicate framework vice using the preshading.  Turned out well.  I will definately experiment with your idea as you've demonstrated here on my build.  I think once you get the markings on it and a final dullcote, it will really be the 'bees knees'.
You have certainly overcome some challenges with paint.  I hate brushing Tamiya acrylics.  I like air brushing but for brushing you can't beat Humbrol.  Sadly there is only source of Humbrol near where I live and that is in St. Paul!!  I digress.  Looking forward to seeing your next update!

Best

Mark
Mark

We few, we happy few.....

Offline IFF1418

  • Hero Member
  • *****
  • Posts: 1541
Re: Sopwith Pup - RNAS : WNW's 1/32
« Reply #37 on: February 07, 2014, 02:19:52 AM »
Hi Andi,

I agree with Rick. Truly magnificent. I haven't seen this before. Great job Andi!

Kind regards
Patrick

Offline Nigel Jackson

  • Hero Member
  • *****
  • Posts: 2608
Re: Sopwith Pup - RNAS : WNW's 1/32
« Reply #38 on: February 07, 2014, 02:31:41 AM »
What a great idea with the pencil wires. Thanks for sharing it with us, Andi.

Best wishes
Nigel

Offline rhallinger

  • Hero Member
  • *****
  • Posts: 1976
Re: Sopwith Pup - RNAS : WNW's 1/32
« Reply #39 on: February 07, 2014, 02:43:56 AM »
That fuselage looks sweet, Andi!  ;D  Very nicely done, and a neat technique. 

Cheers,

Bob

Offline LindsayT

  • Hero Member
  • *****
  • Posts: 844
  • "Somehow it didn't seem like war at all..."
Re: Sopwith Pup - RNAS : WNW's 1/32
« Reply #40 on: February 07, 2014, 03:24:02 AM »
Wow, Andi, that was a lot of mumbling and grumbling about what turned out to be a great effect! I think it looks great!

Lindsay

Offline coyotemagic

  • Hero Member
  • *****
  • Posts: 7710
  • "Here's to not buggering it up." -Winston Chuchill
    • My Models
Re: Sopwith Pup - RNAS : WNW's 1/32
« Reply #41 on: February 07, 2014, 03:26:58 AM »
Wow, Andi, that was a lot of mumbling and grumbling about what turned out to be a great effect! I think it looks great!

Lindsay
Yeah, Andi.  Wot he said.
Cheers,
Bud
"All men dream: but not equally. Those who dream in the dark recesses of the night awake in the day to find all was vanity. But the dreamers of day are dangerous men, for they may act their dreams with open eyes, and make it possible." -T. E. Lawrence

Offline Ernie

  • Hero Member
  • *****
  • Posts: 3961
  • "Once more into the breach"
Re: Sopwith Pup - RNAS : WNW's 1/32
« Reply #42 on: February 07, 2014, 05:49:31 PM »
Geez Andi, you are creating a stunner!  Your paint work is spectacular!  Thanks for the
great idea about the pencil lines.  It turned out perfect.  Looking forward to the next
updates, and more helpful tips. :D

Cheers,
Ernie :)
The new old guy, take two...

Offline pepperman42

  • Hero Member
  • *****
  • Posts: 4507
  • Sergeant, my brown pants.......
Re: Sopwith Pup - RNAS : WNW's 1/32
« Reply #43 on: February 18, 2014, 04:53:30 AM »
Looks great from here!! Nice effect and your colours look good. Looking forward to the next update!

Steve

Offline Rob Hart

  • Hero Member
  • *****
  • Posts: 699
Re: Sopwith Pup - RNAS : WNW's 1/32
« Reply #44 on: February 18, 2014, 10:55:04 AM »
I like the penciled lines also. Thanks for the tip.