Author Topic: 1:72 Maquette Ilya Muromets  (Read 65708 times)

Flying Dutchman

  • Guest
Re: 1:72 Maquette Ilya Muromets
« Reply #75 on: January 12, 2014, 07:16:54 PM »
Very nice work! It will be inspiration when I once build mine. :)

Offline IanB

  • Hero Member
  • *****
  • Posts: 2496
Re: 1:72 Maquette Ilya Muromets
« Reply #76 on: January 14, 2014, 06:36:51 AM »
Here are a couple of pics as promised. Part of the upper wing, the rudder, and the horizontal stabiliser.
 As mentioned, I stripped off all the first effort at the batons and cleaned up the surface as necessary. This explains the patches on the wing. The new, thinner, monofilament is attached first to the upper surface (the pieces long enough to double over), then the lower surface is scribed (this ensures that the top and bottom line up with each other) and the mono is folded under the wing and attached. Finally the ends are trimmed. Seems to be working well, the only slight problem is getting the mono to stick properly with the negative camber under the wing.


I'll almost be using more rigging line ON the wings than I will between them!

Ian
« Last Edit: July 02, 2017, 04:47:20 AM by IanB »

Offline RAGIII

  • Hero Member
  • *****
  • Posts: 19688
Re: 1:72 Maquette Ilya Muromets
« Reply #77 on: January 14, 2014, 07:29:22 AM »
Ian,
Very nice work on your second effort! I probably would have accepted the first  ::) Your dedication to getting it right is admirable to say the least!
RAGIII
"A man has to know his limitations": Harry Callahan

"Don't slop it on" Lynda Geisler

Offline Zabu

  • Hero Member
  • *****
  • Posts: 681
Re: 1:72 Maquette Ilya Muromets
« Reply #78 on: January 16, 2014, 07:24:12 AM »
My hat it's of to you Ina. Impressive!

Cheers

Offline IanB

  • Hero Member
  • *****
  • Posts: 2496
Re: 1:72 Maquette Ilya Muromets
« Reply #79 on: February 06, 2014, 11:43:11 AM »
Just to let you all know I haven't forgotten this one. My bathroom remodel is well on the way to being finished and because we got snowed off (again) today I managed to finish the "batons" on all the tail surfaces and ailerons, only three wings to go now.... :-\

Ian

Offline IanB

  • Hero Member
  • *****
  • Posts: 2496
Re: 1:72 Maquette Ilya Muromets
« Reply #80 on: March 02, 2014, 12:33:13 PM »
A major milestone has been reached - all flight surfaces are complete as far as the "batons" go! I now need to mark out the strut and rigging positions and drill them.... May need to buy some more beer....

Just for the hell of it, I worked out how much mono I used - each upper wing used 12.5 feet, each lower wing 8 feet! So a total of 41 feet (12.5 meters!) for the wings, plus the ailerons and tail surfaces!

Ian
« Last Edit: July 02, 2017, 04:54:01 AM by IanB »

Offline RAGIII

  • Hero Member
  • *****
  • Posts: 19688
Re: 1:72 Maquette Ilya Muromets
« Reply #81 on: March 02, 2014, 01:00:22 PM »
Ian,
That's a lot of Mono but the results are worth the effort!
RAGIII
"A man has to know his limitations": Harry Callahan

"Don't slop it on" Lynda Geisler

Offline Ernie

  • Hero Member
  • *****
  • Posts: 3961
  • "Once more into the breach"
Re: 1:72 Maquette Ilya Muromets
« Reply #82 on: March 02, 2014, 08:08:55 PM »
A major milestone has been reached - all flight surfaces are complete as far as the "batons" go! I now need to mark out the strut and rigging positions and drill them.... May need to buy some more beer....

Just for the hell of it, I worked out how much mono I used - each upper wing used 12.5 feet, each lower wing 8 feet! So a total of 41 feet (12.5 meters!) for the wings, plus the ailerons and tail surfaces!

Ian

Good grief, Ian.  I think that job would drive anyone to drink! Excellent work on something
ultra-tedious.  I look forward to your next update...and more beer. ;) ;D

Cheers,
Ernie :)
The new old guy, take two...

Offline lcarroll

  • Administrator
  • Hero Member
  • ******
  • Posts: 8656
Re: 1:72 Maquette Ilya Muromets
« Reply #83 on: March 02, 2014, 11:21:20 PM »
Ian,
   Let us know what brand of beer you used, it makes for really impressive results! ;D
Cheers,
Lance

Offline IanB

  • Hero Member
  • *****
  • Posts: 2496
Re: 1:72 Maquette Ilya Muromets
« Reply #84 on: March 04, 2014, 07:58:35 AM »
I got a couple of small jobs dealt with yesterday, surprisingly enough, actually utilising kit parts! The engine bearers were thinned but otherwise left as is, the cabane struts (which are one piece as they were covered with fabric between them) were also thinned and a small piece added to the upper front to raise it slightly. This will give the wings the correct gap and ensure that the fore and aft struts are the same length - there was no stagger, the wing cellule being a perfect rectangle.


I decided to use the kit fuel tanks, although they will need a touch of putty on the ends to round off the tips...


I've also corrected a couple of errors I spotted on the wings - the lower ones needed a little tweak on the trailing edge to increase the camber, and the outer section of the upper wings should (and now does) have dihedral.

Ian
« Last Edit: July 02, 2017, 04:53:12 AM by IanB »

Offline Dal Gavan

  • Sr. Member
  • ****
  • Posts: 469
Re: 1:72 Maquette Ilya Muromets
« Reply #85 on: March 04, 2014, 10:27:23 AM »
Great stuff, Ian.  There's no way I'd have the patience to do that amount of work.

Quote
May need to buy some more beer....

Perhaps the site members should send you a slab or two- you've earned it!

Dal.

Offline IanB

  • Hero Member
  • *****
  • Posts: 2496
Re: 1:72 Maquette Ilya Muromets
« Reply #86 on: January 02, 2017, 05:15:52 AM »
Well, folks, now that the Sopwiths are finished and I finally have a clear bench (apart from a 1:72 Airfix Hurricane, but that doesn't count...) it's back to this beast! I've been wanting to get back to it for a while, but kept giving in to temptation and starting something else!

 There are pros and cons to leaving something for a while....I have forgotten a lot of the details I'd worked out, so will have to plan again, but my modelling skills have obviously improved over the last 3 years and what was acceptable, now isn't!
 In particular, the wings. On closer examination it is obvious that much more work is required to tidy them up. I had given them a coat of primer and that looks as though it went on very dry....it's chalky. So the first action is too rub them down, hopefully without removing too much of the beading I added, (some of them have come loose anyway so I need to reattach quite a few) and see if I can get a decent surface. If not, it may be a case of stripping them and starting again, some areas really are that bad!

 Here's what I have:


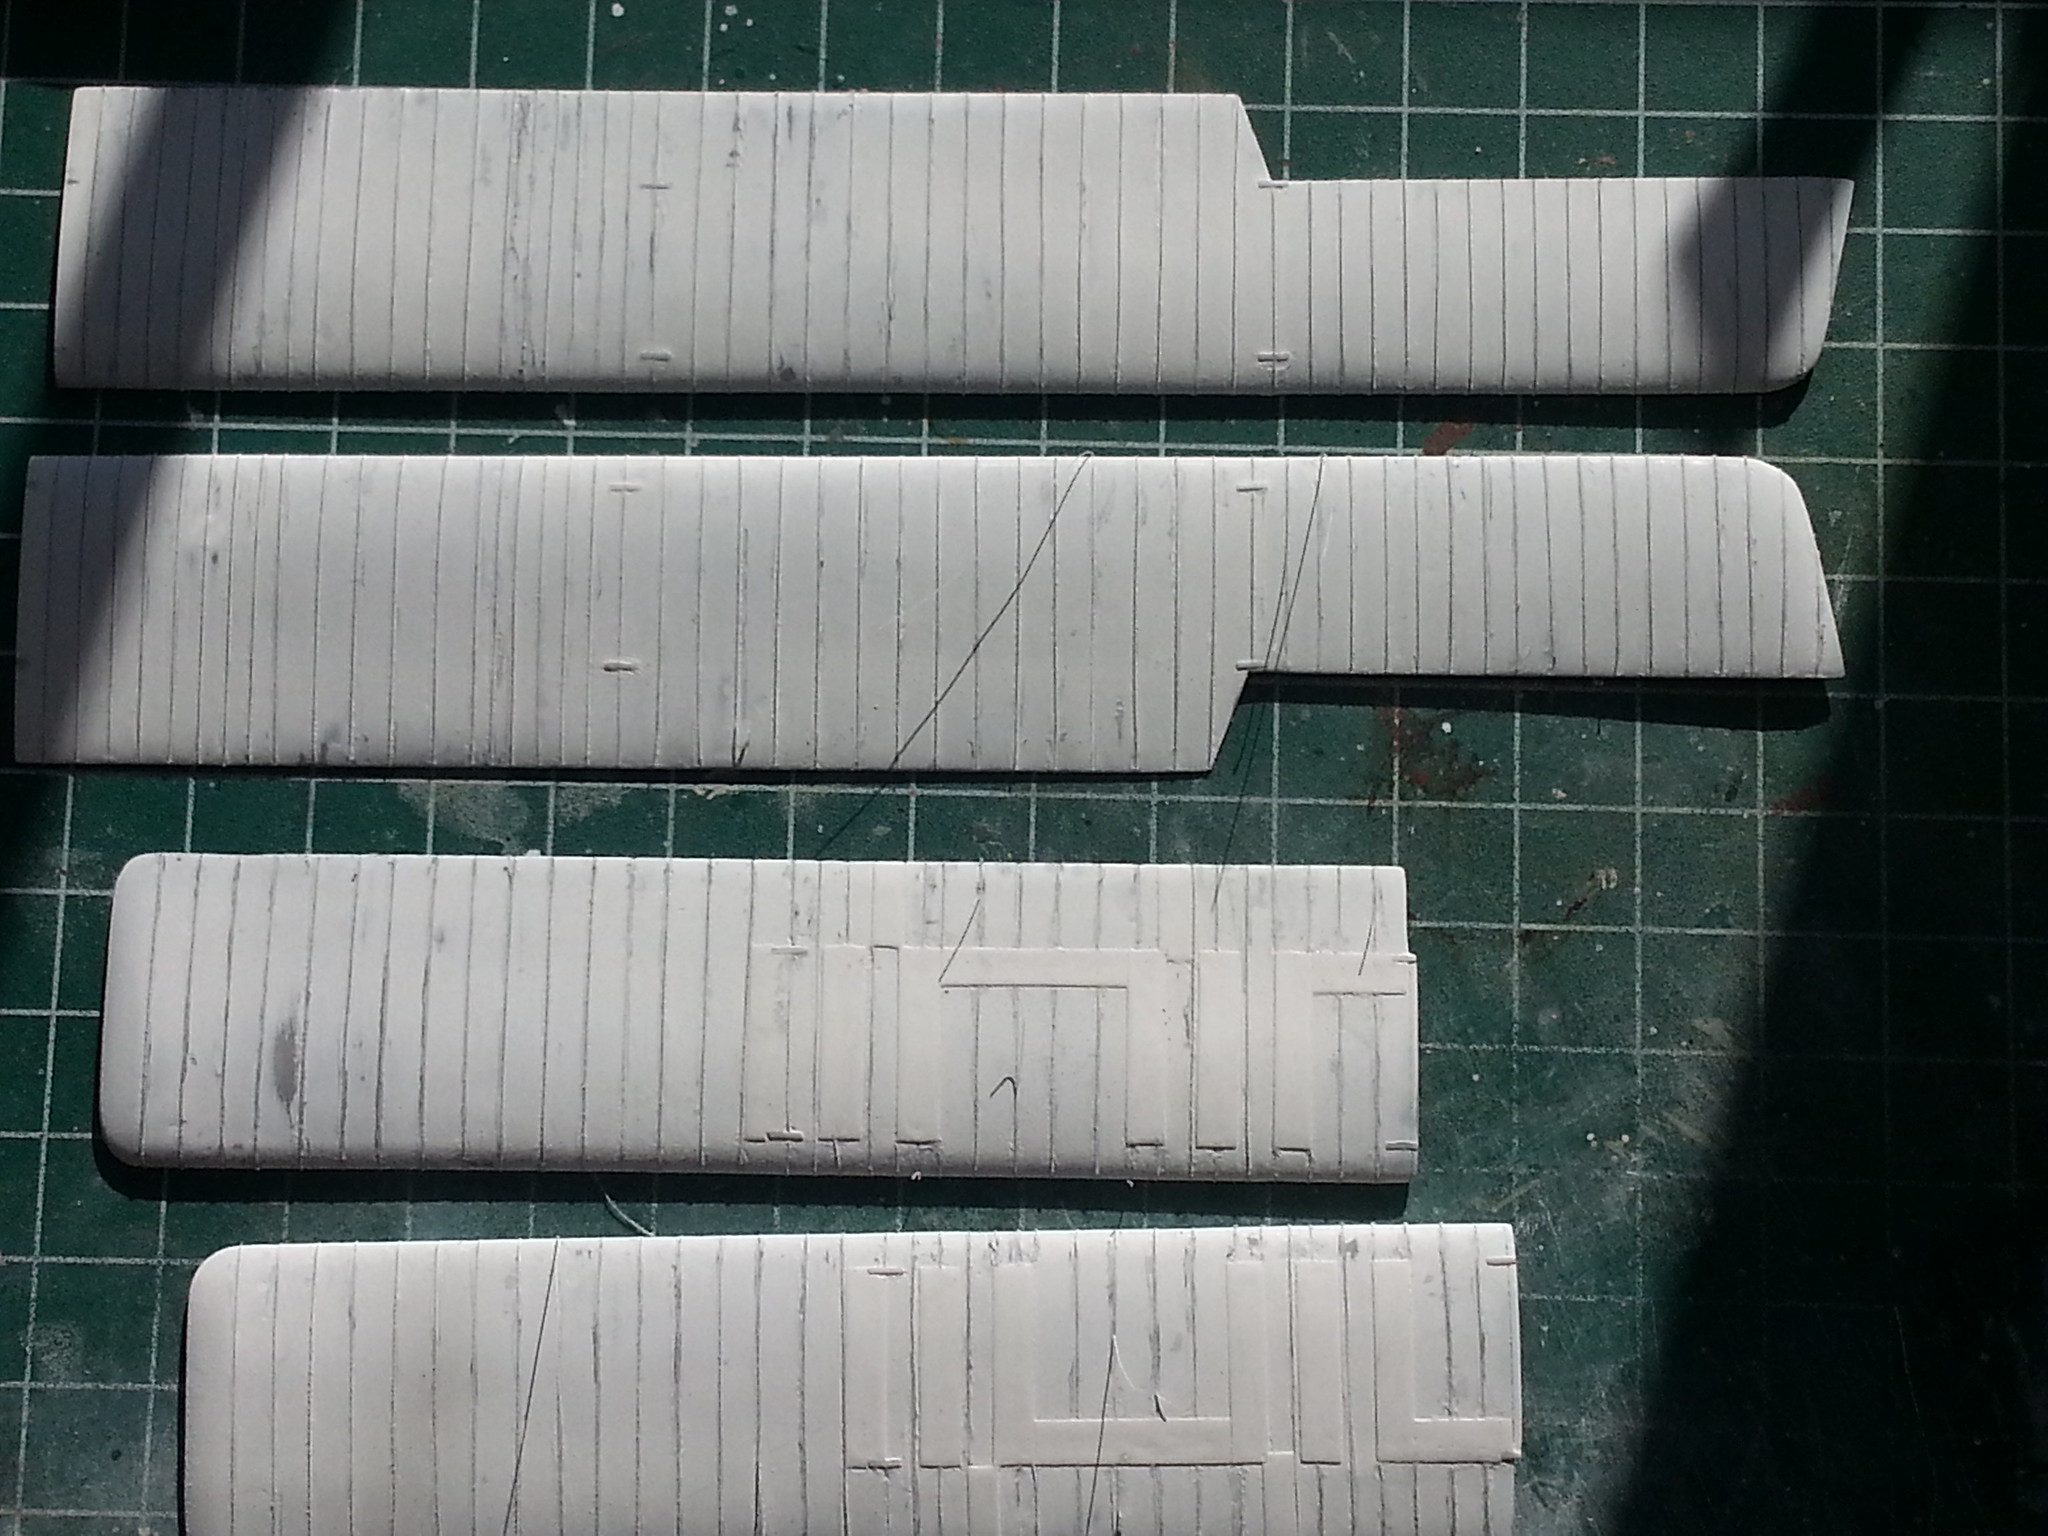
You can see some of the shadows caused b[y the lines that have come loose....a lot of work to do to get back to where I thought I already was!

Ian

Offline jeroen_R90S

  • Hero Member
  • *****
  • Posts: 1060
Re: 1:72 Maquette Ilya Muromets
« Reply #87 on: January 02, 2017, 06:56:50 AM »
I've just browsed through the whole thread -good luck on the mono wing ribs. I've tried that once to repair fuselage stringers, and after a year or so the loosened too, but underneath a finished model. I either used glue too sparingly, or it simply didn't bond that well... I've resorted to thin foil and thicker/thinner decals, but that's for repairs only, not entire wings!

Best of luck, though judging by your other build threads you'll get it sorted :)

Offline Des

  • Administrator
  • Hero Member
  • ******
  • Posts: 9325
    • ww1aircraftmodels.com
Re: 1:72 Maquette Ilya Muromets
« Reply #88 on: January 02, 2017, 07:01:44 AM »
Great to see you back onto this one Ian, I'm looking forward to seeing the next progress photos.

Des.
Late Founder of ww1aircraftmodels.com and forum.ww1aircraftmodels.com

Offline IanB

  • Hero Member
  • *****
  • Posts: 2496
Re: 1:72 Maquette Ilya Muromets
« Reply #89 on: January 03, 2017, 11:08:39 AM »
Thanks Des!
Jeroen, I'm hoping that with all the extra attention the mono should stay attached. I'm looking for something to spray over it all to help seal it all in place.....

 5 hours today in addition to the time spent yesterday. I reattached all the loose lines and then took a fresh number 11 scalpel blade and trimmed the ends at an angle to help stop me catching them with my fingers and loosening them. Then any trace of a loose end was taken care of by holding the line against the wing with tweezers and dabbing PlasticWeld on to literally melt the end of the line to the wing. After that, a little Mr Dissolved Putty and more careful sanding to eliminate the last traces of the strut mounting holes and clean up any small imperfections.  It seems as though every time I pick the wings up there is at least one more tiny loose end somewhere, but they are getting fewer and fewer, especially since trimming the ends and melting them on. I'm confidant that I have resolved the loose wires problem but would still welcome suggestions as to what would be best to use for overspraying to seal it all together.

Ian