Author Topic: 1:72 Maquette Ilya Muromets  (Read 48860 times)

Offline Ronkootje

  • Full Member
  • ***
  • Posts: 229
Re: 1:72 Maquette Ilya Muromets
« Reply #15 on: June 21, 2013, 03:27:27 PM »
Keep in mind that the way the pats look now they cant be cast since they wont come out off the mold some parts you have to make a two part mold to be able to get the part released from the mold. Or add styrene/casting blocks.
Also some parts need to be resin injected hence the complex shape of the part to preven intrapment of air bubles wich can result in a half casted part.
Plus resin casting is expensive making rubber molds without air bubles would mean you have to degass the silicone rubber to prevent airbubels in you mold wich will show in your final part.
Myself invested over 2000 euro before i had good results so that i could sel the parts to fellow modelers.

Also keep in mind you get lots of airbubles in your part since the curing is a chemical reaction wich makes litle airbubbels hence the need of a presure pot for curing the parts in.

You can get resin wich curse in 7 min witch has a potlife of 3 min myself am using resin witch cures in 1 hour and has a pot life of 7 min.
The thinner parts are the more time it takes to cure for example your crank case wil cure faster then the propshaft.

Ron

Offline IanB

  • Hero Member
  • *****
  • Posts: 2435
Re: 1:72 Maquette Ilya Muromets
« Reply #16 on: June 21, 2013, 11:50:10 PM »
Thanks Ron, I'll bear that in mind.
 I was planning on a two-part mould, with vents at the end opposite the pour hole to allow air to escape. Should be an interesting experiment if nothing else!

Ian

Offline IanB

  • Hero Member
  • *****
  • Posts: 2435
Re: 1:72 Maquette Ilya Muromets
« Reply #17 on: June 30, 2013, 01:52:52 PM »
Since the weather here was crappy today and it was my day off, I'd hoped to get the Nieuport a little closer to finished but my strut repair needed repair so....a little work on the radiator master, then what to do? I decided to make a start on the tail surfaces - I know, I'll soon have so many sub-builds going on I'm going to get lost - but I had to do something!
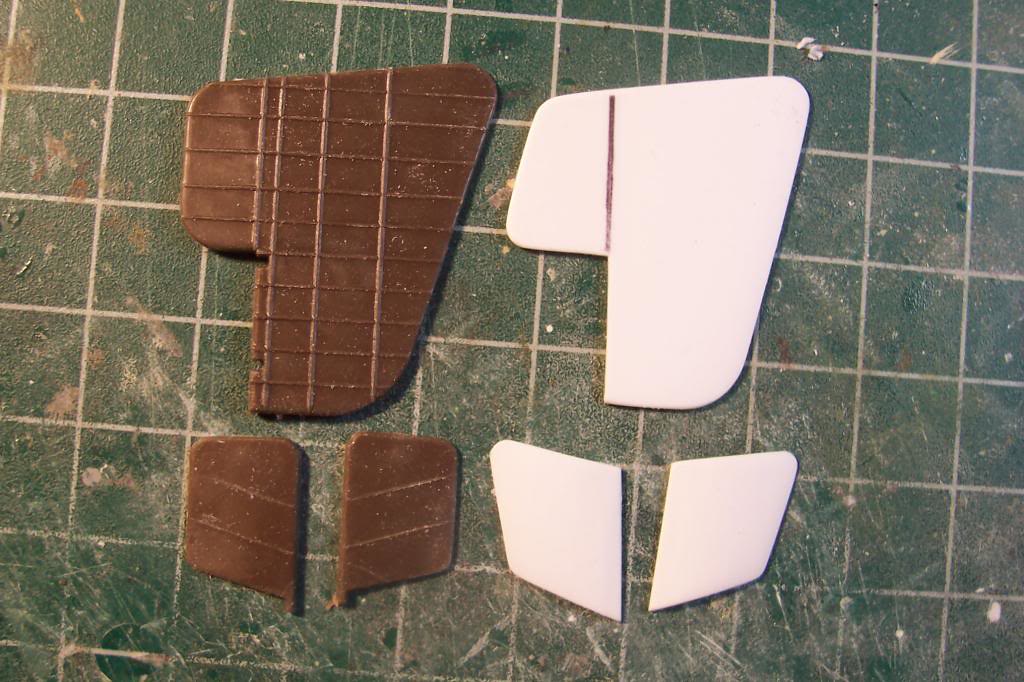
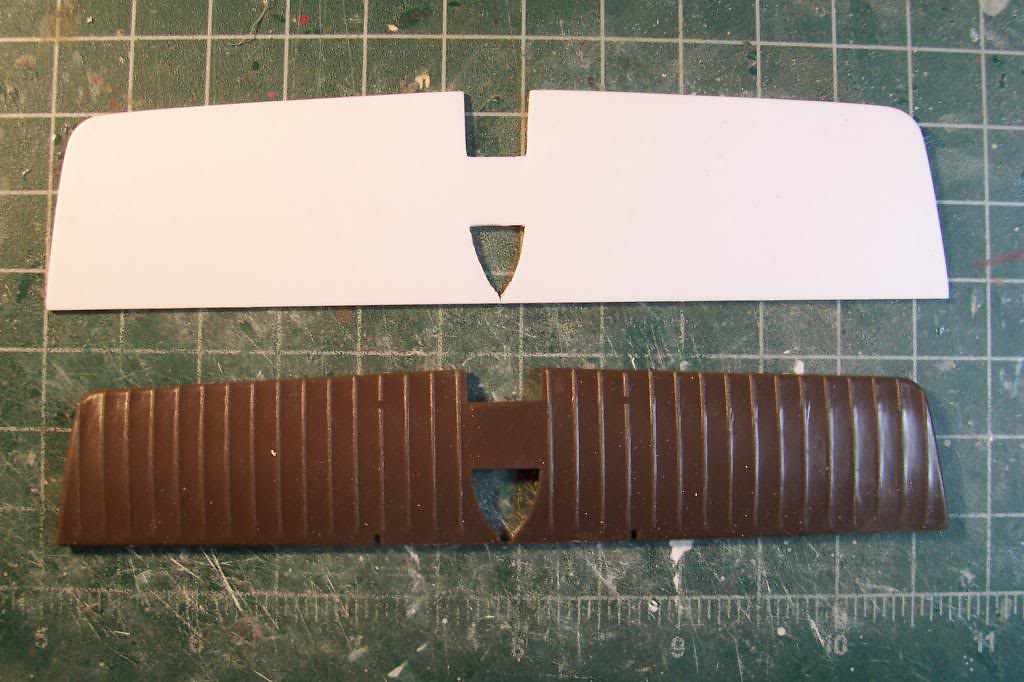
 The rudder is the wrong shape and twice the required thickness (2mm instead of 1mm). The two side rudders ditto, plus they don't have the required curve. The horizontal stabiliser has the same thickness problem, is 2mm too short (side to side) on each side and over 5mm too short front to back, and again doesn't have the required curve, and the elevators are too deep front to back (they make the total depth of stabiliser and elevator nearly correct!) and are too thick and the wrong shape! So a good basis for scratchbuilt tail surfaces....

 The rudder, elevators, and horizontal stabiliser are 1mm sheet, the outer rudders are .75mm sheet. I hope to replicate the batons that held the fabric in place by scribing the surface and letting in the same fishing line I use for rigging. This should, I hope, give me a decent half-round finish somewhat to scale.....I think I'll have to do something similar for the wing too...

Here's what I have so far:


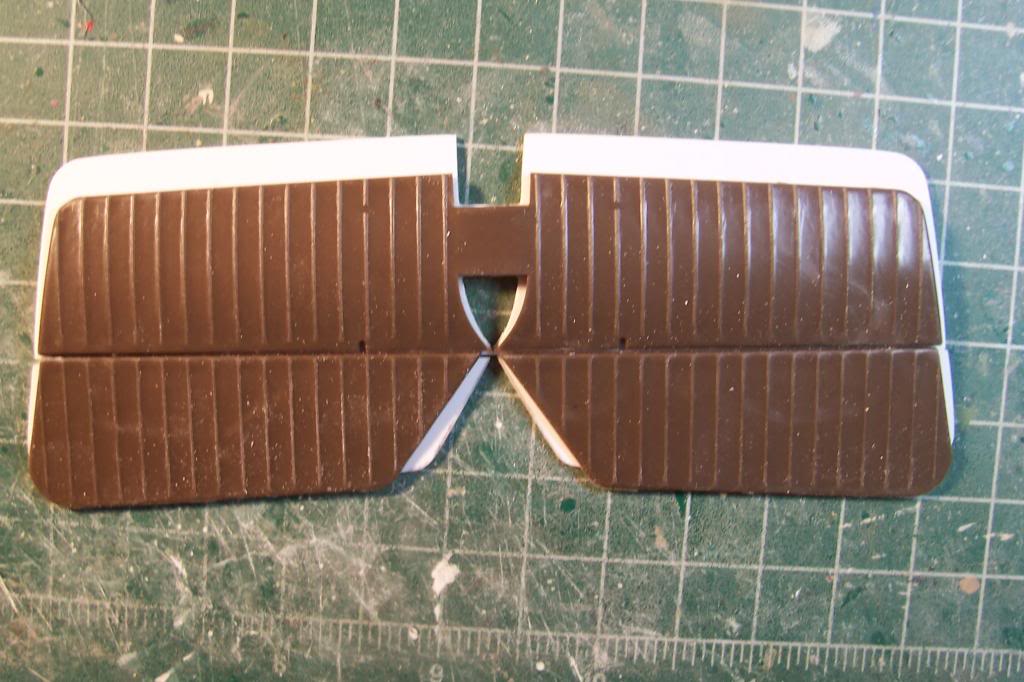
 Good job I love this part of modelling - the cutting, sanding, etc that is needed to fabricate new and improved parts!

Ian
« Last Edit: July 02, 2017, 04:15:08 AM by IanB »

Offline Des

  • Administrator
  • Hero Member
  • ******
  • Posts: 9325
    • ww1aircraftmodels.com
Re: 1:72 Maquette Ilya Muromets
« Reply #18 on: June 30, 2013, 03:33:50 PM »
Nice work Ian on the scratch building of the tail surfaces and the fin and rudders, they will certainly be more in keeping with the scale of your model.

Des.
Late Founder of ww1aircraftmodels.com and forum.ww1aircraftmodels.com

Offline RAGIII

  • Hero Member
  • *****
  • Posts: 18793
Re: 1:72 Maquette Ilya Muromets
« Reply #19 on: June 30, 2013, 08:59:57 PM »
Terrific work on the tail surfaces! Innovative method for the batons!
RAGIII
"A man has to know his limitations": Harry Callahan

"Don't slop it on" Lynda Geisler

Offline rhallinger

  • Hero Member
  • *****
  • Posts: 1976
Re: 1:72 Maquette Ilya Muromets
« Reply #20 on: June 30, 2013, 09:07:08 PM »
Great job Ian!  I am astonished at how far off scale the original parts were. :o  This is a fascinating aircraft, and I look forward to seeing all that you will do with this kit.  Impressive work so far.  Bravo!  ;D

Regards,

Bob

Offline IanB

  • Hero Member
  • *****
  • Posts: 2435
Re: 1:72 Maquette Ilya Muromets
« Reply #21 on: June 30, 2013, 11:09:58 PM »
Thanks gents!
 I hope the inlay method works for the batons, I haven't tried it yet. I did, however, try some other methods on my Blériot, so I know a few that definitely don't work....

Ian

Offline IanB

  • Hero Member
  • *****
  • Posts: 2435
Re: 1:72 Maquette Ilya Muromets
« Reply #22 on: July 28, 2013, 02:52:14 PM »
Although I haven't posted anything for a while I have been busy! Apart from finishing the Nieuport 28, I have been experimenting with something entirely new to me: casting my own parts.

May I present my first effort:


It did actually reach as far as the mould - just!  :)

An afternoon of casting and many failures eventually resulted in four crankcases and radiators that are useable, a couple of air pockets to fill on the rads but nothing drastic.....


I decided after a few attempts that it would be easier to make all the cylinder pairs, carbs and inlet manifolds individually - they would require almost as much effort cleaning up as it takes to make them from scratch and wouldn't be as crisp in the detail, so that's a job for tomorrow.....or at least a start on them - I have one pair of cylinders made and need another 11, plus 3 more carbs/inlet manifolds!

Ian
« Last Edit: July 02, 2017, 04:17:30 AM by IanB »

Offline Des

  • Administrator
  • Hero Member
  • ******
  • Posts: 9325
    • ww1aircraftmodels.com
Re: 1:72 Maquette Ilya Muromets
« Reply #23 on: July 28, 2013, 03:35:25 PM »
Very nice first attempt at casting Ian, looks like you have pulled it off nicely, this is an area of modeling I am going to venture into soon.

Des.
Late Founder of ww1aircraftmodels.com and forum.ww1aircraftmodels.com

Offline RAGIII

  • Hero Member
  • *****
  • Posts: 18793
Re: 1:72 Maquette Ilya Muromets
« Reply #24 on: July 28, 2013, 09:34:14 PM »
Very nice work on your first casting effort! Looking forward to the next update,
RAGIII
"A man has to know his limitations": Harry Callahan

"Don't slop it on" Lynda Geisler

Offline Zabu

  • Hero Member
  • *****
  • Posts: 681
Re: 1:72 Maquette Ilya Muromets
« Reply #25 on: July 29, 2013, 02:33:46 AM »
Superb work from you IanB. Very hard work to get that model in the right shape and casting your own pieces.

Nicely done.

Chers

Offline xmald

  • Hero Member
  • *****
  • Posts: 1093
Re: 1:72 Maquette Ilya Muromets
« Reply #26 on: July 29, 2013, 07:08:41 PM »
One of my favourite threads recently!
Best regards
Filip

Offline Pete Nottingham

  • Hero Member
  • *****
  • Posts: 906
  • I chose the wrong week to stop sniffing glue
Re: 1:72 Maquette Ilya Muromets
« Reply #27 on: July 29, 2013, 08:41:00 PM »
Quite a project you have started Ian, looking very impressive so far.

Cheers

Pete.

Offline lone modeller

  • Hero Member
  • *****
  • Posts: 5300
Re: 1:72 Maquette Ilya Muromets
« Reply #28 on: July 30, 2013, 02:26:51 AM »
An excellent thread - very interesting how you made the tail units and cast the new parts. This is modelling to the very highest standard and I will continue to follow this with great interest and looking out for ideas. Many thanks.

Offline IanB

  • Hero Member
  • *****
  • Posts: 2435
Re: 1:72 Maquette Ilya Muromets
« Reply #29 on: August 06, 2013, 12:45:26 PM »
My little Argus production line is making headway...the cylinder pairs are all done and mounted on the crankcases - I may tweak a couple of them to get them a little more level bt that really only shows in the pics...we'll see! The cylinders are 2 x 5mm long pieces of 2mm rod glued together, then the top halves were wrapped in a strip of 2.5mm x .25mm and the heads were filed to the correct shape when dry. I'm very pleased with the outcome and it was a surprisingly quick process - the filing of these tiny little things took just under 2 hours for all 12 pairs - needless to say not a continuous 2 hours! They are already drilled for the inlet manifolds which will be added after I've figured out the pushrods....


Time for a beer...

Ian
« Last Edit: July 02, 2017, 04:19:18 AM by IanB »