Author Topic: 1:72 Maquette Ilya Muromets  (Read 49384 times)

Offline IanB

  • Hero Member
  • *****
  • Posts: 2439
1:72 Maquette Ilya Muromets
« on: June 03, 2013, 07:31:57 AM »
This is a build I'm doing for a group build on another site and I thought I'd share it here....

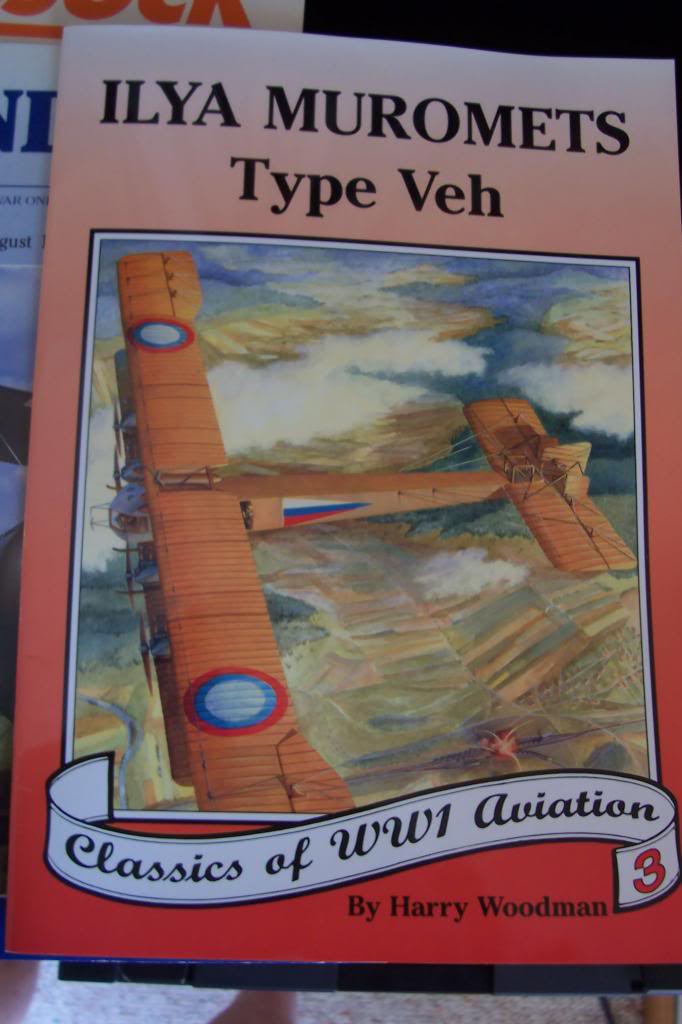
 My referances are the Ilya Muromets Special by Harry, along with Windsock International Vol 6, Number 4 and Vol 12 Number 2, which contain articles by Harry, one on the plane itself, the other on the kit and it's many faults. Unfortunately the plans are all for the blunt nose Veh and I'm building the earlier sharp nosed variant, but from Harry's comments in his articles I think I'm pretty accurate on the differances.


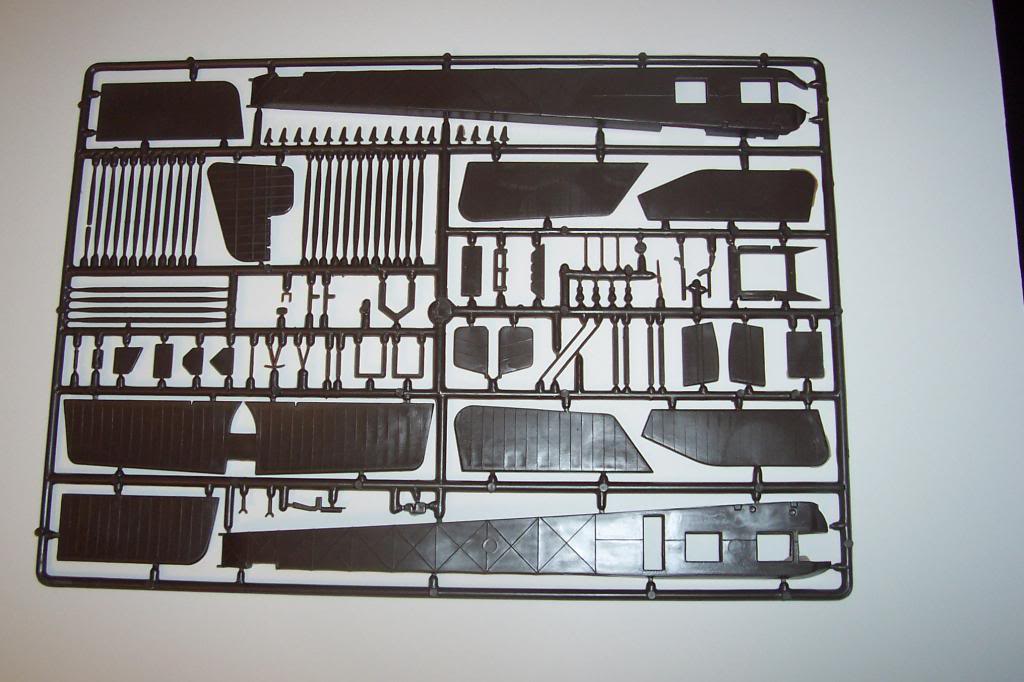
 I'm not going to beat around the bush - the kit is terrible! The parts are very thick and lumpy, but that's the least of the problems.

This is what you get:


As to the errors, I'll list those as I get to them, but since I've started on the fuselage here is the list:

1) The upper longeron is a straight line from nose to tail. It should be parallel to the lower for about 1/5 of the total length, then both upper and lower taper equally to the tail. The longerons should also be parallel in plan form, easily rectified with a little sanding.
2) It's just over 1mm too deep for its entire length. This is not too difficult to resolve as it's about the thickness of the plastic, (except for the nose section which requires a little more to be removed) so I just cut the fuselage bottom off from the inside, using the edge of the plastic as my guide.
3) The windows are too big. Again fairly easy to rectify with plastic card.
4) The door is too far aft.
5) The forward upper gunner's position is too far forward, and the aft one shouldn't be there at all on this early version. (It was only on the later Geh model).
6) All the internal structure and bracing wires are moulded on the OUTSIDE of the fuselage! Since they are joined by many large ejector pin marks it's a case of "get out the sanding block...." anyway!

 So, to the first job - correcting this big lump of plastic and making it more accurate!
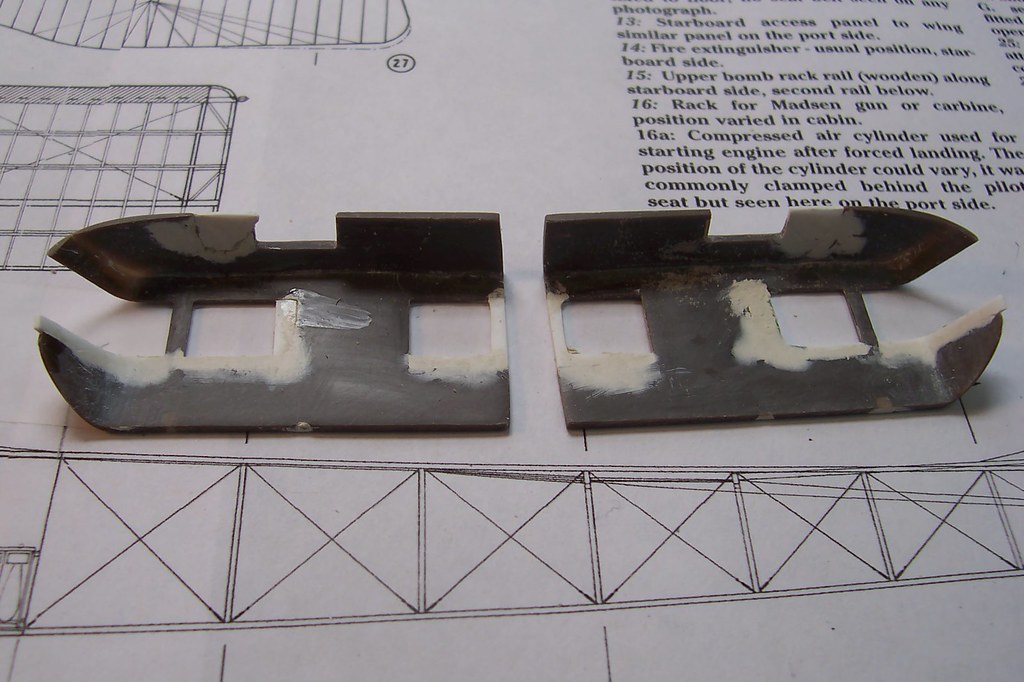
 This first shot shows just how much I had to remove from the bottom of the fuselage to correct the depth. The cockpit section was also cut off where the parallel longerons end, and sanded on their top joint to make them parallel in plan form. The inside of the cockpit sections and the front part of the aft sections were thinned extensively to bring them to a more accurate scale thickness. A little sanding on the aft section where the cut was made brought the tail down to where it should be. A little more sanding on the stern post to square it up, and also at the sides to correct the curve of the tail in plan form. This is all after the outside of the fuselage was sanded clean to remove all the mouldings and ejector pin marks. The door is in its original (incorrect) position in this shot.


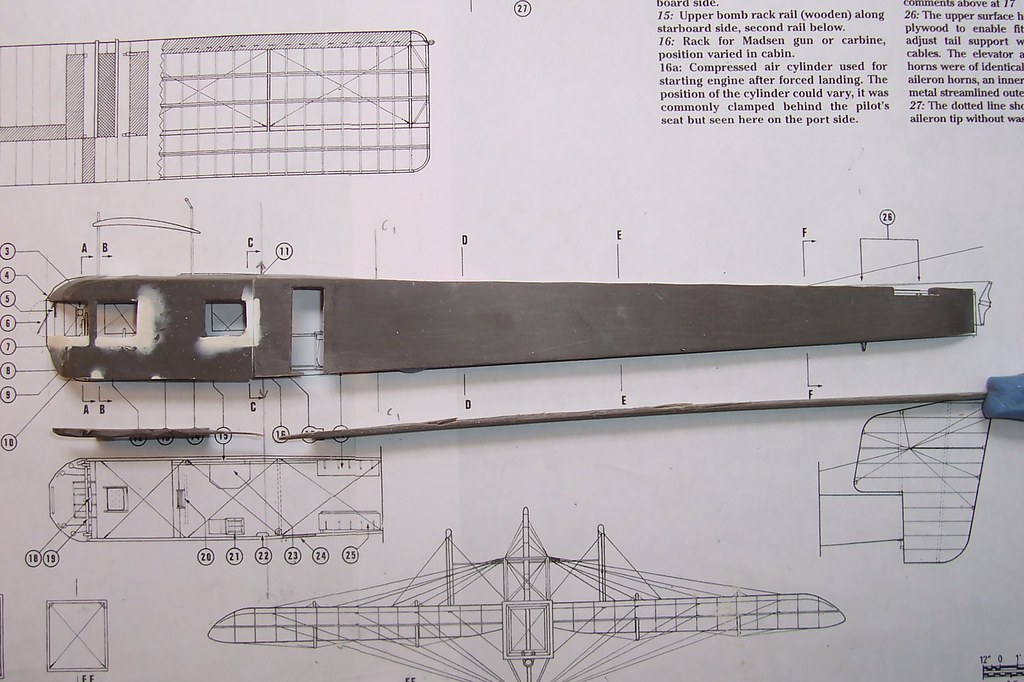
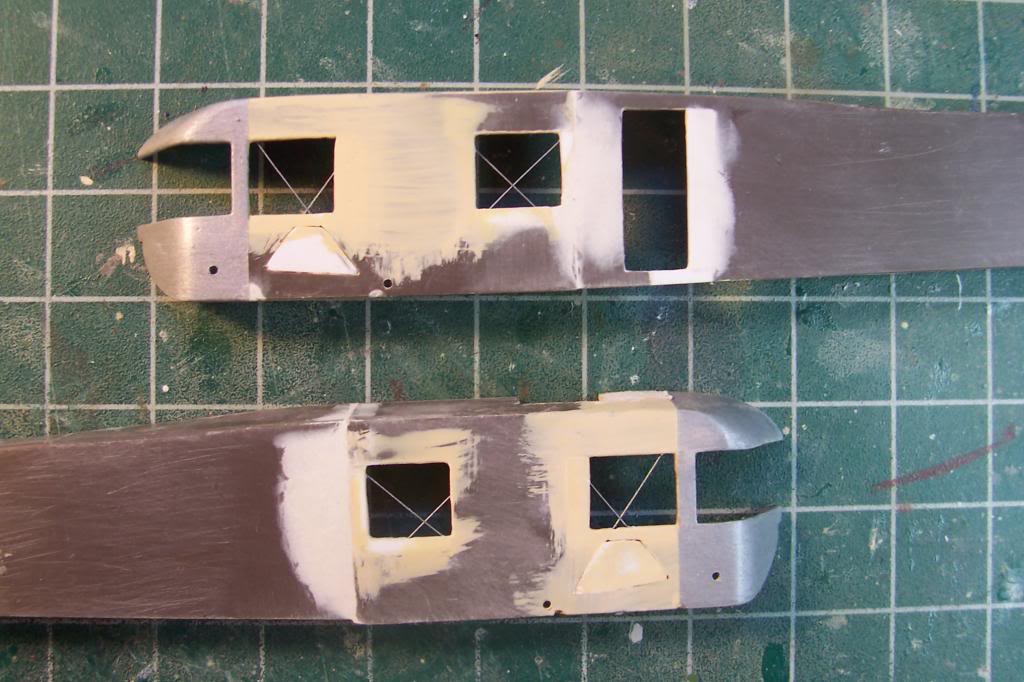
 The windows were then corrected with plastic card. I cut "L" shaped pieces and fitted them to bring the rear of the windows forward, and the bottoms upward. The front windows were also fitted with new bottom pieces to make them narrower top-to-bottom. The upper gunner's position was moved aft so that the front of the new opening is about where the rear of the moulded one is, by cutting out the fuselage in the correct place and filling the moulded opening with card.


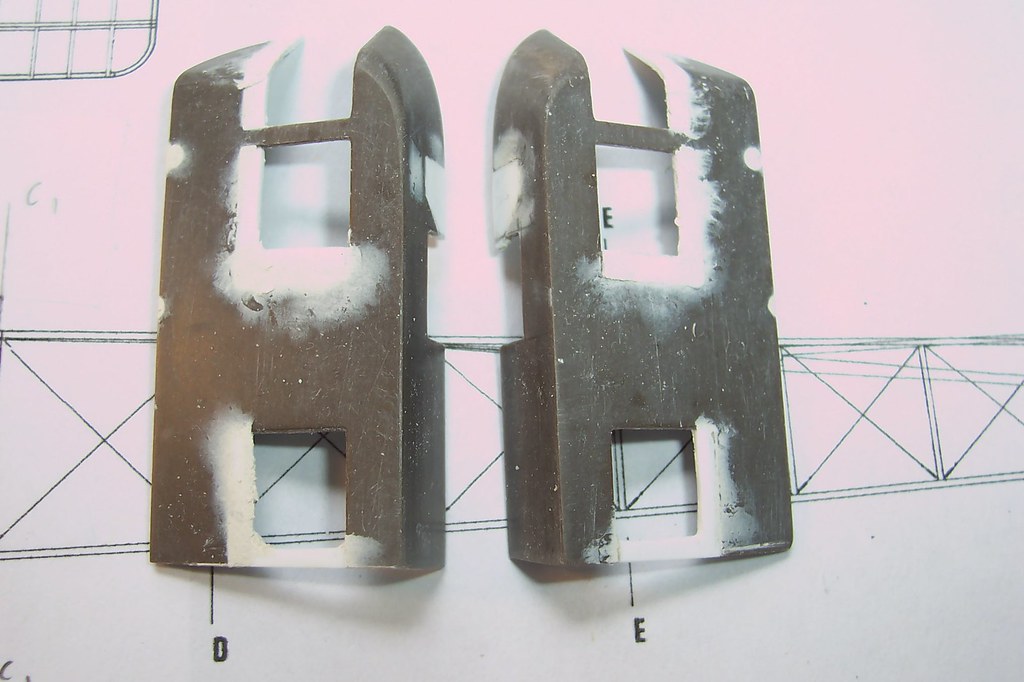
 I also cut out the engineer's access panels in the fuselage sides - these provided a means for him to crawl out onto the wing in flight and fix the engines! One of these will be fitted open, the other closed. If anyone knows how they opened please let me know! I'm not sure if they were removable, or hinged out from the bottom....

The door was moved forward to its correct position which gave the opportunity to square it up again after the adjustment to the slope of the upper rear longeron, and the rear gunner's position closed up with plastic card. The door will be modelled open (it slid rearwards, between the canvas exterior and plywood interior panels, like a pocket door).
 The internal rigging has been fitted across the window and door openings by using a seam scriber and inlaying the rigging line. The joins won't show inside as the cockpit was lined with plywood and this will be fitted over the rigging. I have made these ply panels from card and will fit them soon. I have also drilled new mounting holes for the lower wings. They will be mounted on brass rod to provide some strength, and the rod will be covered with plastic rod (hollowed out to fit over it) where it's visible inside to simulate the spars running across the fuselage floor.
 Finally the cockpit and rear sections were rejoined, filled and sanded as necessary.


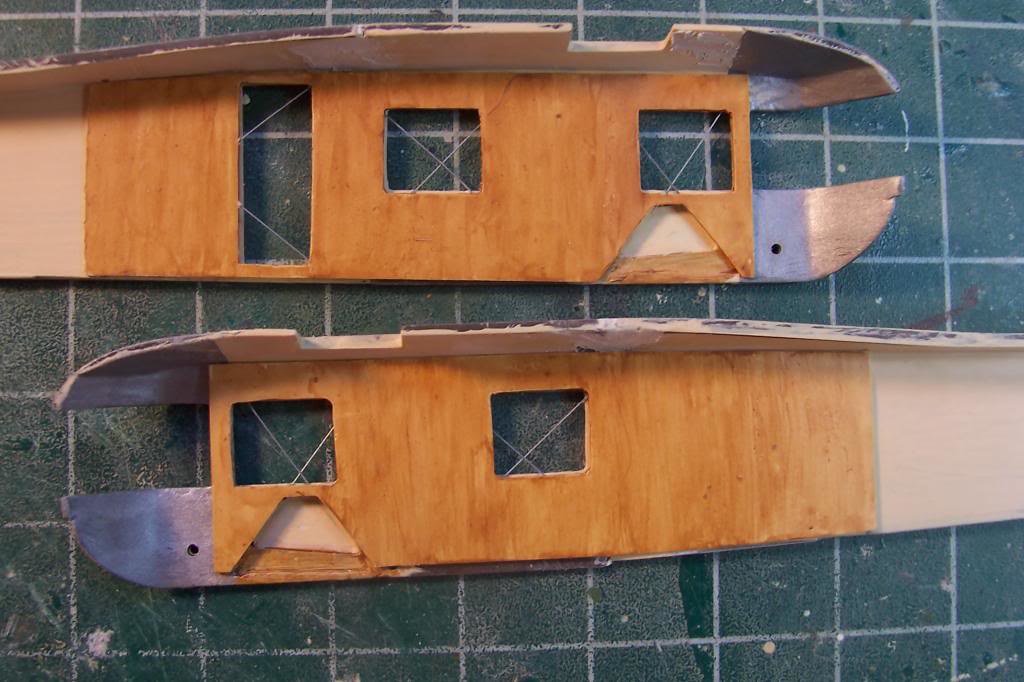
The lower pic shows the "ply" panels sitting in place inside the cockpit.

I'm almost to the stage where I can join the fuselage halves and start the interior detailing. One advantage of removing the floor is that I can build it up separately then just slip it in from below once the details on the sides and roof have been done. I will need to add the crossmembers on the roof, and rig them, as they are very visible through those big windows.

 One last question: I want to try to replicate the feeling of light coming through the rear fuselage fabric. I've thought of using flourescent or luminous paint and then a thin coat of white or CDL to tone it down a little...any thoughts? Is this type of paint even available?

Thanks for checking in, on what will be a long, and hopefully fun, build!

Ian
« Last Edit: July 02, 2017, 03:48:57 AM by IanB »

Offline GAJouette

  • Hero Member
  • *****
  • Posts: 3579
  • " Beware of the Spanish Inquisition"
Re: 1:72 Maquette Ilya Muromets
« Reply #1 on: June 03, 2013, 08:02:29 AM »
 Ian,
Excellent progress to date my old friend. Love that wooden paneling too. As to your question I would suggest you draw in the framework in colored pencil or pen then lightly overspraying with an off white paint. That would give you the appearance of transparency . Hope this helps.
Highest Regards,
Gregory Jouette
" What Me Worry"

Offline uncletony

  • Hero Member
  • *****
  • Posts: 4349
    • Aircraft In Pixels
Re: 1:72 Maquette Ilya Muromets
« Reply #2 on: June 03, 2013, 09:11:04 PM »
Very cool  8)

Offline IanB

  • Hero Member
  • *****
  • Posts: 2439
Re: 1:72 Maquette Ilya Muromets
« Reply #3 on: June 03, 2013, 11:39:30 PM »
Gregory,
 I'm looking more for the "light" rather than the transparency. The fuselage will be quite dark inside towards the back and obviously with a fabric fuselage, it shouldn't be that dark....it may be that your suggestion is about as close as I can get but a luminous paint may work, if there is such a thing... the only other option would be to cut out the sides and top, leaving just the frame, and add very thin plastic card as the "fabric" - maybe too much work!

Ian

Offline GAJouette

  • Hero Member
  • *****
  • Posts: 3579
  • " Beware of the Spanish Inquisition"
Re: 1:72 Maquette Ilya Muromets
« Reply #4 on: June 04, 2013, 12:17:20 AM »
  " the only other option would be to cut out the sides and top, leaving just the frame, and add very thin plastic card as the "fabric" - maybe too much work!"
  Ian,
Sure a lot of work but I believe the results would certainly be worth all the effort my old friend. Besides the basic kit require extra efforts anyway so my not go for it. No doubt you have the skills and craftsmanship pull it off perfectly. Whatever you decide I'm looking forward to following this thread and enjoying your works.
Highest Regards,
Gregory Jouette
" What Me Worry"

Offline coyotemagic

  • Hero Member
  • *****
  • Posts: 7710
  • "Here's to not buggering it up." -Winston Chuchill
    • My Models
Re: 1:72 Maquette Ilya Muromets
« Reply #5 on: June 04, 2013, 03:32:15 AM »
Outstanding progress, Ian.  I'm looking forward to following this one.
Cheers,
Bud
"All men dream: but not equally. Those who dream in the dark recesses of the night awake in the day to find all was vanity. But the dreamers of day are dangerous men, for they may act their dreams with open eyes, and make it possible." -T. E. Lawrence

Online RAGIII

  • Hero Member
  • *****
  • Posts: 18840
Re: 1:72 Maquette Ilya Muromets
« Reply #6 on: June 04, 2013, 11:45:29 AM »
Ian,
Great start and progress! Looking forward to the rest of the build!!
RAGIII
"A man has to know his limitations": Harry Callahan

"Don't slop it on" Lynda Geisler

Offline IanB

  • Hero Member
  • *****
  • Posts: 2439
Re: 1:72 Maquette Ilya Muromets
« Reply #7 on: June 09, 2013, 09:35:57 AM »
Although there's still plenty to do to the fuselage, I decided to take a closer look at the engines for a change of pace. I bought a set of Argus engines from Engines & Things, and they are supposed to be specifically for this kit. However there is quite a bit of work to be done to correct them as they appear to be the later 190hp Arguses.


Oddly enough, the drawing is the one that comes with the engines and it appears to be correct. I'm not quite sure why the engines don't match it!

I'll probably settle for correcting the nose around the prop shaft (cutting it off!), removing and correcting the inlet manifolds and maybe carbs, separating the three cylinder banks with a thin saw-cut (shouldn't be an issue if I'm removong the manifolds anyway), adding the oil pipe along the left side, and maybe something to represent the magneto leads into their sheaths - I'm certainly not going to add each individual wire in this scale!
As for the pushrods....maybe - not sure yet but it would certainly make a big visual impact so I may go for it!
 I'll also need to make up four small cowlings for the front left side of each engine, which were fitted on the particular aircraft I'm building (and apparently on all the aircraft flown subsequently by the pilot of this machine) to protect the carbs,
Should keep me out of mischief for a while!

Ian
« Last Edit: July 02, 2017, 03:54:19 AM by IanB »

Offline Des

  • Administrator
  • Hero Member
  • ******
  • Posts: 9325
    • ww1aircraftmodels.com
Re: 1:72 Maquette Ilya Muromets
« Reply #8 on: June 09, 2013, 10:15:53 AM »
Quite a project you are taking on Ian but what you have done so far is very good, the fuselage is shaping up nicely. This will be an impressive looking model when completed, I wait patiently for the next updates.

Des.
Late Founder of ww1aircraftmodels.com and forum.ww1aircraftmodels.com

Offline IanB

  • Hero Member
  • *****
  • Posts: 2439
Re: 1:72 Maquette Ilya Muromets
« Reply #9 on: June 13, 2013, 01:53:11 AM »
A little progress on the engines - I know I'm getting a little ahead of myself here, but I needed a change from the fuselage work....
 I first removed all the moulded detail on the cylinders (carbs, ignition lead tubes, inlet manifolds, exhausts etc) then separated the cylinder blocks into three blocks of two.  A little Mr Dissolved Putty between the cylinders in each pair has reduced the depth of the gap between them. The cylinders aren't quite the correct shape - they should have a little more of a bulge at the top, but short of removing them and recasting my own, they'll have to do. A few more cuts separated the valve rockers from each other and at least gives the appearance of separate valve assemblies.
 The engine  mounting plates are in the wrong place (the end ones should be a little closer to the ends of the crankcase) but I've left them where they are and just opened them up to look like three plates instead of the moulded triangular lump. I've also removed the conical "nose" on the crankcase and replaced it with a flatter cross-shaped piece.
 Next I'll give them a coat of paint, then start adding back the details, including the pushrods.

I also had a look at the kit props - surprise! They're awful! The pic shows one as supplied, and the first of the corrected ones - quite a differance and I'm pleased with the result. I just hope I can match the others to it!


Thanks for looking in!

Ian
« Last Edit: July 02, 2017, 03:58:01 AM by IanB »

Offline DaveM

  • Jr. Member
  • **
  • Posts: 82
Re: 1:72 Maquette Ilya Muromets
« Reply #10 on: June 13, 2013, 06:07:04 PM »
Hi Ian,
great build and project,you're a braver man than I Gunga Din.
The cabin structure wall translucency,have you thought about tracing paper panels cut to fit the cabin walls.I just held a sheet of paper up to a wooden ships deck and all the detail showed through,but with a light effect.Don't know wether it will work in that enclosed space though.

Dave.

Offline Modelnut

  • Full Member
  • ***
  • Posts: 228
Re: 1:72 Maquette Ilya Muromets
« Reply #11 on: June 19, 2013, 09:17:14 AM »
Any progress Ian? I'm looking forward for this big bird.

Offline IanB

  • Hero Member
  • *****
  • Posts: 2439
Re: 1:72 Maquette Ilya Muromets
« Reply #12 on: June 19, 2013, 11:59:05 AM »
Thanks for the interest!
 I'm working on masters for the engine and radiators so that I can cast them in resin. I have a pair of cylinders almost done, the inlet manifold and carburetor are nearly finished and the radiator needs trimming up. The crankcase has been modified from the Engines & Things one, with the cylinders removed. I will post pics when I have the masters ready.
 I have never tried resin moulding before - how quickly does this stuff set? Will the resin in the mould cure quicker than any I have left? In other words, will it be possible to mix enough for 3 cylinders, pour one, let it set, pour another and so on? Or will it all set at the same pace?

Ian

Offline uncletony

  • Hero Member
  • *****
  • Posts: 4349
    • Aircraft In Pixels
Re: 1:72 Maquette Ilya Muromets
« Reply #13 on: June 19, 2013, 12:39:10 PM »
will it be possible to mix enough for 3 cylinders, pour one, let it set, pour another and so on? Or will it all set at the same pace?

Ian

Yes it will all set at once, so no, not possible. Once you mix it up it has a very short pour life -- like a few minutes at most.

Did you see Albatros1234's link to basic resin casting? Gives some good basics. If not lemme know, I'll dig around for the link...

Cheers

Offline IanB

  • Hero Member
  • *****
  • Posts: 2439
Re: 1:72 Maquette Ilya Muromets
« Reply #14 on: June 21, 2013, 02:21:35 AM »
Here's the progress so far with the engines.
 I've made a pair of cylinders from 2mm rod, and wrapped the top half with .25mm x 2.5mm strip for the water jacket. These were then sanded to the correct shape. The carburetor venturis and inlet manifold are .75mm rod, and the radiator is a piece of stock sheet clad in .25mm brass rod. This still needs the ends and straps adding but I'm pleased with how it's coming on. The crankcase is the engines & things one, modified front and rear, and with the cylinders removed. The plan is to cast all these in resin rather than try to make 12 sets of cylinders and 4 of everything else and get them all the same. I've also made 4 camshaft gears from 2.4mm plastic tube, filled with .4mm plastic rod to make it solid. These were sanded to the correct thickness, drilled and fitted with a brass rod "camshaft". These gears also drove the left magneto, with a smaller one on the right side. The mag drive gears are simply short lenghts of .5mm rod which will be cut to the correct length later. I will make 4 smaller gears for the left mags later.


This pic also shows the original, already modified, cylinders and should give an idea of why I decided to scratch my own!


I'm hoping that the parts on the rear of the crankcase will cast ok...we'll see!

Ian
« Last Edit: July 02, 2017, 04:03:11 AM by IanB »