Author Topic: 1:32nd scale OEFFAG Albatros D.III  (Read 845 times)

Offline NigelR

  • Hero Member
  • *****
  • Posts: 2773
Re: 1:32nd scale OEFFAG Albatros D.III
« Reply #15 on: July 14, 2026, 07:29:03 PM »
I'm going to get me one of those riveter tools seeing how well it's worked on this build and on Bertl's Albatros builds.

Online Mike Norris (UK)

  • Hero Member
  • *****
  • Posts: 2732
  • RAF Old and Bold
    • Mikes WW1 Aircraft Models
Re: 1:32nd scale OEFFAG Albatros D.III
« Reply #16 on: July 15, 2026, 06:25:00 AM »
Hi all,
The basic fuselage is more or less completed.
The photo-etch parts have been painted and added.
Weathered with Flory Models dark dirt wash and dry brushing with Mr. Color Super Metallic 2 (203).

Now it's onto the engine,

Mike


Retired - 27 years RAF service then 20 years Military Aerospace Technical Author/editor.

Offline NigelR

  • Hero Member
  • *****
  • Posts: 2773
Re: 1:32nd scale OEFFAG Albatros D.III
« Reply #17 on: July 15, 2026, 06:17:03 PM »
That looks superb Mike, the overall finish is fantastic. The wood and the nail runs look particularly impressive.

Online Mike Norris (UK)

  • Hero Member
  • *****
  • Posts: 2732
  • RAF Old and Bold
    • Mikes WW1 Aircraft Models
Re: 1:32nd scale OEFFAG Albatros D.III
« Reply #18 on: Today at 12:33:12 AM »
Hi all,
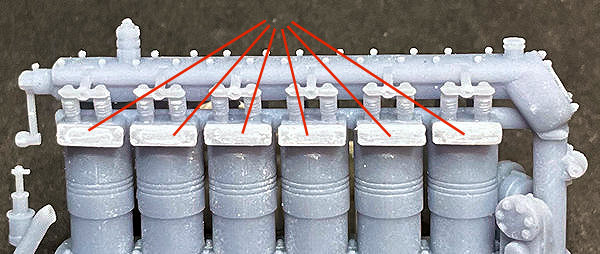
The kit supplied engine exhaust pipes are flattened along their entire length.
However, most photographs of the aircraft show the exhaust pipes at the engine end being flattened, but then changing to tubular shape at their outer ends.
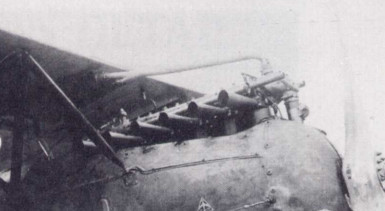
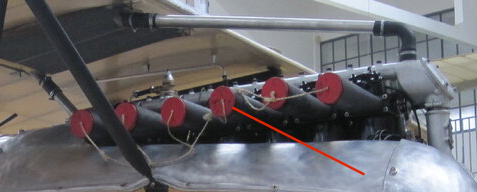
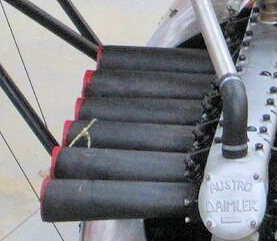


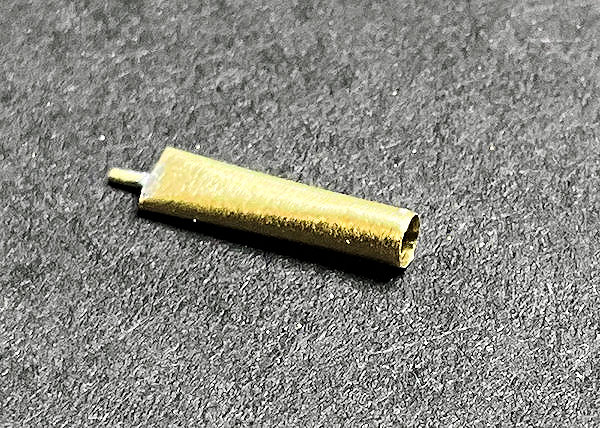
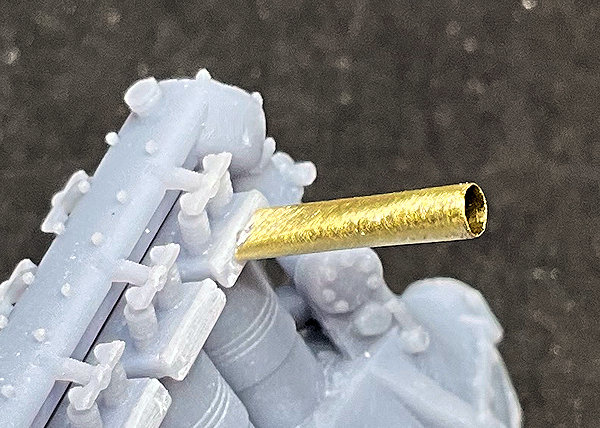
The replacement exhaust pipes were made as follows:

File or sand away the locating stub on the engine side of the exhaust pipe flanges.
Carefully cut away the exhaust pipes close to the flange.
Using thin CA adhesive, secure each flange centrally onto the exhaust outlets of the engine cylinders.
Cut a 10 mm length of 2.0 mm diameter Brass tube, such as ?Albion Alloy?s? (MBT20) or similar.
Using flat pliers, carefully flatten one end of the tube and reduce the flattening outboard to approximately half way along.
The bore of the flattened end should be approximately 0.5 mm wide.
Cut a length of 0.5 mm diameter Brass rod, such as that from ?Albion Alloy?s? or similar.
Insert the rod centrally into the flattened end of the tube, leaving approximately 4 mm protruding.
Secure the rod in the tube using either thicker, slow setting CA adhesive or soft solder the rod in the tube.
Drill a hole of 0.5 mm diameter centrally into an exhaust flange.
Test fit the exhaust pipe into the engine, making sure it?s 90 degrees to the engine when viewed from above and from the front.
Repeat the procedure to create the remaining five exhaust pipes.



Retired - 27 years RAF service then 20 years Military Aerospace Technical Author/editor.

Offline bobs_buckles

  • Hero Member
  • *****
  • Posts: 3874
  • Freedom isn't free.
    • Bobs Buckles
Re: 1:32nd scale OEFFAG Albatros D.III
« Reply #19 on: Today at 02:01:39 AM »
Super duper work, Mike!

Carry on, Sir!

BB


https://www.bobsbuckles.co.uk/

Last Minute Man Of Faith