Hi Andreas,
Jamo has posted excellent pictures of Koloman's D.II here in the forum - the Albatros built by Koloman Mayrhofer went to New Zealand.
https://jamesfahey.smugmug.com/Albatros-DII
The Albatros D.I was built in exactly the same way as the D.II in terms of cockpit equipment and arrangement of controls and components.
Maybe it's not too late for your model to add the compass on the right in front of the seat, which Roden forgot.
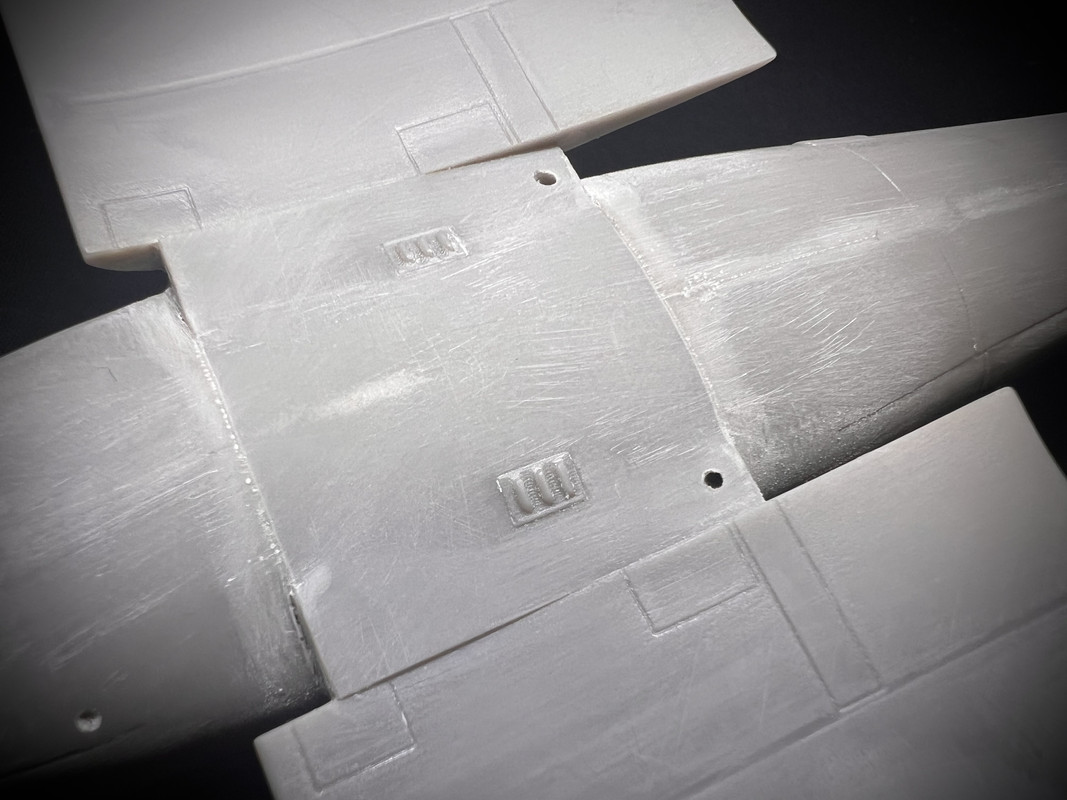
I know that with the engine installed you can no longer see the area underneath the engine - but by missing engraving I meant the panels on the underside of the nose from the outside.
There you would have to re-engrave these panels arranged lengthwise.
Ronny Bar also forgot to draw these panels on the views from below, in his profile book "German Fighters of the Great War" (Vol.1), he unfortunately only shows a single wide panel in front of the front landing gear legs and that is wrong.
These panels are also missing in the profile pictures (views from below) of the Albatros D.III and the Albatros D.V (up to approx. D.2065/17)
Servus
Bertl
Translated with DeepL.com (free version)
Thanks a lot for these hints, Bertl. I will care for these panel lines when detailing the exterior. You truely have a sharp eye for the detail.
And thanks a lot AngryJazz and Alan for your kind words.
I finally got the fuselage halves closed and added the lower wings which are connected by a small part of the underside of the fuselage; an usual approach that keeps the wing dihedral and gives sturdiness. I however acted so stupidly this time adding the lower wing that I almost surrendered. I cannot remember having such fit issues on my last Albatros from 2016 and I never read of such problems in any build report so I need to explain this only with my own clumsiness. It fit quite well in the end with much patience and some bad words.
One needs to fill the two holes on the fuselage right over the wingroot. They are meant as anchor points for rigging wires, but they sit too high. These rigging wires need to enter the fuselage directly at the border between fuselage and wing where I sanded and scrapped a little recess.
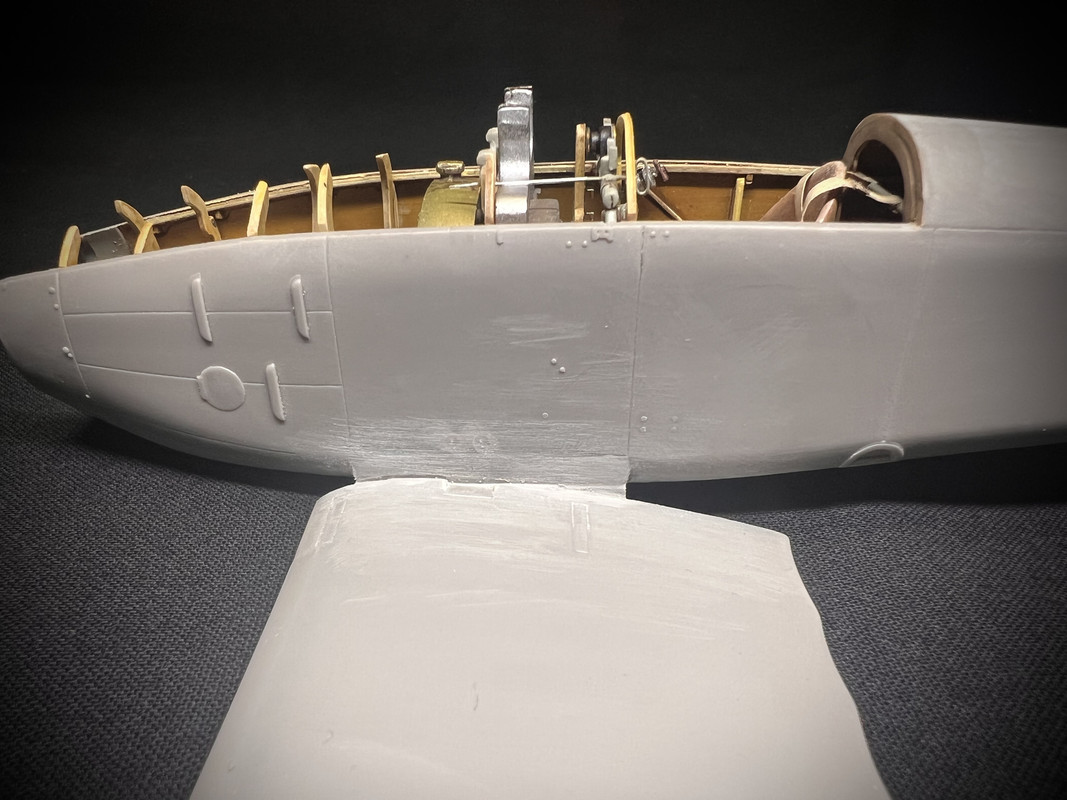
I sanded away the inspection hatches to replace them later with PE parts. These sanding scars look terrible in the photos. They are way less prominent in real life ? promised.
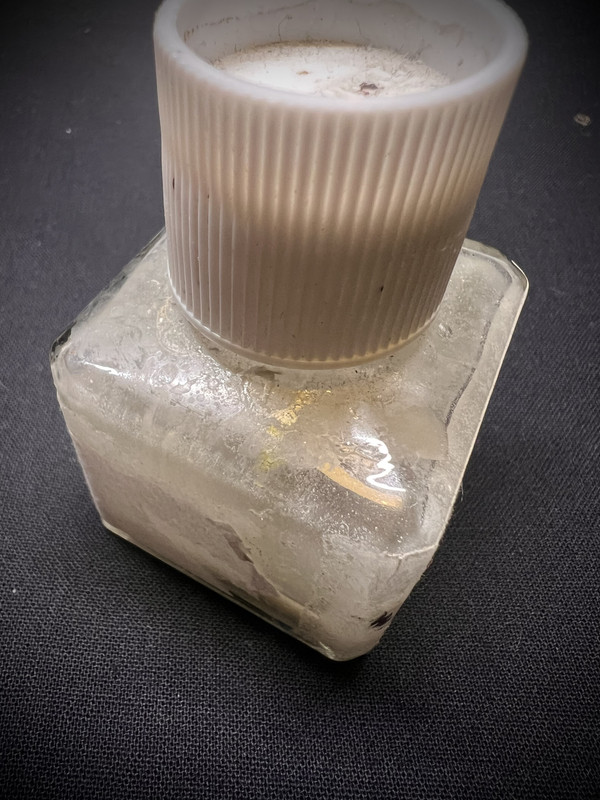
I spent an evening just slicing sprue bits into tiny flakes and putting them into an almost empty bottle of Tamiya glue.
Letting this react overnight one gets some great filler that I prefer over all these custom putties when it comes to putty fuselage gaps.
That is the almost finished working place of the pilot now. Some cables are still missing.
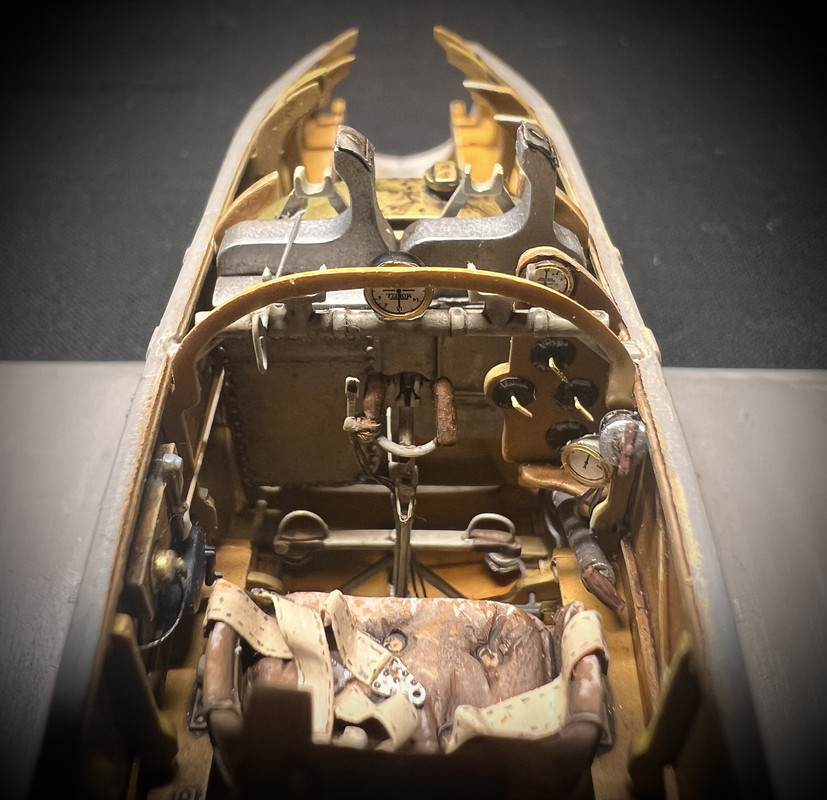
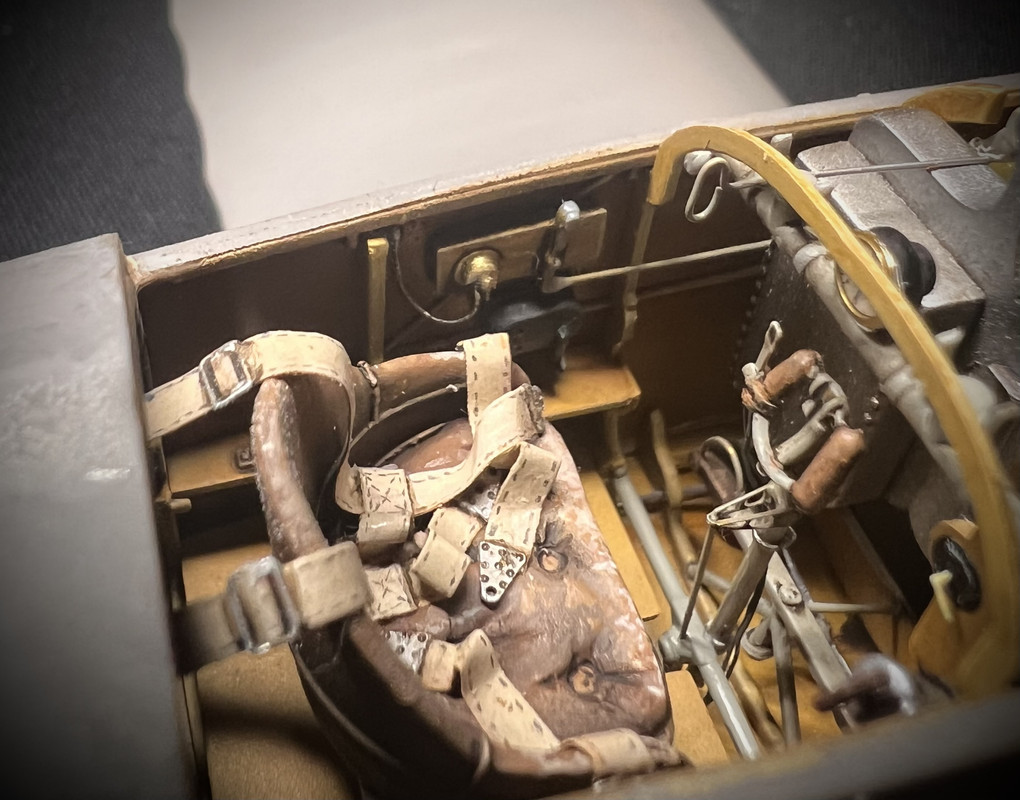
Last time I plundered a Roden Fokker Dr. 1 kit for the compass. I did not want to do this again, so I scratch build one with some plastic waste, a PE part from airscale and a spare decal from WNW.
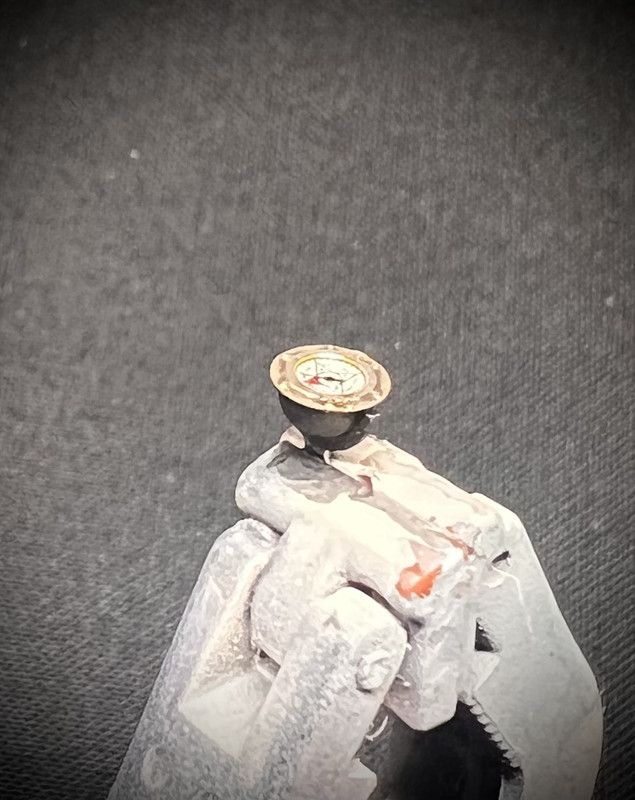
I have seen many better compasses than that, as it is a little primitive and does not reflect the actual construction if this device, but that is not really visible once installed, so it is fine for me.
Compass installed:
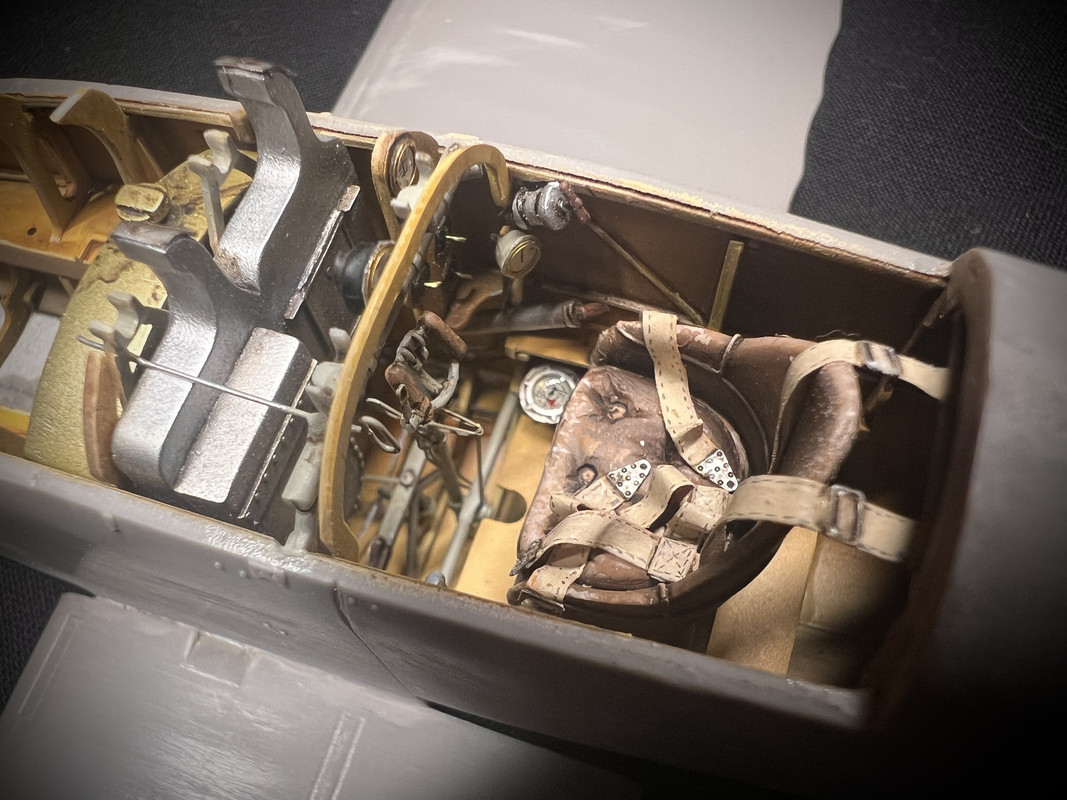
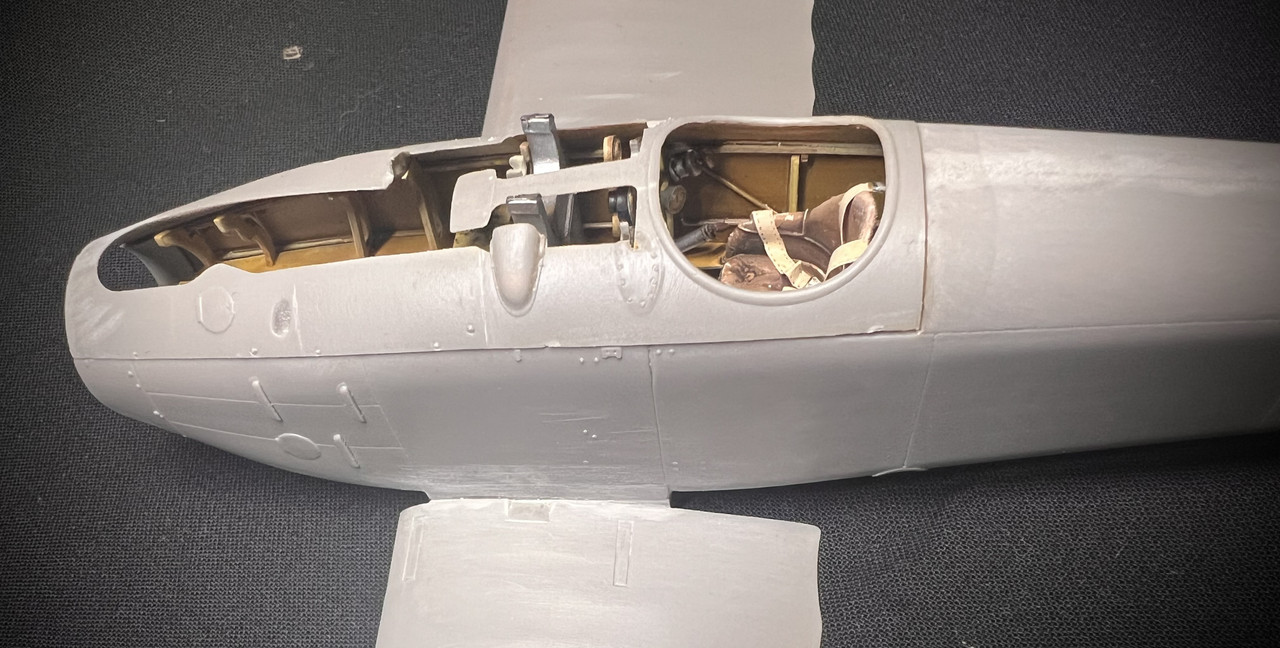
And with this last picture showing the upper decking of the fuselage dryfitted, I am calling the cockpit done.
And I need to call this build on pause.I simply could not keep myself off and cut the first parts of the new CSM Nieuport 11 from the sprues tonight. . .

