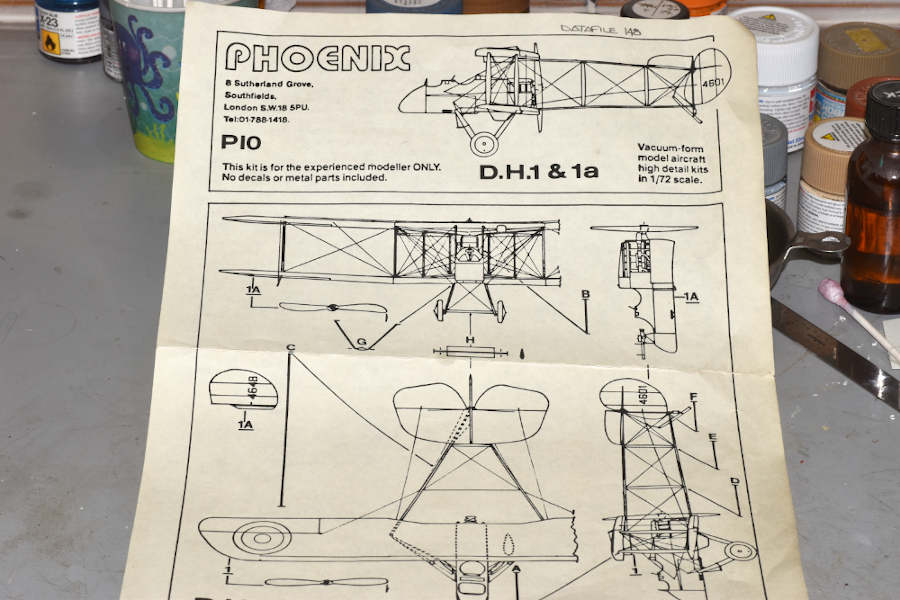
As I was going through my box of kits, I found the Phoenix DH1 in either the 1 or 1a version that had been started many years ago but relegated back to the box for unknown reasons. Maybe it was prior to Datafile # 148 when research material was almost nonexistent. But since I am fan of the De Havilland pushers, I decided to fill in a gap in the collection.
The kit was produced in 1988 and is a basic vacuform with no decals or metal parts. Over the years I have acquired a large number of the parts that the kit did not provide; ie, guns, engine, seats, decals.
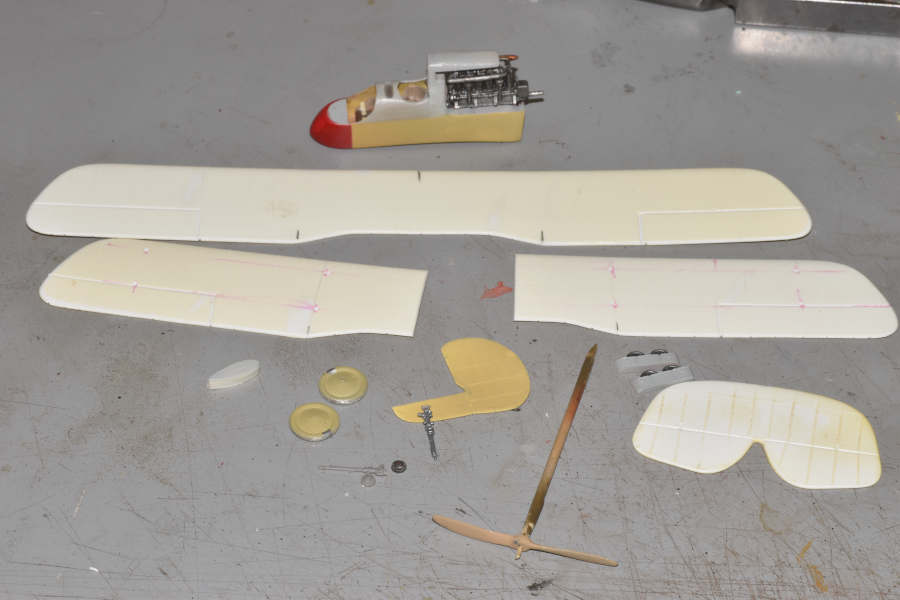
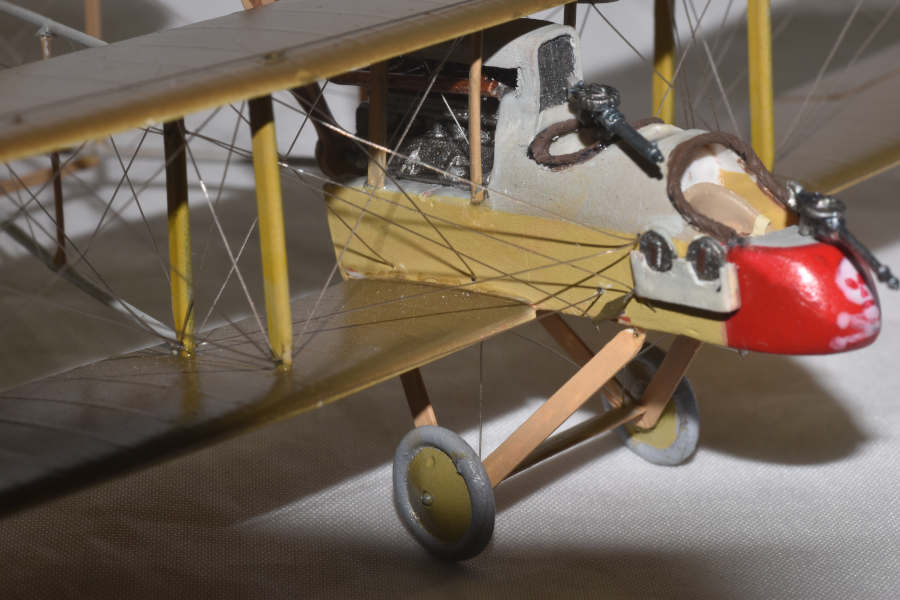
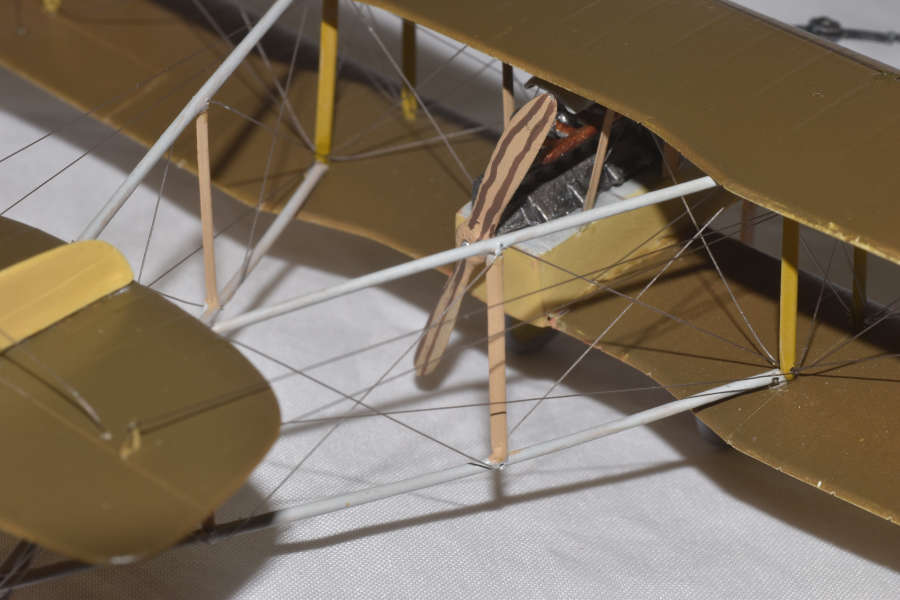
The fuselage proved to be difficult. For the 1A, the alignment was off and it took some tweaking to get it to line up. A lot of the problem was not very clear photos of the plane. But I did fight my way through and the results are reasonable. The engine is Aeroclub white metal. The seats are extras from other builds. A radiator would have been a nice additional or at least something that resembled it. Not to be, though.
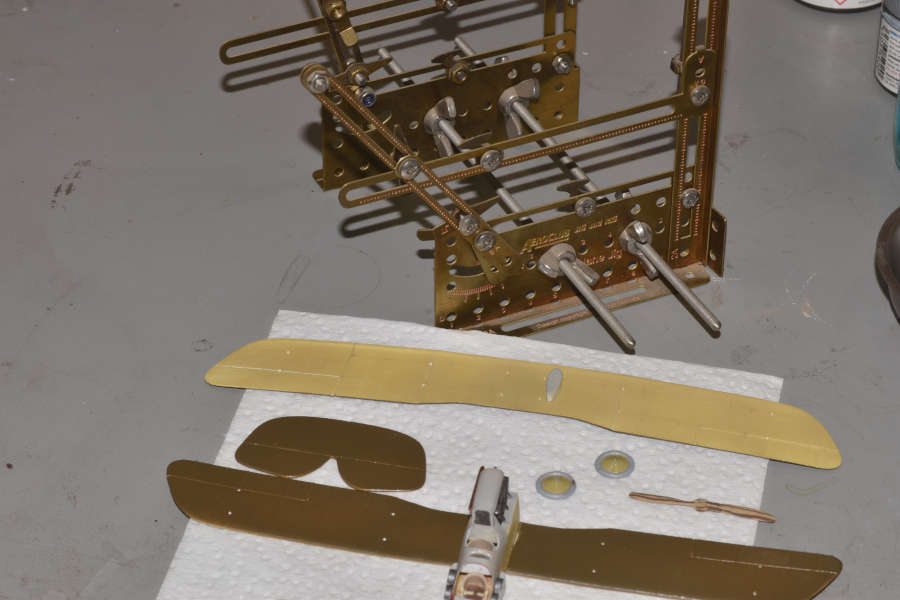
The wings are wet sanded on a sheet of 280 grit wet/dry sandpaper until I have the shape I am happy with. There is enough upper wing detail to satisfy me and the lower wing ribs are a single swipe with an engraving tool. All strut location points are drilled on the wings and it is ready for paint. The same method is used for the tail surfaces.
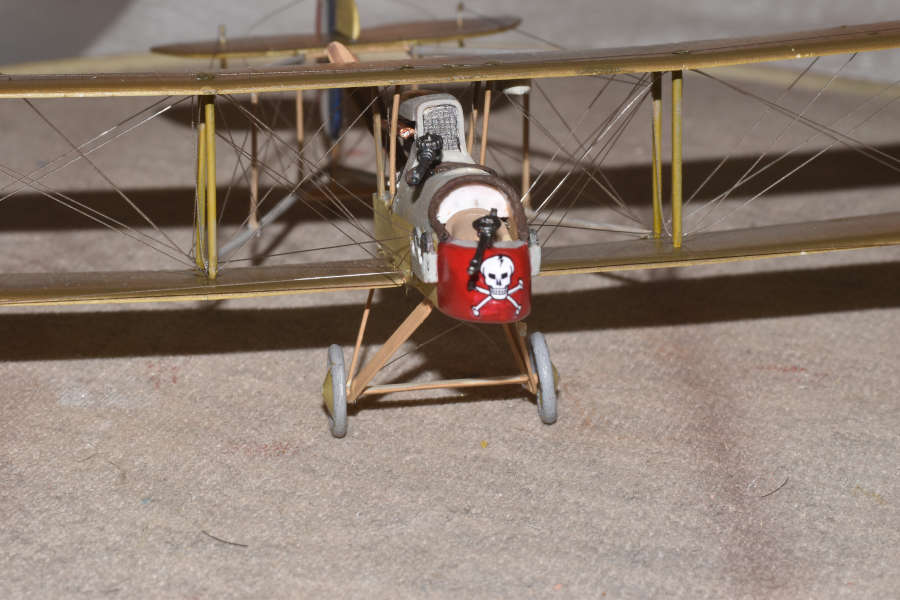
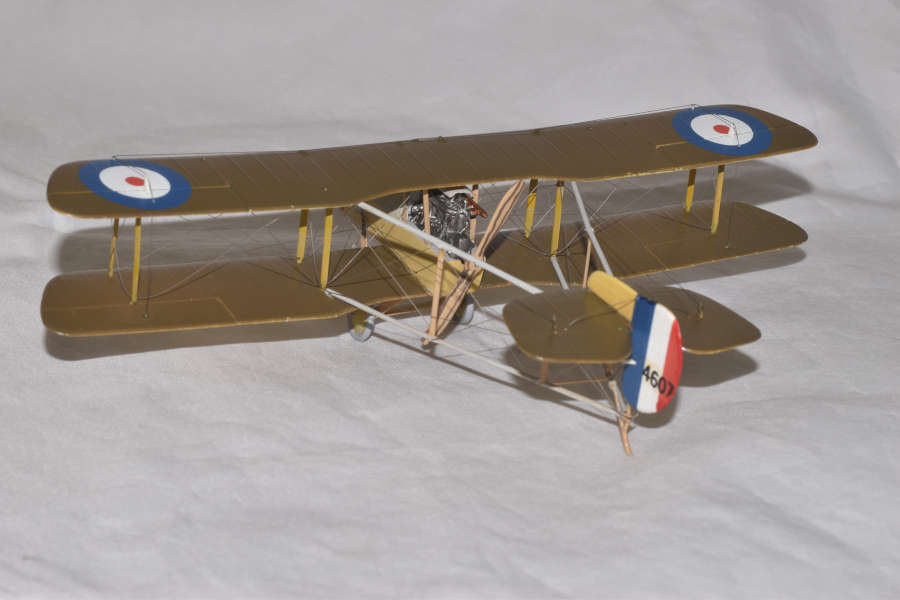
The next photos will be painting the wings. Standard olive over unbleached linen. I chose this color scheme primarily because of the red nose and skull and crossbones. It is possibly #4607 flown in the Middle East.
Here is my next installment of the DH1a but first let me thank every one for the positive comments on the build.
Antique Roadshow. I like that because, well, I am an antique.
Knowing when to stop on adding detail is what I call my Comfort Level. I build to a level that I am comfortable with. Could I go farther? Yes, but then the pleasure of the build diminishes for me. And as I get older, my comfort is reached sooner than before. Sigh.
Now the build.
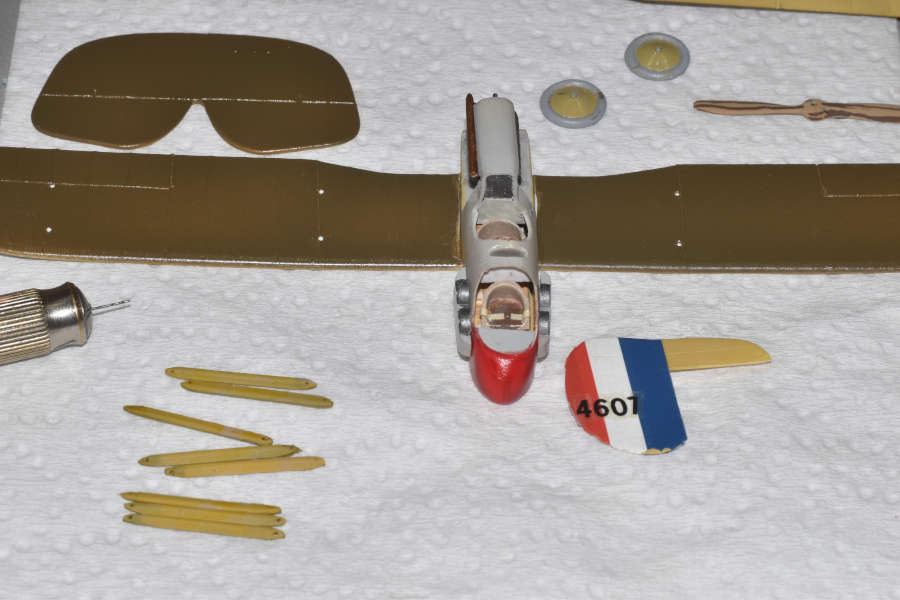
At this point I paint and decal the wings. I decal early to minimize handling the kit when it is completed. As you can see, all locating hole are drilled. The lower wing was attached and some putty work was required but the alignment is good.
Struts are next. Using the kit strut material, I have cut and drilled the eight main struts. The color is wood washed with thinned yellow.
The rudder numbers are from the kit with some cutting. I did not have a seven so I applied the one at an angle and added the top part of the number seven. A little touch up will be performed soon.
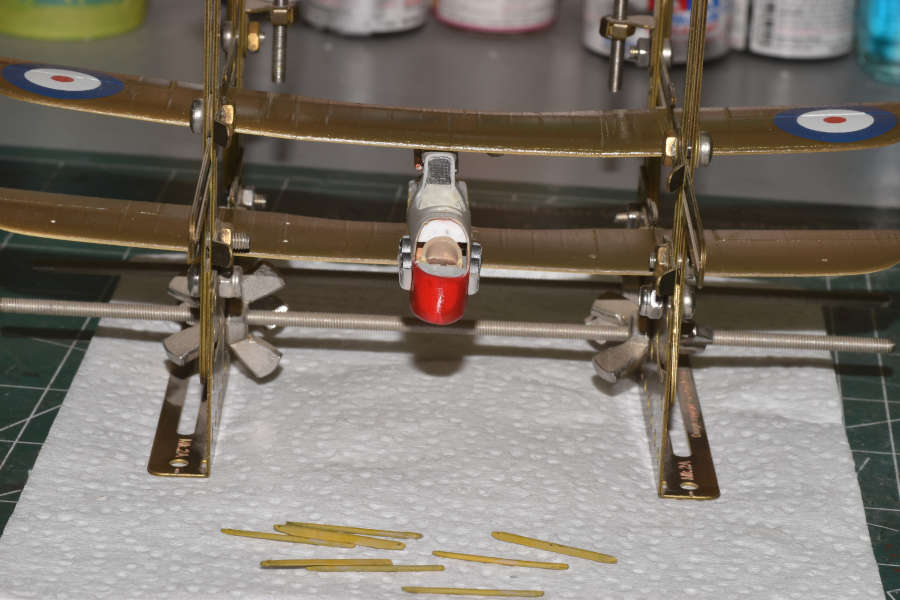
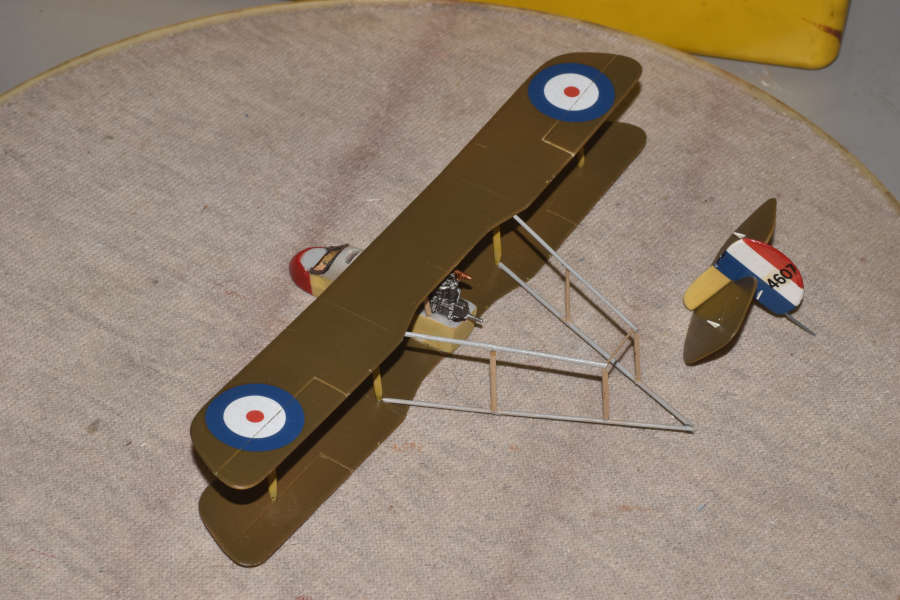
Installing the top wing is next and you can see the Aeroclub jig ready to go.
It is now time for one of the difficult areas (for me) and that is attaching the top wing. So, off the shelf comes the Aeroclub Jig that I purchased about 30 years ago. (Good Lord, I've gotten old) Dusted it off, re-learned how to use it and away I went.
The first thing is the gap between the wings. Once that is set, set the angle of the wings, forward, rear sloping or in the case of the DH1, vertical.
The locating holes have been drilled and the gap is set a little tight. I locate one end, say bottom, then move the upper end of the struct to the hole. It will bend slightly and then snap straight when it goes into the hold. At this point the eight main structs are located along with the cabanes. The jig is light and sturdy enough that the jig can be picked up to a better working angle. The last photo shows the finished product. Tail boom are next.

Oct 13, 2023
Progress is steady but there is that little sound behind me saying something is wrong. I suspect what it is but refused to listen.
I had gone to my spare parts box and had two beautiful magazine holder for the DH2 I built and i added them. Alas, they turned out to be 1/48th. I spent the next few hours making two new one is the correct scale.
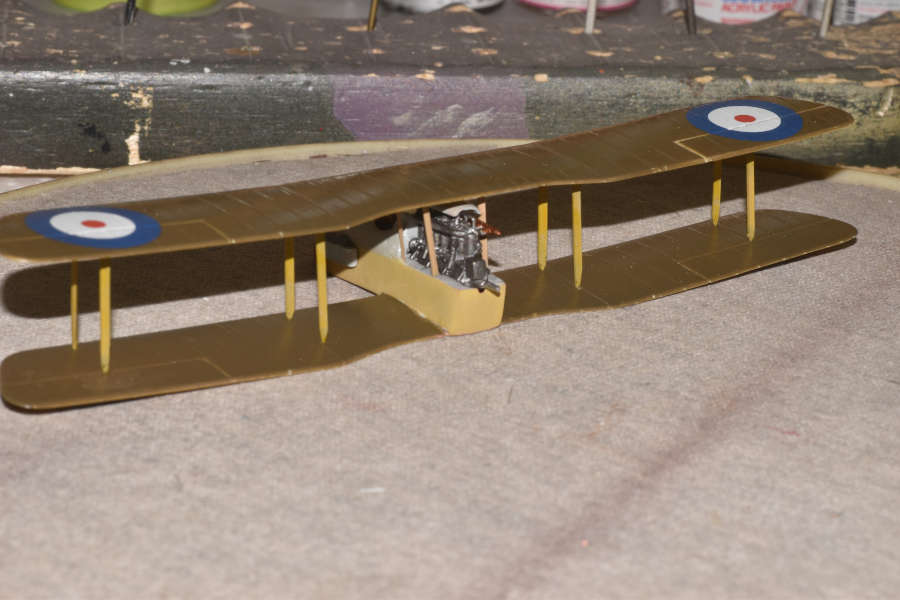
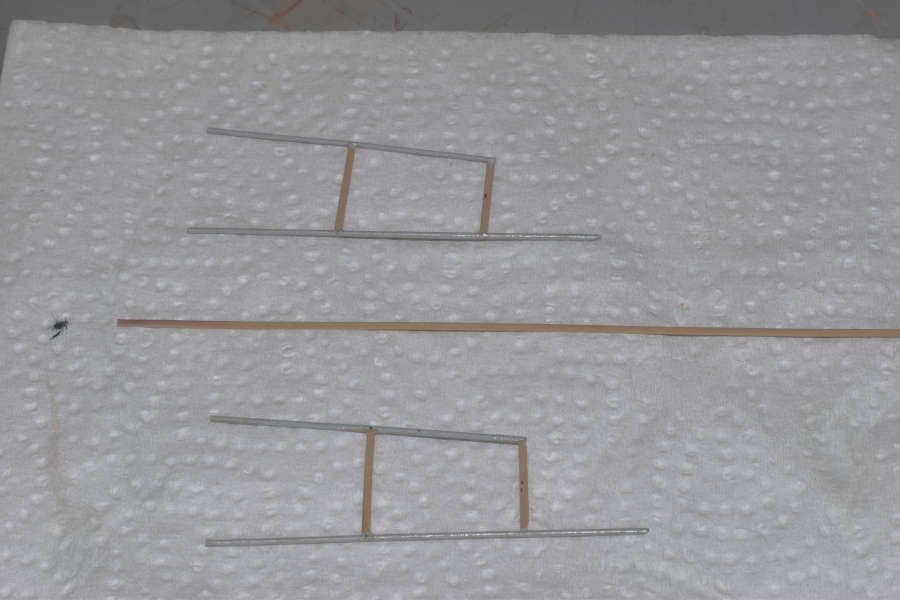
I then made the booms using round stock and strut material and painted them wood and grey. Slight trimming was necessary but they fit with no problems. Next will be attaching the tail surfaces and making the undercarriage.

October 31, 2023
After a bout with the flu and week of construction on the house, I made it back to the modelling table.
I must have lost my groove because the next three photos were a nightmare. Booms were constructed, they were both the same size and the fuselage and wings were square. The booms attached without a problem but they did not like the tail surfaces. I took two days of snipping, tweaking and threats to finally get everyone to talk to each other. But during this battle, the undercarriage got out of square and I did not notice it until too late. So it sits a little cattywampus. Oh, well. It isn't the first and I am sure it will not be the last.
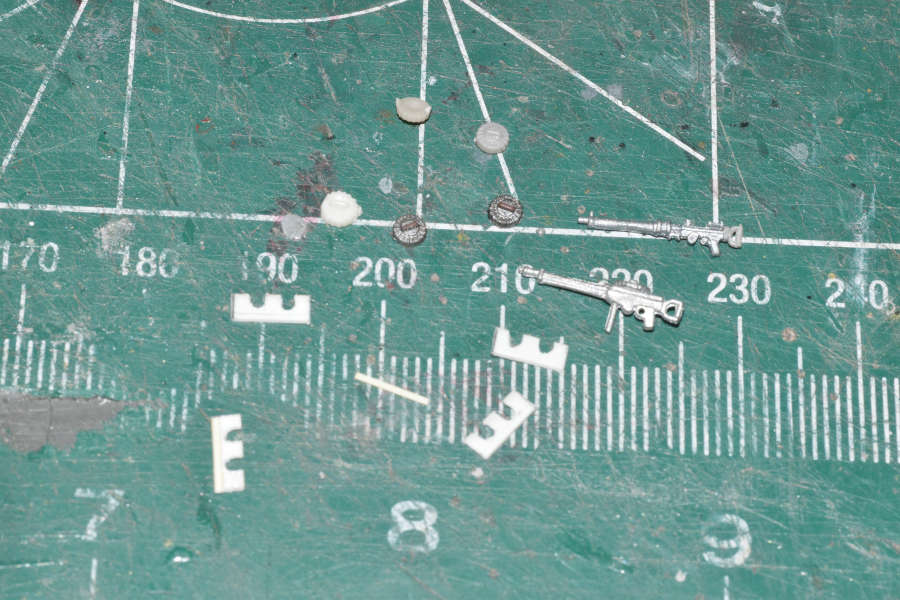
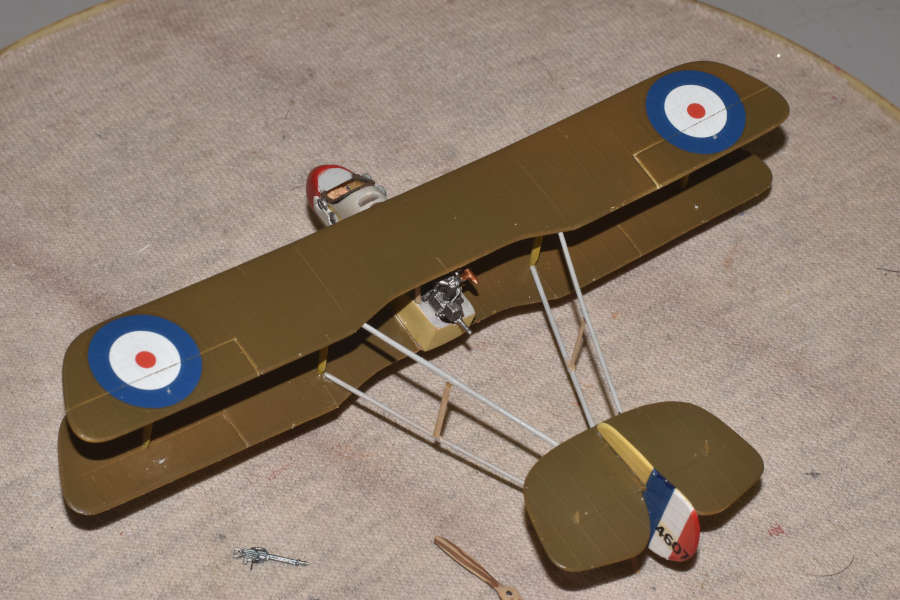
At this point the machine guns were prepared and all of the control horns were attached. I leave these off until after the rigging so as not to knock them off during rigging.
As of today, the rigging is 90% complete so my next set of photos will be of the completed kit.
November 3, 2023
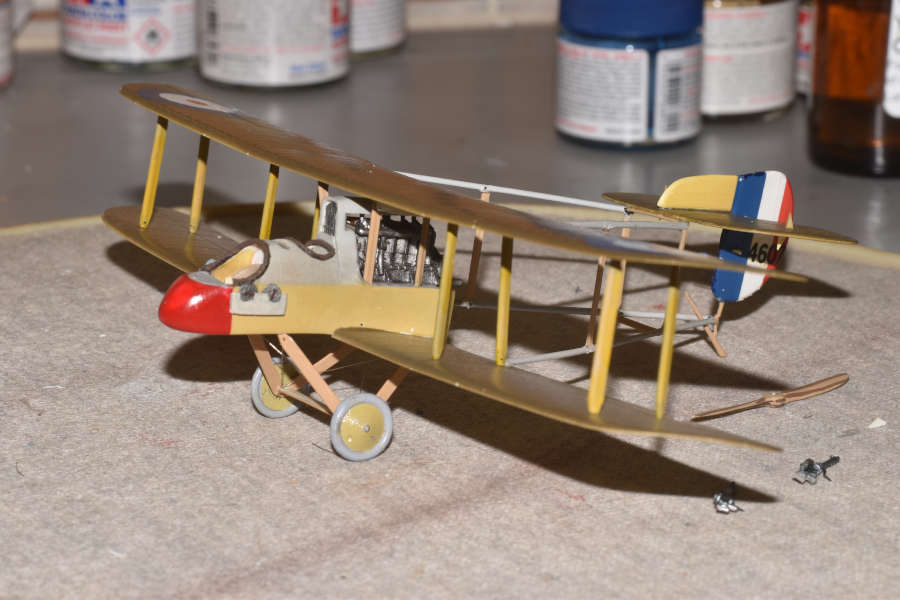
The model is now complete and here is a brief evaluation of the build.
As mentioned, this is a 30 year old vacuform prior to decals and metal parts. Over the past 30 years I have added spare parts to my stores so this did not present a problem. I found the kit difficult especially the fuselage and the tail booms. The quality in these areas is not that good but it looks ok and joins the rest of my de Havilland collection.
It is amazing how many flaws can be seen from a high resolution photo after you have put your stamp of approval on it. There will be some minor touch-up but the kit is basically complete. The last photo has its name tag and that is the last thing I do to the kit. Not my best work but the kit fills a hole in my collection.
Dennis


November 11, 2023
A friend gave me a skull and crossbones decal that fits exactly on the nose of the plane. It is not authentic but it is a lot better than that awful thing I tried to paint. This now completes the model.