Author Topic: 1:32nd scale RAF BE2c  (Read 24379 times)

Offline hrcoleman66

  • Sr. Member
  • ****
  • Posts: 284
Re: 1:32nd scale RAF BE2c
« Reply #45 on: May 07, 2022, 01:04:13 PM »
Another area that worries me is the combing behind the pilots cockpit.  The Plywood combing should follow the line of the stringers all the way up to the padded surrounds.  But for some reason, Lukgraph have changed the angle.


This, I think, will be more difficult to rework.

Great job so far!

Cheers,

Hugh

Offline Rookie

  • Hero Member
  • *****
  • Posts: 1023
  • No guts, no glory...
Re: 1:32nd scale RAF BE2c
« Reply #46 on: May 07, 2022, 07:56:07 PM »
Beautifull work on the interior Mike. I love what you've done to the Barracuda wicker seats.

Great correction of the rounding of the underside of the nose!

Willem 

Offline Mike Norris (UK)

  • Hero Member
  • *****
  • Posts: 2464
  • RAF Old and Bold
    • Mikes WW1 Aircraft Models
Re: 1:32nd scale RAF BE2c
« Reply #47 on: May 07, 2022, 10:35:01 PM »
Another area that worries me is the combing behind the pilots cockpit.  The Plywood combing should follow the line of the stringers all the way up to the padded surrounds.  But for some reason, Lukgraph have changed the angle.

This, I think, will be more difficult to rework.

Great job so far!

Cheers,

Hugh


Hi Hugh,
Yes you are correct.
I did notice that, but as you say, it'll be difficult to rectify.
The plywood rear decking is tapered to align with the linen covering over the fuselage stringers.
I think 'Lukgraph' assumed that as wood, it wasn't profiled, but fitted horizontal.
Unfortunately it can't, like the nose profile, be sanded, as the fuselage skin is too thin and would be open up.
A more obvious, but not as easily rectified, error on the kit,

Mike
« Last Edit: May 15, 2022, 01:15:40 AM by Mike 'Sandbagger' Norris »


Retired - 27 years RAF service then 20 years Military Aerospace Technical Author/editor.

Offline Mike Norris (UK)

  • Hero Member
  • *****
  • Posts: 2464
  • RAF Old and Bold
    • Mikes WW1 Aircraft Models
Re: 1:32nd scale RAF BE2c
« Reply #48 on: May 07, 2022, 10:49:24 PM »
Hi all,
Another area that I think needs attention.
The kit instructions indicate that the left and right tailplane's should be attached to the rear sides of the fuselage, using two rods.
The illustration shows the inboard ends of the tailplane's being 90 degrees to their leading edges and noticeably clear of the fuselage sides along their entire length.
However, it seems that in reality, the inboard ends of the tailplane's were angled to follow the sides of the fuselage and the only noticeable gap was at the rear, where the fuselage tapered to its end.

Mike


Retired - 27 years RAF service then 20 years Military Aerospace Technical Author/editor.

Offline Mike Norris (UK)

  • Hero Member
  • *****
  • Posts: 2464
  • RAF Old and Bold
    • Mikes WW1 Aircraft Models
Re: 1:32nd scale RAF BE2c
« Reply #49 on: May 08, 2022, 12:15:28 AM »
Hi all,
Tailplane's:
I cut the inboard ends of both tailplane's to match the fuselage sides.
This only needed a small amount of trimming so doesn't alter the span of the tailplane's much.
The fuselage was drilled through with 0.8 mm diameter holes at the tailplane location points.
Two lengths of 0.8 mm diameter Brass rod were secured through the fuselage using thin CA adhesive.
Both tailplanes were drilled with 0.8 mm diameter holes to match the added rods.
The tailplane's were test fitted to ensure they were horizontal to the fuselage and at 90 degrees to the fuselage centre line.

Now the fuselage (possibly),

Mike


Retired - 27 years RAF service then 20 years Military Aerospace Technical Author/editor.

Offline Mike Norris (UK)

  • Hero Member
  • *****
  • Posts: 2464
  • RAF Old and Bold
    • Mikes WW1 Aircraft Models
Re: 1:32nd scale RAF BE2c
« Reply #50 on: May 08, 2022, 01:38:19 AM »
Another area that worries me is the combing behind the pilots cockpit.  The Plywood combing should follow the line of the stringers all the way up to the padded surrounds.  But for some reason, Lukgraph have changed the angle.


This, I think, will be more difficult to rework.

Great job so far!

Cheers,

Hugh

Just out of interest, this is a BE2d built under license by the 'Vulcan Motor & Engine Co'.
It was the 76th of 200 built under contract 87/A/124 dated October 1915.
The aircraft was flown by No.67 Squadron RFC.
On the 17th July 1916 and piloted by 2nd Lt. A.H.Earle with passenger Lt. G.L.Paget, it left Deir el Belah, Palestine.
It was shot down on route by a German fighter and both occupants were killed.
As a BE2d is does differ from the BE2c, but not concerning the alignment of the fuselage rear to pilots cockpit or the engine with its cowl shape,

Mike

« Last Edit: May 15, 2022, 01:18:45 AM by Mike 'Sandbagger' Norris »


Retired - 27 years RAF service then 20 years Military Aerospace Technical Author/editor.

Offline WD

  • Hero Member
  • *****
  • Posts: 1361
Re: 1:32nd scale RAF BE2c
« Reply #51 on: May 08, 2022, 03:44:23 AM »
Beautiful work so far Mike.

WD

Offline Mike Norris (UK)

  • Hero Member
  • *****
  • Posts: 2464
  • RAF Old and Bold
    • Mikes WW1 Aircraft Models
Re: 1:32nd scale RAF BE2c
« Reply #52 on: May 08, 2022, 05:59:00 AM »
Hi all,
I'm moving my hosting server for the forum build logs photographs to another server.
In the meantime, all of the build log photographs in the forum will not show.
I'll post once I get them back online with the new server.

My web site (link in signature) is OK,

Mike
« Last Edit: May 08, 2022, 07:46:46 PM by Mike 'Sandbagger' Norris »


Retired - 27 years RAF service then 20 years Military Aerospace Technical Author/editor.

Offline KiwiZac

  • Global Moderator
  • Hero Member
  • *****
  • Posts: 2853
    • My Linktree
Re: 1:32nd scale RAF BE2c
« Reply #53 on: May 09, 2022, 07:07:44 AM »
Good luck with the move Mike, I'm excited to see what's next in your build.
Zac in NZ

Offline Mike Norris (UK)

  • Hero Member
  • *****
  • Posts: 2464
  • RAF Old and Bold
    • Mikes WW1 Aircraft Models
Re: 1:32nd scale RAF BE2c
« Reply #54 on: May 16, 2022, 08:32:13 PM »
Hi all,
I'm moving my hosting server for the forum build logs photographs to another server.
In the meantime, all of the build log photographs in the forum will not show.
I'll post once I get them back online with the new server.

My web site (link in signature) is OK,

Mike


Hi all,
Back online and with the same URL links,

Mike


Retired - 27 years RAF service then 20 years Military Aerospace Technical Author/editor.

Offline Mike Norris (UK)

  • Hero Member
  • *****
  • Posts: 2464
  • RAF Old and Bold
    • Mikes WW1 Aircraft Models
Re: 1:32nd scale RAF BE2c
« Reply #55 on: May 17, 2022, 01:31:28 AM »
Hi all,
Here's the re-profiled fuselage rear decking panel.
This was done by sanding away the decking panel, the cutting a new panel shape from 0.2 mm thick plastic card.
That was glued in position then sanded with the flats of the fuselage stringers re-instated by scrapping.

Mike


Retired - 27 years RAF service then 20 years Military Aerospace Technical Author/editor.

Offline Mike Norris (UK)

  • Hero Member
  • *****
  • Posts: 2464
  • RAF Old and Bold
    • Mikes WW1 Aircraft Models
Re: 1:32nd scale RAF BE2c
« Reply #56 on: May 17, 2022, 02:32:33 AM »
Hi all,
A few more areas of the model that anyone building it might want to be aware off.

1. The instructions have no call out for the parts, apart from the supplied photo-etch parts.
This could cause some confusion with the cockpit, as parts are supplied to make a trainer version.

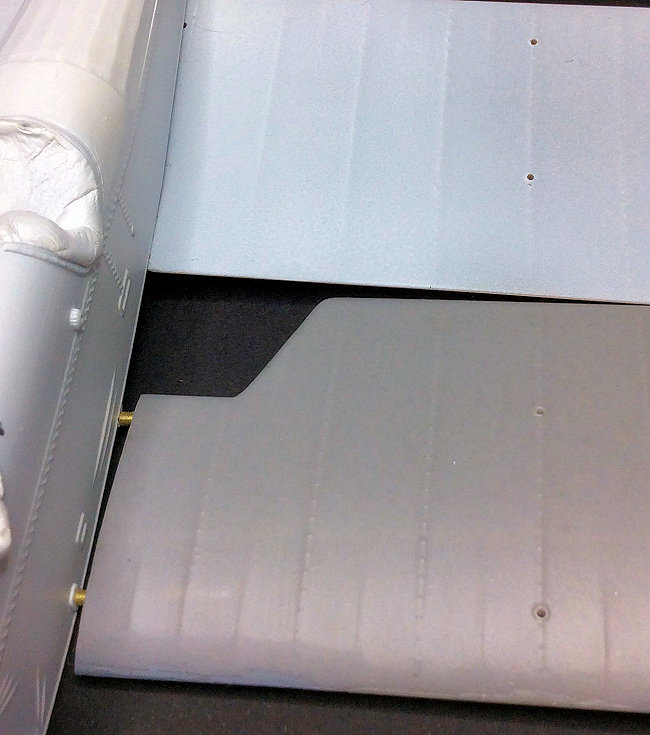
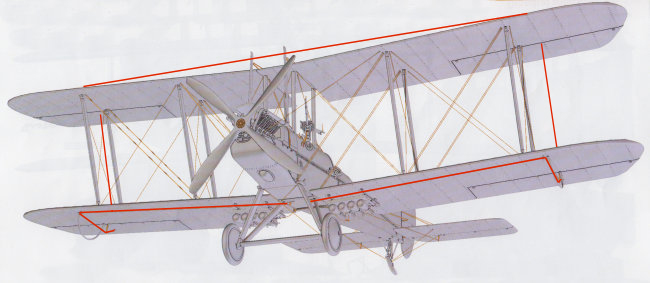
2. The instruction give the impression that the lower wings butt up to the sides of the fuselage.
In face there should be a gap between the wings and fuselage, exposing the front and rear spars and attachments.
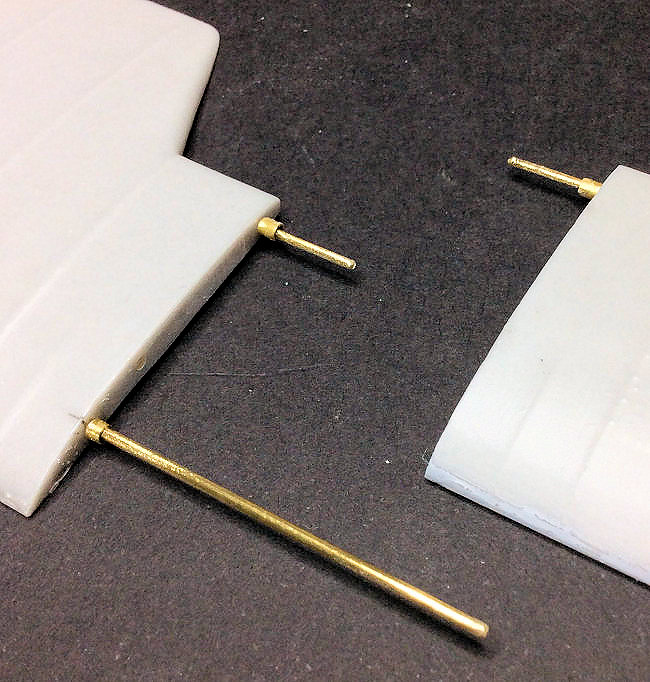
This is important as if the lower wings are not positioned correctly, the interplane struts to the upper wing will tilt inwards at the bottom, when they should be vertical.
I've added a brass rod through the fuselage for extra support and added tube spacers for the necessary gap between wings and fuselage.


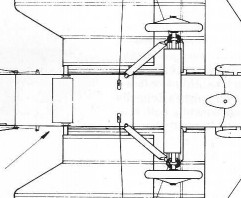
3. The rigging diagram in the instructions fails to show the interconnecting aileron control wires between the upper and lower ailerons.


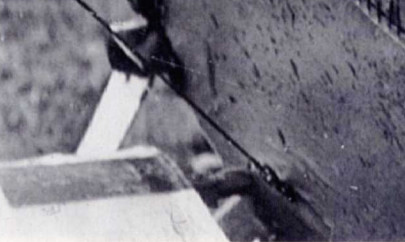
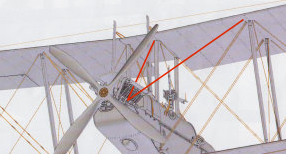
Also only one drag wire is shown from the engine bearers to the upper wing, whereas there were two, one to the top of the forward cabane struts and a second to the top of the forward, inboard interplane struts.


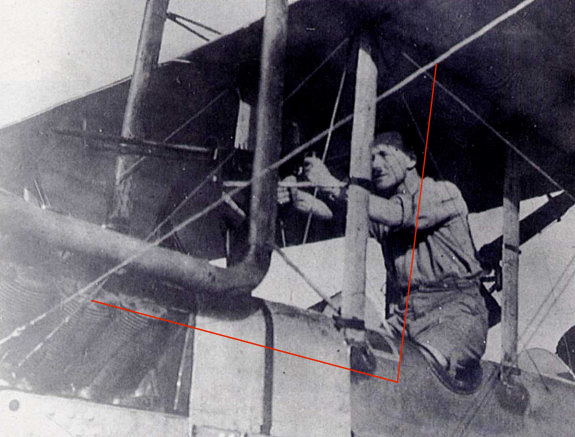
4. The rigging diagram in the instructions shows only two bracing wires for the fuselage cabane struts, whereas there were actually four.
A wire was attached to the tops of the two rear cabane struts and also the forward cabane struts.
These wires were routed through openings at each side of the pilots decking panel and into the cockpit, where there were attached to the cockpit side frames. 


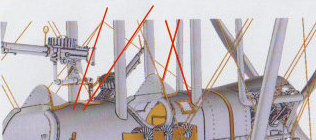
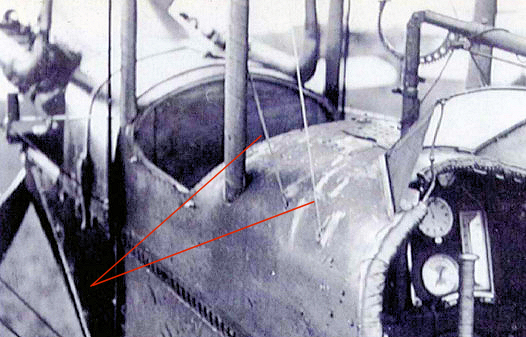
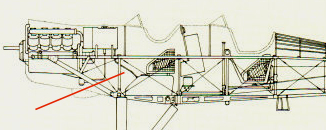
5. The gravity fuel tank (behind the engine) and the main fuel tank (under the observers seat) were interconnected with a fuel transfer pipe.
A fuel supply pipe was also connected between the gravity tank and the engine.
That pipe won't be seen on the model, but the gravity to main tank pipe can be seen from the observers cockpit.
I added this pipe using flexible black tube.


6. The 3D printed tail skid is intended to be butt glued to the rear, underside of the fuselage.
I felt, given the size and weight of the final model by prove to be too weak.
Therefore I reinforcred the centre strut of the tail skid using 0.5 mm diameter rod.

Apart from that, it's all going quite well  ;)

Mike
« Last Edit: May 17, 2022, 07:30:28 PM by Mike 'Sandbagger' Norris »


Retired - 27 years RAF service then 20 years Military Aerospace Technical Author/editor.

Offline Rookie

  • Hero Member
  • *****
  • Posts: 1023
  • No guts, no glory...
Re: 1:32nd scale RAF BE2c
« Reply #57 on: May 17, 2022, 02:47:09 AM »
Your research is impeckable as always Mike!

Willem

Offline KiwiZac

  • Global Moderator
  • Hero Member
  • *****
  • Posts: 2853
    • My Linktree
Re: 1:32nd scale RAF BE2c
« Reply #58 on: May 17, 2022, 04:09:08 AM »
Welcome back Mike! Your work on the fuselage is excellent.

I know you've taken a look at Jamo's TVAL BE.2c galleries before but I suggest they may be helpful when it comes to rigging - if only to provide clearer images to confirm period photos.
Zac in NZ

Offline Mike Norris (UK)

  • Hero Member
  • *****
  • Posts: 2464
  • RAF Old and Bold
    • Mikes WW1 Aircraft Models
Re: 1:32nd scale RAF BE2c
« Reply #59 on: May 17, 2022, 04:34:54 AM »
Welcome back Mike! Your work on the fuselage is excellent.

I know you've taken a look at Jamo's TVAL BE.2c galleries before, but I suggest they may be helpful when it comes to rigging - if only to provide clearer images to confirm period photos.

Yes they are  ;)
I go by them to confirm period shots or if there's no period shots available,

Mike


Retired - 27 years RAF service then 20 years Military Aerospace Technical Author/editor.