Author Topic: 1/32 Avro 504 scratchbuild #4  (Read 21931 times)

Offline kensar

  • Hero Member
  • *****
  • Posts: 2505
  • Reshaping the world - one piece at a time.
Re: 1/32 Avro 504 scratchbuild #4
« Reply #105 on: December 15, 2020, 01:39:27 AM »
Another update.  The landing gear detail is taking quite a while.

Mock up and painting of the landing gear.


The toothpick mounting before painting.  I used PE turnbuckles for some of the cable mounting points.


Color on the cowling.  I'm waiting a few days for the paint to cure before clear coating.


Thanks for following along.  I know these scratchbuilds take a long time to completion.

Offline lone modeller

  • Hero Member
  • *****
  • Posts: 5322
Re: 1/32 Avro 504 scratchbuild #4
« Reply #106 on: December 15, 2020, 02:48:50 AM »
That undercarriage assembly looks very complicated but you have tackled it extremely well and I a sure that it will be strong enough to take the weight of the model. I am awestruck by the detail you have put into the legs and cable attachment points - first class.

Scratch builds do take a long time, but they are worth every minute spent on them.

Stephen

Bughunter

  • Guest
Re: 1/32 Avro 504 scratchbuild #4
« Reply #107 on: December 15, 2020, 04:19:53 AM »
Again an update with the WOW! effect :o Lovely
 
I used PE turnbuckles for some of the cable mounting points.
Why does this feel so well-known to me? Scratching my head ... ;D ;D

Cheers,
Frank

Online Radarman

  • Hero Member
  • *****
  • Posts: 688
Re: 1/32 Avro 504 scratchbuild #4
« Reply #108 on: December 15, 2020, 05:24:43 AM »
Ken,
Your solder work looks fantastic. What setup or method are you using to assemble such complicated structures?

                                                                                                                                  Kevin
We are all victims of history!

Offline Alexis

  • Hero Member
  • *****
  • Posts: 7947
  • Love the self
Re: 1/32 Avro 504 scratchbuild #4
« Reply #109 on: December 15, 2020, 07:48:30 AM »
Awesome job on the undercarriage Ken and use of the PE turnbuckles  :)


Terri
Hurra ! , Ich Leben Noch
Body and life is a vessel we use to travel the planet . Femininity is the gift , The miracle comes from what we do with it .

Offline kensar

  • Hero Member
  • *****
  • Posts: 2505
  • Reshaping the world - one piece at a time.
Re: 1/32 Avro 504 scratchbuild #4
« Reply #110 on: December 15, 2020, 10:24:08 AM »
Stephen - your Schuckertt could be as frustrating as anything I've done, with all those wings and struts.  Amazing job you're doing on it.

Frank - I know a good idea when I see one.  Its your contribution to this build!

Kevin - Complicated structures are made of simpler ones.  Putting them all together is the trick, and in this case (as with most soldering I've done) having a jig to hold things in place is a key component.  I usually don't fabricate anything complicated - I just cob something together and solder quickly before it falls apart.

Thanks Terri.  I'm looking forward to putting all these pieces together - for the last time.


Offline William Adair

  • Sr. Member
  • ****
  • Posts: 271
Re: 1/32 Avro 504 scratchbuild #4
« Reply #111 on: December 15, 2020, 06:01:30 PM »
Wonderful soldering work.  That looks lovely!

Offline Fvdm

  • Sr. Member
  • ****
  • Posts: 326
Re: 1/32 Avro 504 scratchbuild #4
« Reply #112 on: December 19, 2020, 05:40:11 PM »
Wow, incredible work. Are you building this with only the datasockfile as reference? Are there good measurements in these files?

Offline kkarlsen

  • Sr. Member
  • ****
  • Posts: 398
  • 'Old modeller' - Trying to catch up!
Re: 1/32 Avro 504 scratchbuild #4
« Reply #113 on: December 20, 2020, 06:29:44 AM »
Wonderful stuff K!

Offline gbrivio

  • Hero Member
  • *****
  • Posts: 1682
Re: 1/32 Avro 504 scratchbuild #4
« Reply #114 on: December 20, 2020, 06:39:41 AM »
Great metal and wood works, very well done.
Ciao
Giuseppe

Offline kensar

  • Hero Member
  • *****
  • Posts: 2505
  • Reshaping the world - one piece at a time.
Re: 1/32 Avro 504 scratchbuild #4
« Reply #115 on: December 20, 2020, 06:50:25 AM »
Thanks for the encouraging comments, William, Kent, Fvdm, and Giuseppe.

The Windsock datafile is the primary reference, but not the only one.  The windsock datafile has no pictures of the interior, so I am using other pictures found on the internet and on YouTube.  There are almost no pictures of the version I am building, so I am going on educated guesses.

I have removed the painting masks and applied the engine turned firewall.


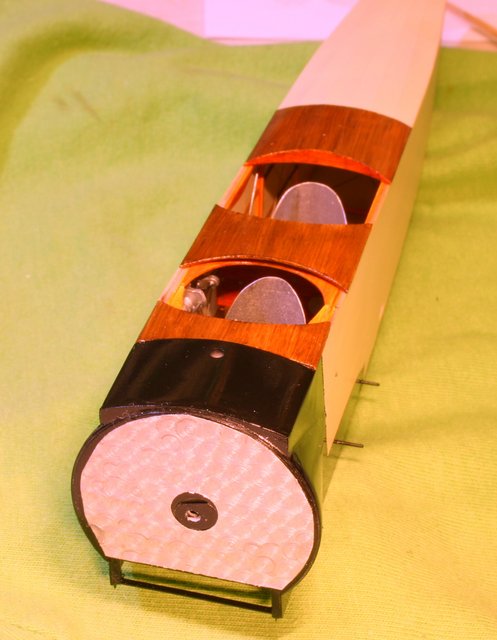
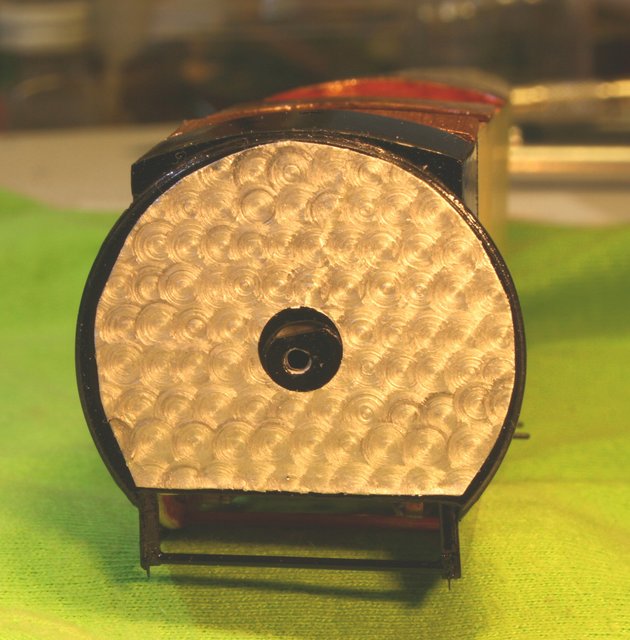
The engine turning looks more subtle than it does in the picture.
I'll soon get back around to the wings.

Thanks again for commenting.

Online RAGIII

  • Hero Member
  • *****
  • Posts: 18850
Re: 1/32 Avro 504 scratchbuild #4
« Reply #116 on: December 22, 2020, 12:23:15 AM »
I am just now catching up on this one and must say how impressive your AVRO looks! The soldering of the gear, painting, and the turned firewall are awesome! The cowling really turned out to be a thing of beauty!
RAGIII
"A man has to know his limitations": Harry Callahan

"Don't slop it on" Lynda Geisler

Bughunter

  • Guest
Re: 1/32 Avro 504 scratchbuild #4
« Reply #117 on: December 22, 2020, 12:57:41 AM »
This will be a breathtaking beauty! I like every single piece of it.
Thanks for letting us watch the build process.

Cheers,
Frank

Offline lone modeller

  • Hero Member
  • *****
  • Posts: 5322
Re: 1/32 Avro 504 scratchbuild #4
« Reply #118 on: December 22, 2020, 04:52:59 AM »
This is scratch building at the highest level Ken. The engine turning on that firewall is something to die for. Brilliant.

Never mind the smaller details: if you cannot be sure what they were like, then it is very unlikely that anyone else would know either!

Stephen.

Offline kensar

  • Hero Member
  • *****
  • Posts: 2505
  • Reshaping the world - one piece at a time.
Re: 1/32 Avro 504 scratchbuild #4
« Reply #119 on: December 22, 2020, 11:33:59 PM »
Thanks for leaving the positive comments Rick, Frank, and Stephen.  It keeps the motivation going.

I have gotten back to the lower wings for the moment. The rigging is somewhat confusing in that some period pictures show 504s with turnbuckles and cables and some with RAF flying wires, but it is not always clear what versions of 504s they are.  I suspect early 504s had turnbuckles and cables (likely built pre-war) and later ones have RAF wires.  Also, some early ones were probably converted from turnbuckles/cables to flying wires.  I have read that government orders for aircraft in 1915 specified flying wires, which had been around since before the war.  The plane I'm modeling was probably built in mid to late 1914.  So, amid all the confusion, I have decided to rig the wings with flying wires and use turnbuckles/cables on the bracing applications.  Interesting stuff.