Author Topic: Bristol Scout C 1/32 First scratch build attempt FINISHED!  (Read 38787 times)

Offline Alexis

  • Hero Member
  • *****
  • Posts: 7947
  • Love the self
Re: Bristol Scout C 1/32 First scratch build attempt
« Reply #225 on: May 26, 2021, 11:10:02 PM »
There's a desk in there somewhere ....I'll find it ! Just give me a few minutes .....I did think I spotted Waldo  ;)


Alexis
Hurra ! , Ich Leben Noch
Body and life is a vessel we use to travel the planet . Femininity is the gift , The miracle comes from what we do with it .

Offline Rookie

  • Hero Member
  • *****
  • Posts: 927
  • No guts, no glory...
Re: Bristol Scout C 1/32 First scratch build attempt
« Reply #226 on: May 26, 2021, 11:25:51 PM »
 :o    :-X

Offline lone modeller

  • Hero Member
  • *****
  • Posts: 5317
Re: Bristol Scout C 1/32 First scratch build attempt
« Reply #227 on: May 28, 2021, 03:19:43 AM »
Your desk looks a bit like mine....

Glad to see that you managed to get your wings into shape eventually. Trial and error, (with rather more of the latter than the former to start with), are part and parcel of scratch building. But it is all worthwhile in the longer run as we move up the learning curve. Basswood is much better than balsa for strength IMHO - even though it is a bit more expensive.

Stephen.

Offline RichieW

  • Hero Member
  • *****
  • Posts: 1966
Re: Bristol Scout C 1/32 First scratch build attempt
« Reply #228 on: May 31, 2021, 06:46:43 AM »
Well it has been a very busy week so what little bench time I had was largely given to the task of clearing up the mess and putting things away.

I have found time for a few experiments, I wanted to give the impression of 3d rib tapes. I have some Archer rib tape decals but I don't really like them much. They seem to thick and too wide, I have had bad masking experiences where I left the masks on too long and ended up with steps between colours so I thought this would be a good way to go. Lots of masking and bit of airbrushing later;

Rib tapes from paint by Richard Williams, on Flickr

I managed to miss a few somehow but have since corrected the mistakes, a quick rub with micro mesh keeps the effect more subtle.

One stage I have been very much looking forward to but unsure how to do was trying to create the translucency of the lower wing  surfaces. Thankfully I have several failed wing making attempts to experiment with. I drew the internal wing structure with a pencil in the same way I read Des used to on his builds. I drew the cockade (with the colours the wrong way round!) with watercolour pencils and just rubbed my finger over it to create a softer edge. Around the edges of the framework I drew lighty with a pale ochre pencil and then airbrushed a light coat of MRP bleached CDL. Between the ribs and spars I then sprayed MRP white and finally a very light of thinned white was airbrushed to bring it all together.

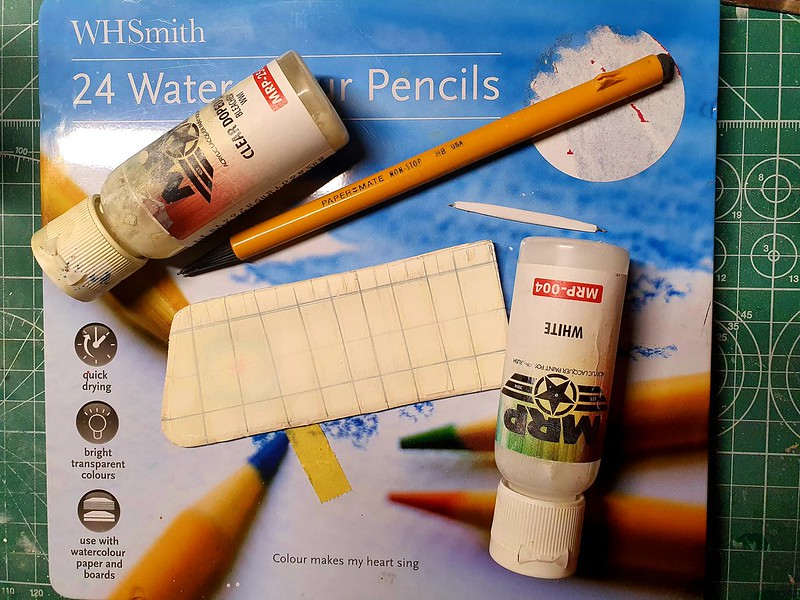
Strut making and translucent painting experiment by Richard Williams, on Flickr

With a bit of tweaking I think this method will work well, I still have a few reject wings to play with and I am definitely not in a hurry.

You may have noticed a single strut in the picture, I tried to make them from bamboo skewers but struggled to make several identical and had problems with drilling a hole to insert a brass pin. In the end I opted to have a 0.5mm brass rod run the length of a strut made from 3 layers of 0.5mm styrene sheet. The middle layer is cut down the middle to make room for the brass rod. The result seem easily stiff enough to use as a strut and if I use my cutter to produce the styrene layers I should end up with identical struts. This technique should work for making the undercarriage legs too.

Many thanks for reading, if you have any opinion on whether to cut out the ailerons and wing segments before painting I would appreciate any advice offered, I'm a little puzzled about which is the best order.

Richie

Offline Alexis

  • Hero Member
  • *****
  • Posts: 7947
  • Love the self
Re: Bristol Scout C 1/32 First scratch build attempt
« Reply #229 on: May 31, 2021, 06:59:38 AM »
Hi Richie ,

Your wings look really nice under a coat of paint and your method that you came up with for other builds seems to be working for you , which is the way to go . Find what works for you ! One of the true pleasures of this hobby .

As to removing the flight controls now could cause sets back if errors are made only creating more work or another restart . Wings are already under way with the painting so maybe just scribing in would be an option . When I making wings I do this kind of work before the painting stage . If I over sanded or made cut errors it is easier to fix those mishaps now then after painting .

Choice is yours of course Richie on what you are comfortable with .


Alexis
Hurra ! , Ich Leben Noch
Body and life is a vessel we use to travel the planet . Femininity is the gift , The miracle comes from what we do with it .

Offline RichieW

  • Hero Member
  • *****
  • Posts: 1966
Re: Bristol Scout C 1/32 First scratch build attempt
« Reply #230 on: May 31, 2021, 07:03:20 AM »
Many thanks Alexis, I was thinking maybe just scribing might be sensible. I really don't want to have to make a 5th set of wings!

Richie

Offline Alexis

  • Hero Member
  • *****
  • Posts: 7947
  • Love the self
Re: Bristol Scout C 1/32 First scratch build attempt
« Reply #231 on: May 31, 2021, 11:56:52 PM »
No trouble at all Richie  ;)

Maybe this will be inspiring for you .....you can never have enough detail  ;)

https://forum.ww1aircraftmodels.com/index.php?topic=10109.0

This was two and half months spent just in the wheel bay  ;)


Alexis
Hurra ! , Ich Leben Noch
Body and life is a vessel we use to travel the planet . Femininity is the gift , The miracle comes from what we do with it .

Offline RichieW

  • Hero Member
  • *****
  • Posts: 1966
Re: Bristol Scout C 1/32 First scratch build attempt
« Reply #232 on: June 01, 2021, 12:32:21 AM »
No trouble at all Richie  ;)

Maybe this will be inspiring for you .....you can never have enough detail  ;)

https://forum.ww1aircraftmodels.com/index.php?topic=10109.0

This was two and half months spent just in the wheel bay  ;)


Alexis

Wowsers!!!!!! Alexis, that is incredible and I am indeed very inspired! There are WW2 that I have such affection for that I would be happy to go to such lengths for. The P51d is one, the other 2 are rather predictably for a Brit the Spitfire and Hurricane.

I'm developing a real love for WW1 aircraft, the Tripehound is my favourite followed closely by the Pup, Bristol Scout. Until a year or so ago I'd never built a model from the great war period.

Richie


Offline lone modeller

  • Hero Member
  • *****
  • Posts: 5317
Re: Bristol Scout C 1/32 First scratch build attempt
« Reply #233 on: June 01, 2021, 03:29:13 AM »
I agree with Alexis. I would scribe the ailerons on the wings - unless you really want to show them slightly offset. I can see a 6th set of wings being made if you do try to cut the ailerons out at this stage.

The underside looks very convincing. Remember that if the tops of the wings are PC10 then you will not get the see through wing structure or roundels.

Stephen.

Offline RichieW

  • Hero Member
  • *****
  • Posts: 1966
Re: Bristol Scout C 1/32 First scratch build attempt
« Reply #234 on: June 01, 2021, 04:18:58 AM »
Thanks Stephen, yes scribed ailerons it will be.
The model will be all clear doped linen, the finish I get on the lower wing surfaces will make or break the model. I'm getting quite excited about it but will take my time and must layer the details in the correct order.

Richie

Offline Alexis

  • Hero Member
  • *****
  • Posts: 7947
  • Love the self
Re: Bristol Scout C 1/32 First scratch build attempt
« Reply #235 on: June 01, 2021, 11:57:14 AM »
Richie , before I got into WW1 aircraft it was WW2 subject and I did a lot of super detailing and working with resin and resin kits . This was in 72 and 48 scale . I didn't build in the larger scale and this Mustang was one of my first detailing projects in this scale . I had to re-make a lot of parts and spent a lot of time studying photo's of the real deal . Something which is hard to do with most WW1 kites . I don't know if you recall my Hawker Typhoon build , it's in the off topic section , have a peek at that one if you like , the pit is 95 % scratched and highly detailed .

When I started building and detailing WW1 subjects it started off with a few parts here and there and it just exploded from there with cockpits being scratched with as much details as I could pack in there . Well that wasn't good enough so i did a few conversions and started making my own wings to replace overly think kit parts . This caused the bug to bit within even more and I did my first full Scratch build ( Fe-8 ) . Which lead me to Vac-forum kits and those are an excellent way to build on ones skills .

But if you want to detail a hurrie ...I say go for ! Fly Model's has a nice 32 scale kit  ;) I found what really help me was being versitie in types of kits I built , even though the skills are in par , it is different on the other hand in it teaches you on working with different shapes other then just box structures .

I'm really glad that you are enjoying this project Richie and I must say it has been a joy for me following a long ...it brings back a lot of happy memories when I started .


Alexis
Hurra ! , Ich Leben Noch
Body and life is a vessel we use to travel the planet . Femininity is the gift , The miracle comes from what we do with it .

Offline RichieW

  • Hero Member
  • *****
  • Posts: 1966
Re: Bristol Scout C 1/32 First scratch build attempt
« Reply #236 on: June 01, 2021, 09:32:20 PM »
Loved reading that post Alexis, learning something of people's modelling history is always fascinating. I will check out your Tiffie build. I very seldom make it to the off topic build page.


I've spent a very pleasant couple of hours at the bench this morning making struts. With no brass tube of the right size to squish I used my Cricut cutter to make the strut shapes from 0.5mm card, a 0.5mm brass rod was the CAd in place after drawing a pencil line to mark the correct position. Each was then glued to another piece of 0.5mm card using the rod as a guide. The first piece of strut shaped styrene then acts as a cutting guide.


Struts by Richard Williams, on Flickr


The sandwich is then completed by gluing another pre cut piece of styrene on top. This leaves a small groove at the top which is easily filled. I used deluxe perfect plastic putty followed by a quick wipe with ultra thin CA glue and a dab of talc.

Struts by Richard Williams, on Flickr


A bit of scrapery and sanding and we have wing and cabane struts with a brass pin for mounting. All perfectly symmetrical, except somehow these aren't quite. :(

 
Struts by Richard Williams, on Flickr


A feature that I was going to ignore was the fringe at the bottom of oil tank due to the difficulties of making it. You can see it here above the access hatch on the side panel.

Bristol Scout 1264 by Richard Williams, on Flickr


I didn't think my Cricut would be able to cut such a precise shape and thought that even it could it would be a complete pain in the backside to draw the shape in the supplied software. In the end it was simplicity itself, a quick roll along with a rivet wheel and it was done. Definitely close enough.


Oil tank fringe by Richard Williams, on Flickr


Although looking at the photo I seem to have lost my rivets and will have to do this side again.


Many thanks for reading, the sun's out, I'm feeling cheery and it's time for a sarnie and maybe a celebratory beer.


Richie


Offline Alexis

  • Hero Member
  • *****
  • Posts: 7947
  • Love the self
Re: Bristol Scout C 1/32 First scratch build attempt
« Reply #237 on: June 01, 2021, 10:28:40 PM »
Enjoy that beer Richie , you earned it  ;)


Alexis 
Hurra ! , Ich Leben Noch
Body and life is a vessel we use to travel the planet . Femininity is the gift , The miracle comes from what we do with it .

Online RAGIII

  • Hero Member
  • *****
  • Posts: 18842
Re: Bristol Scout C 1/32 First scratch build attempt
« Reply #238 on: June 01, 2021, 10:47:07 PM »
Wings, struts and added detail are amazing Richie! You are really making progress!
RAGIII
"A man has to know his limitations": Harry Callahan

"Don't slop it on" Lynda Geisler

Offline RichieW

  • Hero Member
  • *****
  • Posts: 1966
Re: Bristol Scout C 1/32 First scratch build attempt
« Reply #239 on: June 05, 2021, 06:34:42 AM »
Thanks Rick and Alexis, you keep me going back to the bench with your kind words, sage advice and encouragement.

Despite many hours in the cave since the last update I have very little to show you. Most of the time has been spent pondering how to mount the wings and get the correct dihedral. What I have decided is to have slightly oversized tubes in the fuselage and pins in the wings, this will provide enough wiggle room to position the wings as required before gluing. I think this is the best way as the frame is too fragile to allow bending of spars.

I also added individual rivets to the stepped fringe of the fuel tank, completed what will be visible of the internal bracing wires and painted the struts. A little plumbing was also added to the pulsator. Not a lot to show for all the bench time but most of the time has been spent staring into space and wondering how to get things done. Now I have sorted out how to mount the lower wings I can skin the fuselage.

20210604_145823 by Richard Williams, on Flickr

Struts by Richard Williams, on Flickr

Thanks for reading, have a good weekend everybody.

Richie