Hard to believe it's been 6 weeks since my last update; time at the Model desk has been at a premium of late! Finally I do have some progress to post, the engine assembly is more or less complete. I found this part to be a bit of a "bear", lots of conflicting reference material and many challenges. Since there were 3 separate versions of the Rolls Royce Falcon used on the aircraft there appears to be a larger number of plumbing layouts employed. This one is my best guess at the common layout for, despite a wealth of reference photos and assistance from Des with even more photos, the confusion still remains. Also many of the photos I found were of Falcons on stands, removed from the aircraft, and missing various lines.
Overall, if I did it again, I would incorporate less detail, as I'll admit freely that this sub-build was not only a bit painful, but also exceeded my talent level. I'm happy with the overall effect however "clean" this is not, even under the guise of dirtying and weathering. Not being the sensitive type I'll accept any and all constructive comments and suggestions. There's lots to be learned from the experience here, and I'm wide open to that!
First, I elected to complete the engine as a separate module to be added to the airframe on final assembly. With my fat fingers the potential for disaster during assembly or rigging is at an all time high. The components including frame, radiator, and engine proper were prepped in the usual manner and as much pre-assembly painting as possible was done. The aim is to display this beast with the engine panels removed, however I may install just the right side panels, that option can be employed at any time.
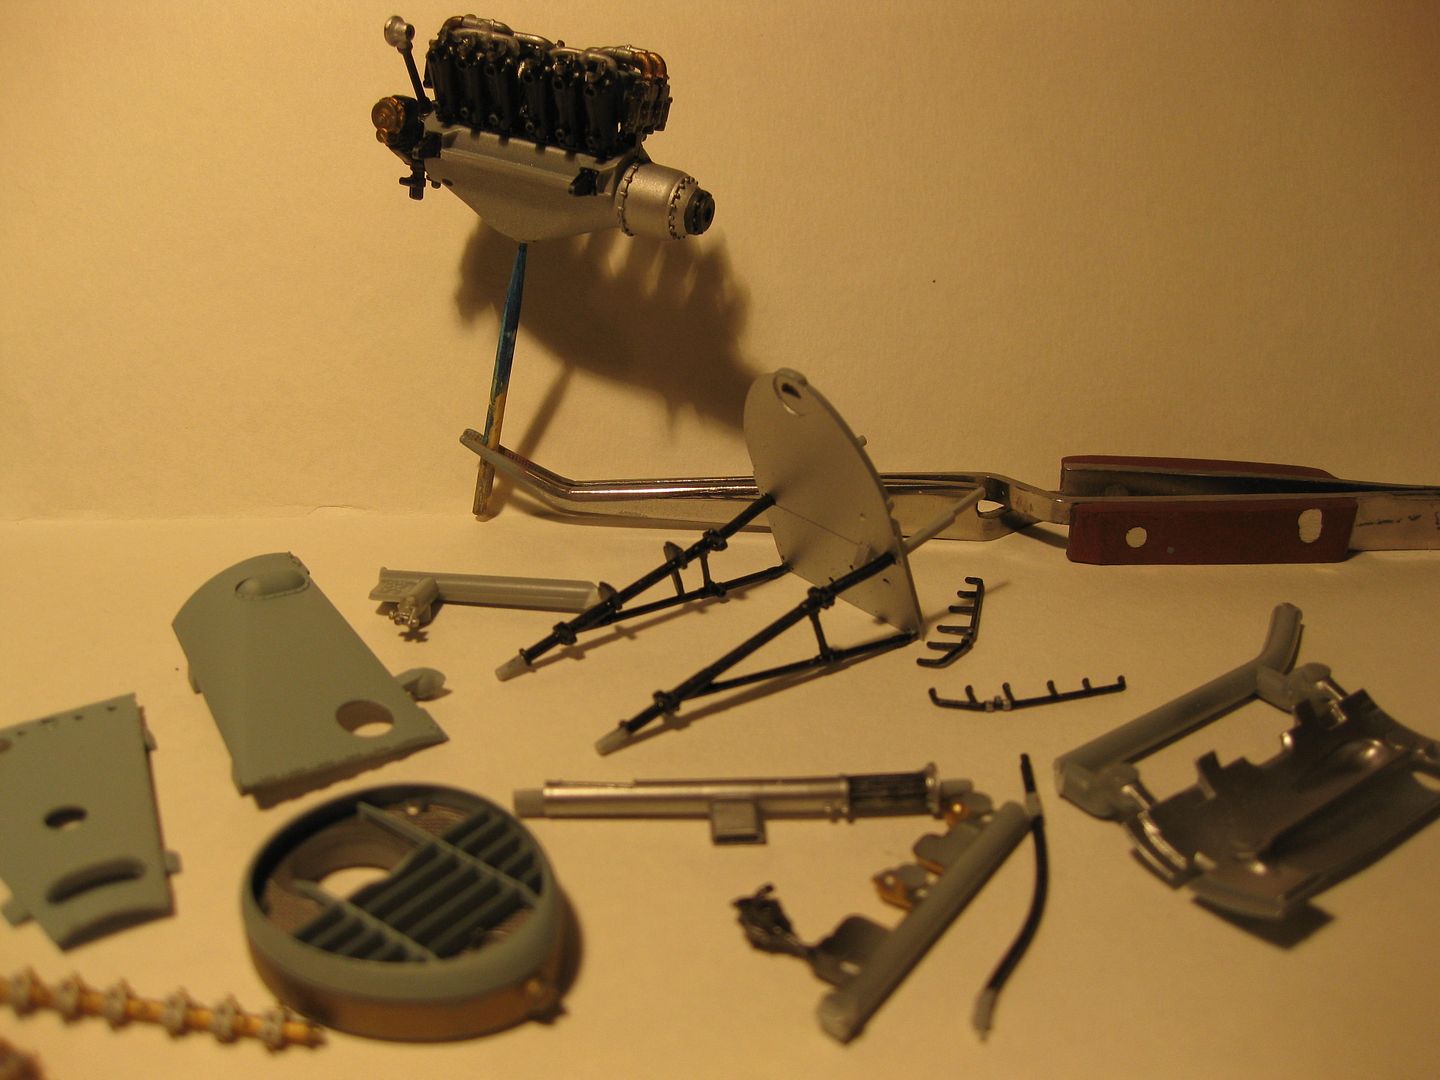
Assembly proper commenced with the basic engine component ready for the ignition harness addition. I recently discovered Alclad paints so a lot of the components have this metalic finish. Great product but without a sealing or overcoat rubs off at a disasterous rate!

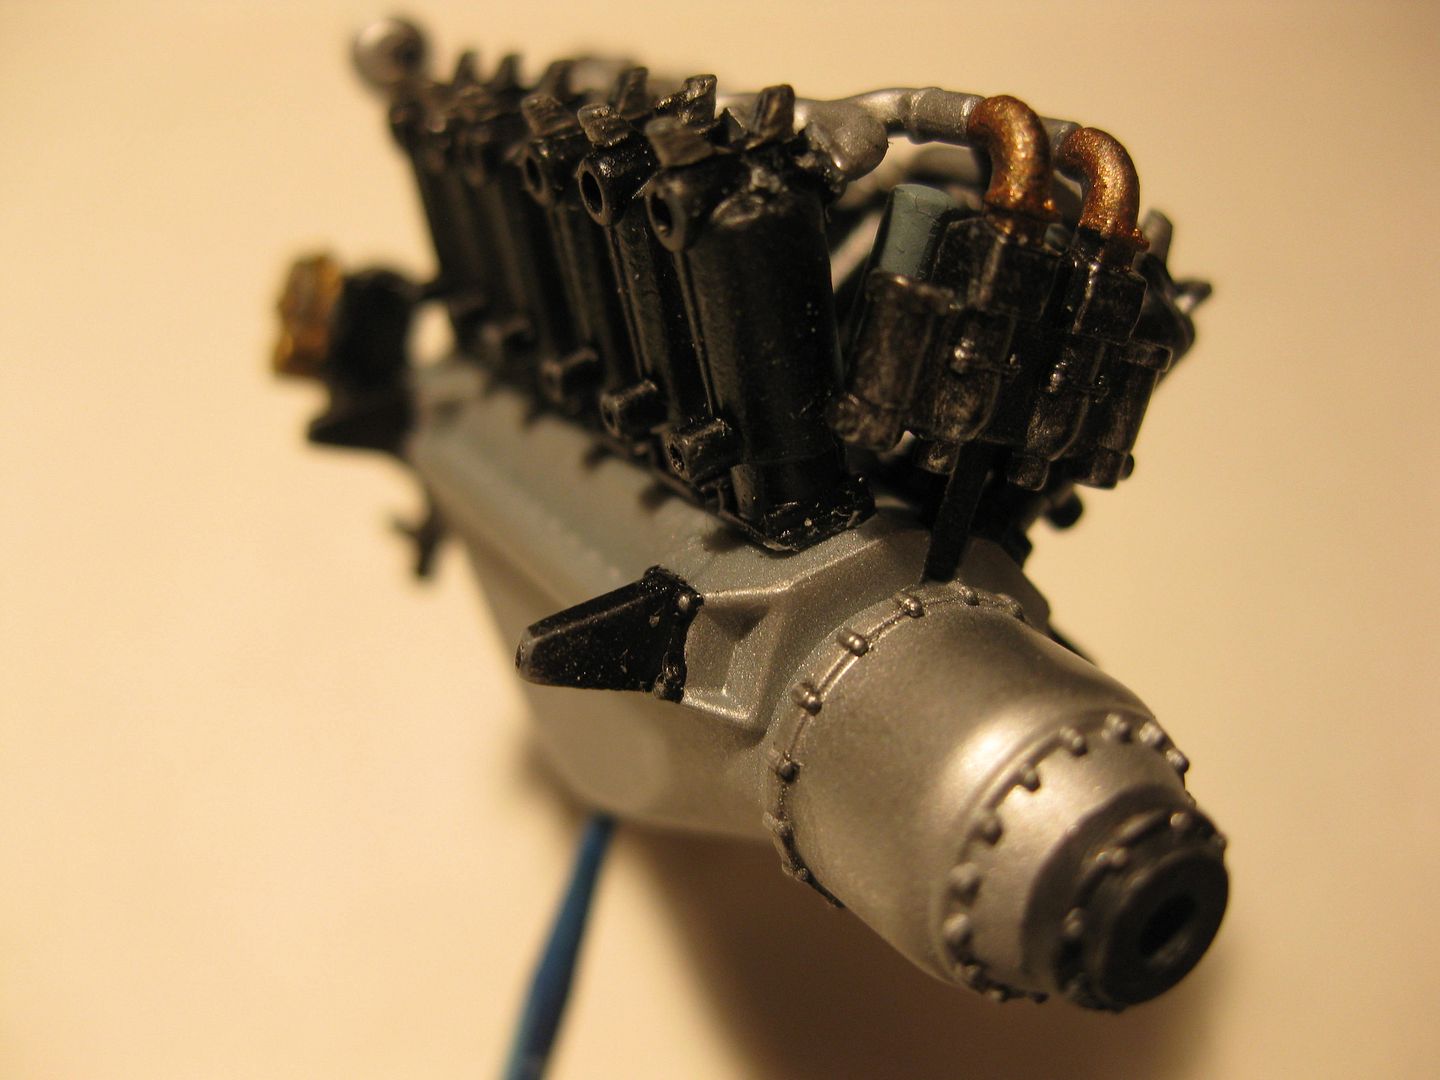
Next copper ignition wires were installed on the mags, #80 holes being pre drilled and thin CA used to attach the individual wires. I discovered two distinct methods of Mag wiring, the one I used had the two bundles of six attached to their own sides of the mag, some photos showed three of each combined per side and then bundled as a "six pak" above the magnetos.
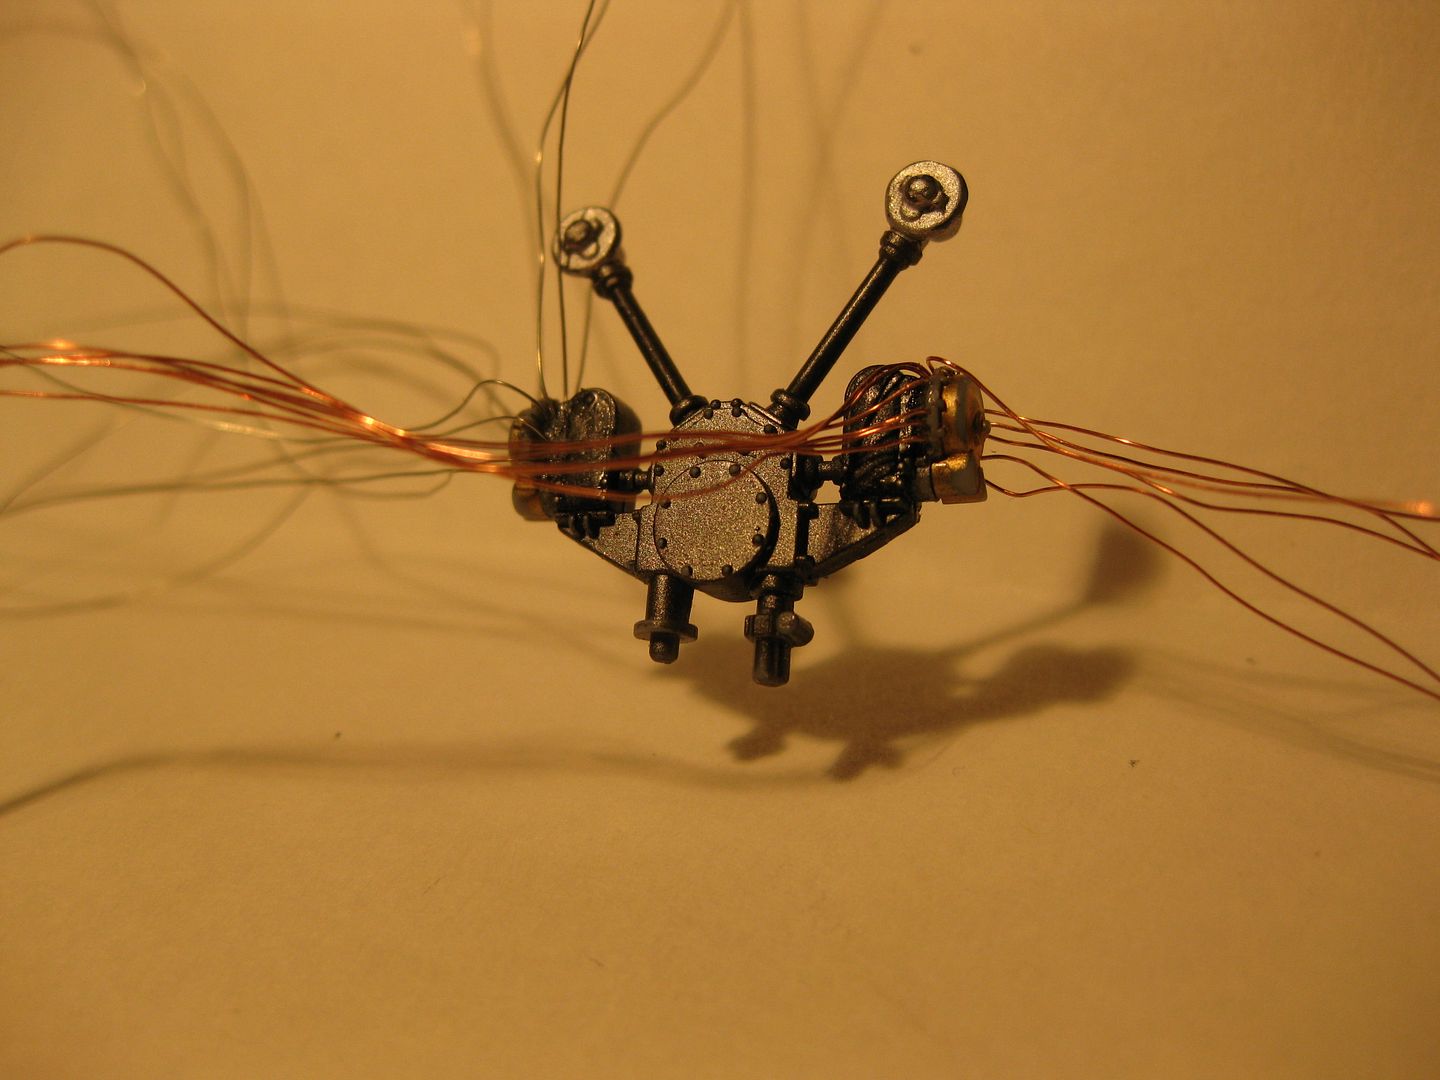
Note the Alclad Brass rubbed off on the photo above, since touched up (many times!) The assembly was then installed on the back of the engine block for routing to the plugs etc. At this point the wires were painted with a beige enamel.

At this point things were going quite well. I'll follow this with a second update immediately as I'm concerned with my computer or router locking up. The joys of country living!
Cheers,
Lance

