Hi all,
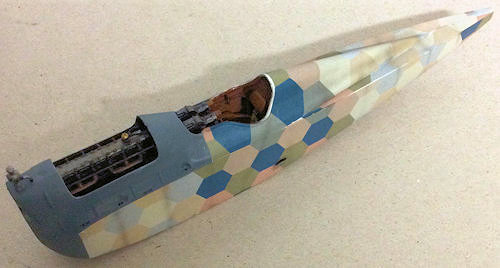
The remaining Lozenge decals applied.
To say these particular decals were a challenge to apply would be an understatement!!
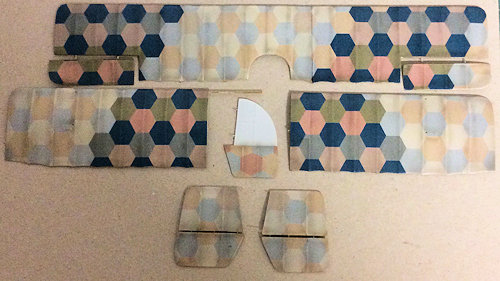
They are not cookie cut so have to be accurately cut out from the backing sheets.
The backing sheets are thick so extra soaking is required to release the decals.
The marks from the polythene bags they were delivered in (including a second set I had delivered) are still evident, although hopefully weathering and sealing coats will cover them.
The first set of decals (in the delivered kit) had small areas pulled away with the packaging.
The cut out decals for the ailerons, elevators and rudder were oversized and had to be trimmed to shape before applying.
The fuselage lozenge comes in 6 separate pieces (two for the fuselage sides, one each side of the fuselage rear decking (the faired 'hump') and one for each side for the tricky area between the fuselage side and base of the rear decking panel).
As you can imagine the lozenge hexagons need to be accurately aligned, but even so I found that I had to cut and add thin strips to the front of the fuselage sides decals, as they didn't reach forward far enough.
The colours for the lozenge hexagons for the two 'infill decals', between the top of the fuselage sides and the fuselage rear decking are different so can't be aligned and matched to the others
If the decals overlap anywhere you get the dark overlap due to double decals, so that need to be sorted where necessary.
Finally, as the carrier is very thin, they are prone to 'fold over' on themselves if you're not careful.
I think the only positives about these decals is that they are transparent so you can pre-shade before applying them (similar to 'Aviattic' clear backed decals) and they seem fairly robust when being applied.
Anyway, after the best part of the day, all of the lozenge decals have been applied.
There are a couple of small areas where the decals chipped etc, but weathering etc should render them less visible,
Mike