Author Topic: Lloyd C.V 1/32 Scratch Build Project  (Read 45063 times)

Offline coyotemagic

  • Hero Member
  • *****
  • Posts: 7710
  • "Here's to not buggering it up." -Winston Chuchill
    • My Models
Re: Lloyd C.V 1/32 Scratch Build Project
« Reply #165 on: March 19, 2013, 12:40:59 AM »
Outstanding work, Bob!  This is getting exciting.
Cheers,
Bud
"All men dream: but not equally. Those who dream in the dark recesses of the night awake in the day to find all was vanity. But the dreamers of day are dangerous men, for they may act their dreams with open eyes, and make it possible." -T. E. Lawrence

Offline Chris Johnson

  • Hero Member
  • *****
  • Posts: 1959
Re: Lloyd C.V 1/32 Scratch Build Project
« Reply #166 on: March 19, 2013, 08:21:16 AM »
It looks like you carved it from a block of walnut. I can't get any better than that.

Cheers,

Chris
You can have it good; You can have it fast; you can have it cheap. Pick any two, but all three are impossible.

Offline Checkers67

  • Full Member
  • ***
  • Posts: 226
Re: Lloyd C.V 1/32 Scratch Build Project
« Reply #167 on: March 19, 2013, 01:44:27 PM »
Stunning paint job Bob! All you need is some Pledge to keep the dust off your new furniture-airplane. Love your build. More photos please.
 ;D
Steve

Offline rhallinger

  • Hero Member
  • *****
  • Posts: 1976
Re: Lloyd C.V 1/32 Scratch Build Project
« Reply #168 on: March 22, 2013, 11:40:53 AM »
Hello all.  The Doug Craner wood Knoller-Jaray prop has arrived!  Its a real beauty:


Anyone have any ideas where I might get artwork for the Jaray label or decals?  More soon.

Regards,

Bob

Offline rhallinger

  • Hero Member
  • *****
  • Posts: 1976
Re: Lloyd C.V 1/32 Scratch Build Project
« Reply #169 on: March 25, 2013, 11:13:29 AM »
Still plodding along.  I got the engine compartment covers, landing gear struts and cabane struts painted, as well as the fuselage crosses:


Couldn't resist adding the fin for one shot ;):


There are still lots of PE details to add to the fuselage, as well as resin rivets on decal film from Archer Fine Transfers to represent the bolt heads on the engine compartment covers.  I've also cast a plaster master for the prop spinner, which I will vacuform.  The serial number on the fuselage will be a decal made on my home computer and laser printer.

The flying surfaces are all finshed and awaiting paint.  They are visible in the background.  I still need to get to that top wing mounting bracket.  I will need to make a jig for that.  Still lots to do, but much less than before.  I'm getting there, and trying to think through next steps and keep the build in proper order.  I hope I don't overlook too many things! ;)

Regards,

Bob

Offline lcarroll

  • Administrator
  • Hero Member
  • ******
  • Posts: 8660
Re: Lloyd C.V 1/32 Scratch Build Project
« Reply #170 on: March 25, 2013, 12:01:42 PM »
Bob,
   Looking very much one of a kind and beautifully done; this is a really interesting project you have going here and certainly an eye catching Model in the works. Nice work, great demo of your skills, and a very interesting Thread to follow!
Cheers,
Lance

Offline GAJouette

  • Hero Member
  • *****
  • Posts: 3579
  • " Beware of the Spanish Inquisition"
Re: Lloyd C.V 1/32 Scratch Build Project
« Reply #171 on: March 25, 2013, 11:27:28 PM »
  Bob,
Absolutely beautiful craftsmanship my old friend. Your woodwork is amazingly true to the original.Looking forward to seeing more.
Highest Regards,
Gregory Jouette
" What Me Worry"

Offline pepperman42

  • Hero Member
  • *****
  • Posts: 4507
  • Sergeant, my brown pants.......
Re: Lloyd C.V 1/32 Scratch Build Project
« Reply #172 on: March 26, 2013, 02:25:09 AM »
Your plodding is beautiful. Using that definition of plodding I am clearly crawlin' on ma' belly....

Steve

Offline ALBATROS1234

  • Hero Member
  • *****
  • Posts: 2657
Re: Lloyd C.V 1/32 Scratch Build Project
« Reply #173 on: March 28, 2013, 07:00:09 PM »
she sure is looking like a lloyd now my friend. spectacular work.

Offline rhallinger

  • Hero Member
  • *****
  • Posts: 1976
Re: Lloyd C.V 1/32 Scratch Build Project
« Reply #174 on: March 28, 2013, 08:42:36 PM »
Thanks for all the kind words guys!  I have a little over three weeks left to go, since my mother-in-law will be occupying my modeling room on April 21st for about a month, and I won't be able to get as much done after that.  I might not make the Group Build cutoff, but no problem.  I'll just have Des slide me on over to Scratchbuilt and I'll git 'er done before too long. ;)

The wheels are now painted and the axle fairing is almost complete.  I have finally laid out the jig for the top wing mounting bracket, and will put that together tonight.  Maybe some soldering this weekend  :o, and I hope to get the flying surfaces painted also.   I broke down and ordered the JH Biplane jig last Sunday (it looked like just what I need for an ad hoc assembly like this, and beautifully designed as well, plus it will save me all kinds of time in not having to design and build my own!).  I should have it by tomorrow or Monday, so I am nearing readiness for ssome major assembly, while lots of smaller details remain.  I sort of know what I have left to do, but I'm just not sure how long it will take.  It's definately a little different when you have to fabricate most of the small parts! :D  I'll post more pix when I something substantial to show. 

Take care guys! 

Regards,

Bob

Offline rhallinger

  • Hero Member
  • *****
  • Posts: 1976
Re: Lloyd C.V 1/32 Scratch Build Project
« Reply #175 on: March 31, 2013, 10:03:29 AM »
Here's the latest, moving along at a deliberate pace.  I actually built a jig and soldered the top wing mounting bracket (a pair of 3mm wide lengths of brass tube connected by brass rod about 1.9mm long overall), FINALLY!  I had been putting this off because I was nervous about my lack of skill and experience with soldering, but the jig made things easy and it went well, over in about 3 minutes (all that fretting for naught!).  Here is the jig, with the soldered parts:


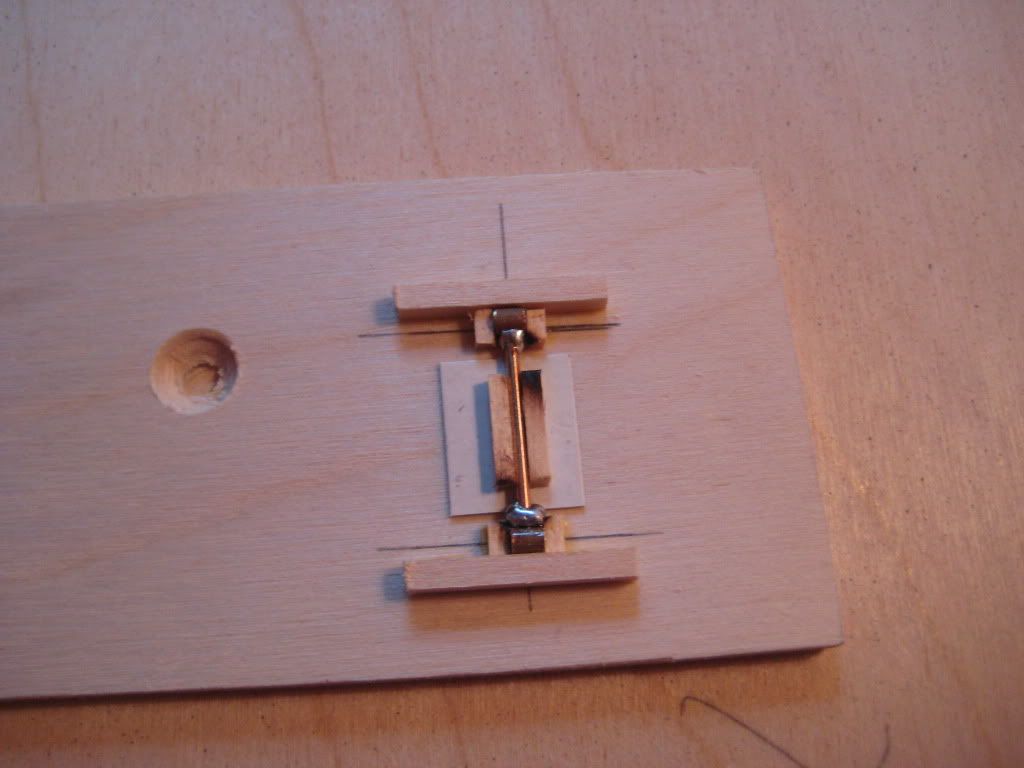
Note the big blobs of solder; like I said, not my forte.  Still, it cleaned up with a jeweler's file pretty well.  This pic shows the bracket with the brass rod top wing pins which slide through the bracket tubes:


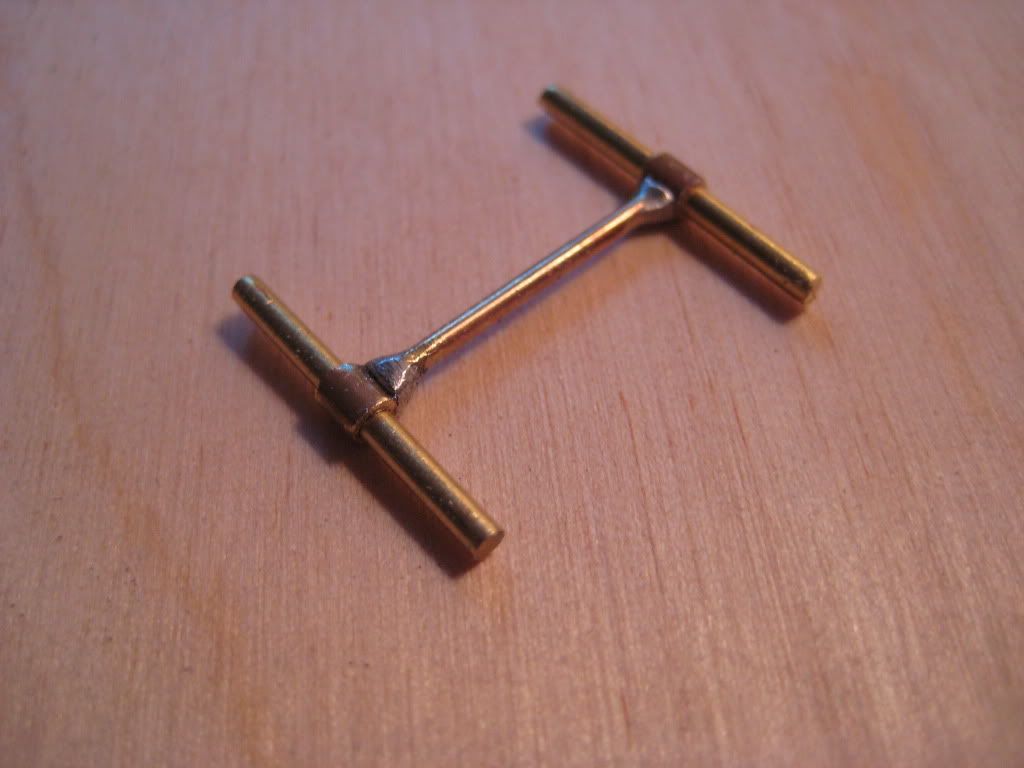
The bracket tubes rest on the cabane struts, which meet in an inverted V along the centerline of the fuselage.  Here is another pic of the mounting bracket and wing pins, with the wheels thrown in to show relative size:


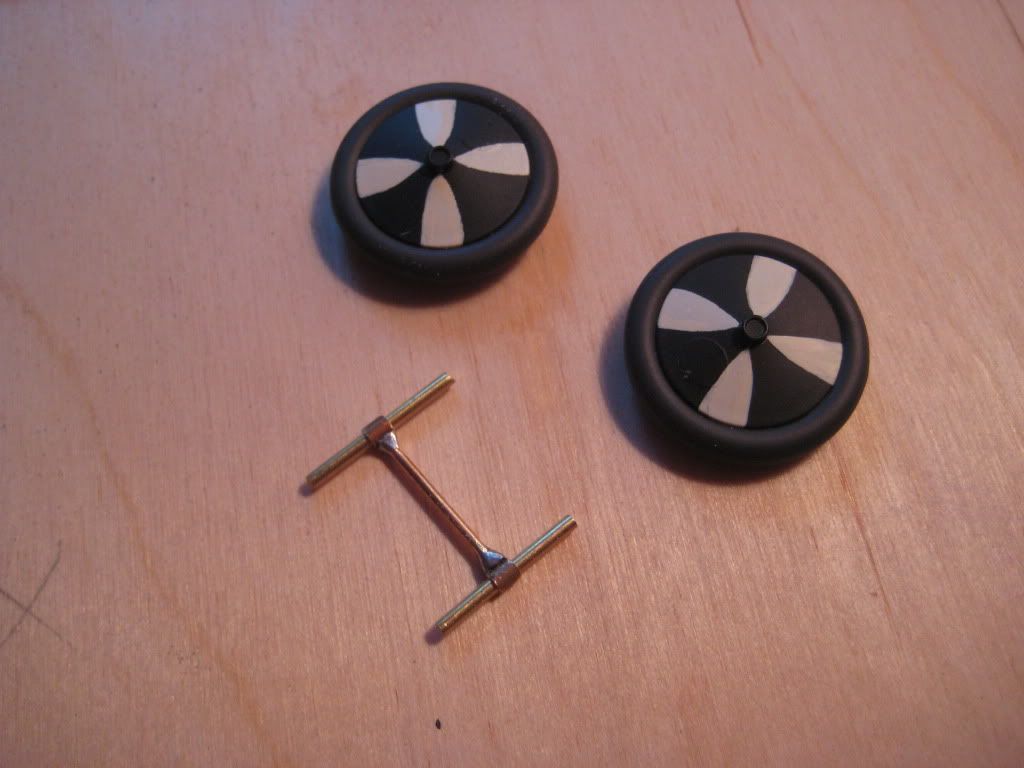
I couldn't resist doing the crosses on the wheels, as I do not have any other aircraft models like that.  It appears from photos that the AH air service employed this wheel motif frequently, and I have several pictures of Series 82 Lloyds with such wheels.  I like them. ;)

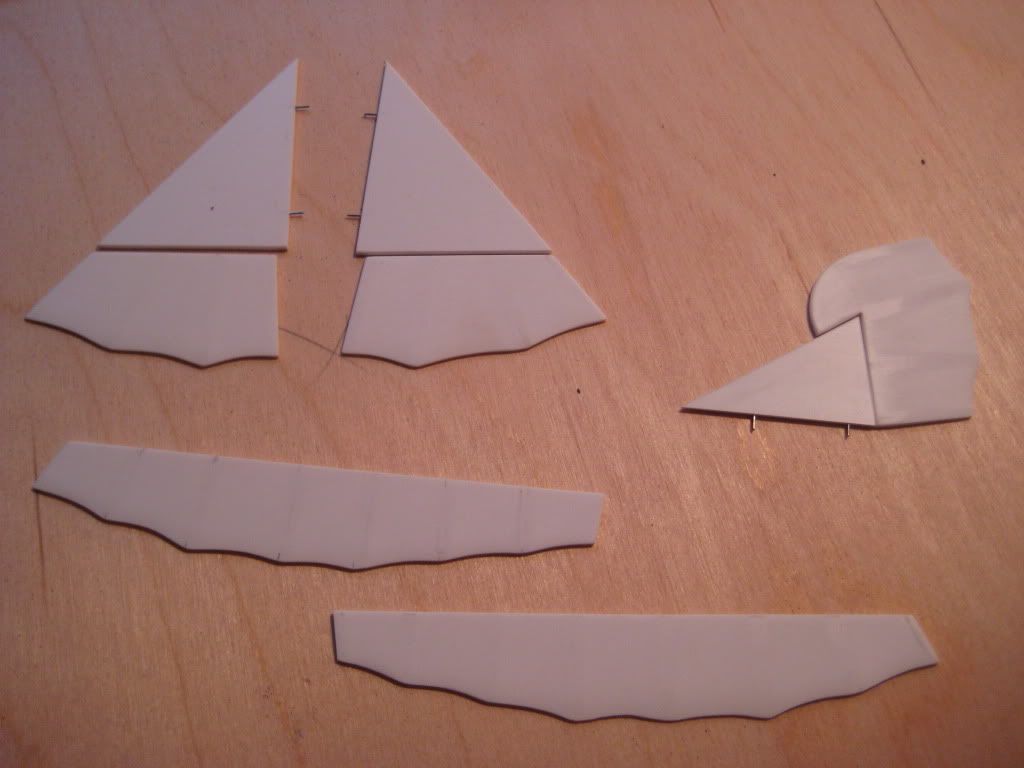
The flying surfaces are now ready for paint.  Although it's hard to see in the photos, I sanded between the ribs, and the surfaces feel and appear slightly scalloped.  I will accentuate that with paint and weathering. 


That's all for now.  We are babysitting my daughter's 14-week old Black Lab puppy for another week, so progress will be slow--the puppy is a real handful and takes lots of what used to be free time! ;)  . . . but she's really cute. ;D 

Cheers,

Bob


Offline rhallinger

  • Hero Member
  • *****
  • Posts: 1976
Re: Lloyd C.V 1/32 Scratch Build Project
« Reply #176 on: March 31, 2013, 10:06:56 AM »
Oooops!  Correction on length of top wing mounting bracket: 1.9cm--not mm!

Offline coyotemagic

  • Hero Member
  • *****
  • Posts: 7710
  • "Here's to not buggering it up." -Winston Chuchill
    • My Models
Re: Lloyd C.V 1/32 Scratch Build Project
« Reply #177 on: March 31, 2013, 11:44:31 AM »
Extraordinary job with the wing mounting bracket, Bob.  This is really getting exciting. 
Be careful.  Lab pups love to chew.  They seem to be especially fond of plastic.
Cheers,
Bud
"All men dream: but not equally. Those who dream in the dark recesses of the night awake in the day to find all was vanity. But the dreamers of day are dangerous men, for they may act their dreams with open eyes, and make it possible." -T. E. Lawrence

Offline rhallinger

  • Hero Member
  • *****
  • Posts: 1976
Re: Lloyd C.V 1/32 Scratch Build Project
« Reply #178 on: March 31, 2013, 12:08:30 PM »
I hear you Bud!  This pup chomps on just about everything. :o  Fear not--the Lloyd is well protected! ;)

Regards,

Bob

Offline mgunns

  • Hero Member
  • *****
  • Posts: 2255
Re: Lloyd C.V 1/32 Scratch Build Project
« Reply #179 on: March 31, 2013, 01:42:30 PM »
Hello Bob:

Good progress on the wing mounting bracket.  Not sure I understand the whole concept, but I take your word for it.  I like the wheels!  The AH folks knew how to dress up an airplane.  I am looking forward to seeing more.

Best

Mark
Mark

We few, we happy few.....