Author Topic: LVA Fokker D.VII from Wingnut Wings  (Read 27496 times)

Offline Whiteknuckles

  • Hero Member
  • *****
  • Posts: 1334
Re: LVA Fokker D.VII from Wingnut Wings
« Reply #45 on: January 16, 2013, 12:50:26 PM »
Lovely detailing Ivo, the cockpit looks great ;)

Andrew
Eternal Apprentice

Offline IvotB

  • Sr. Member
  • ****
  • Posts: 426
Re: LVA Fokker D.VII from Wingnut Wings
« Reply #46 on: January 17, 2013, 08:32:32 PM »
In preparation of other parts of my Fokker D.VII I have a question regarding rigging. It is almost non existing on this aircraft, but there is rigging in the landing gear and there is (at least on the LVA version) some rigging for the stabilo. So not only the struts under the stabilo, but also some rigging between the stabilo and the rudder.

Now I do see turnbuckles in the rigging of the landing gear, but it is not clear to me what kind. I see different arangements on several websites and books. Would anybody have advice for me on this, or should I just make some with brass tube?

regards,
Ivo

Offline kornbeef

  • Hero Member
  • *****
  • Posts: 961
  • U.K. Carpet monster genocide squad leader.
Re: LVA Fokker D.VII from Wingnut Wings
« Reply #47 on: January 18, 2013, 12:10:14 AM »
I think the standard arrangement is a turnbuckle at the lower end, the top end would appear to loop around the frame and slice in on itself. arrangement of course may vary between manufacturers.

I'll be doing mine with brass tube or maybe Gaspatch turnbuckles.


Keith
Never too old to learn sumfink noo

Offline IvotB

  • Sr. Member
  • ****
  • Posts: 426
Re: LVA Fokker D.VII from Wingnut Wings
« Reply #48 on: January 19, 2013, 09:05:34 AM »
I will probably make the turnbuckles as decribed by Des. There are only two, so that shouldn't be much of a problem.

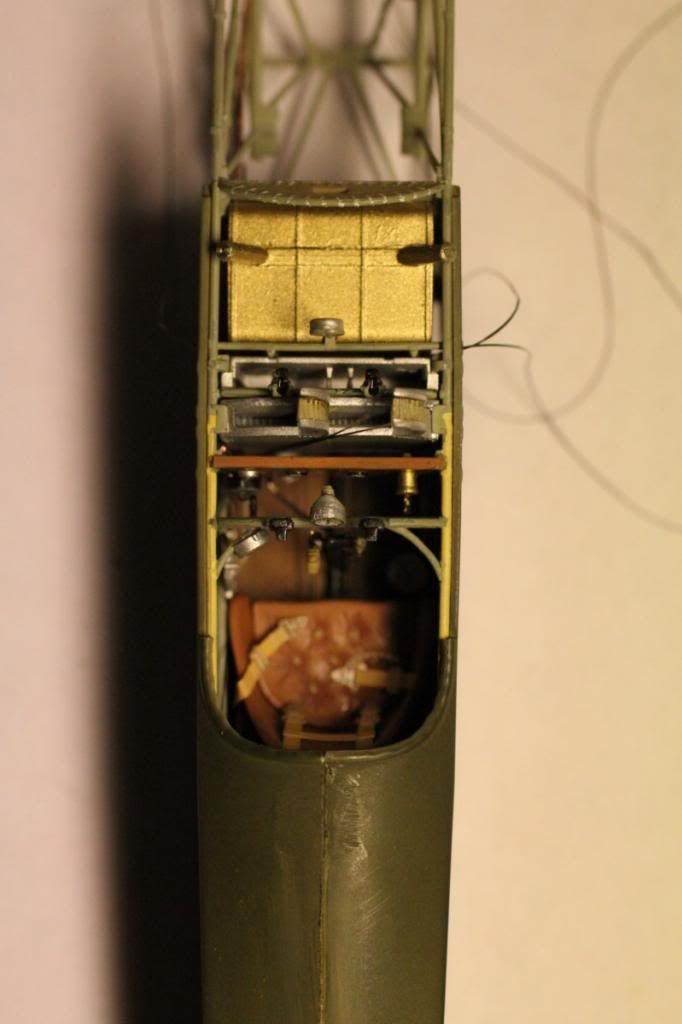
After all the cockpit work it became time to hide all beautiful details ;)  I added the high pressure fuel line from behind the instrument panel to the two floater housings. Now I am a little bit at a loss here, because sometimes I miss the correct technical term in english. You may have seen other examples in this topic. But I don't really know the correct translation of the dutch word vlotter as a part of a carburator into english. Maybe it is a floater, but it may well be a very different word. It is the part were the liqued fuel is held at a certain level to avoid the carburator from 'drowning'.

But anyway it can only be seen now in the engine compartment and will recieve some paint. At this stage I am missing the parts from Taurusmodels, so I can't finish the engine. The controls can be scratchbuild and added to the model in such a way that the engine can still slide from the front into the frame.

But first I wanted to get rid of all the control cables. First I glued the right side of the fuselage to the frame and warned by Epeeman I took precaution to get it right.


I guided the control cables of the right aileron through the side and then I glued behind de back panel and at the front beam the frame into the fuselage. This went without any problem and fitted ok.

Then I had to guide 3 control cables to the back of the fuselage, pulled them through and glued them from the inside. This is absolute nonsense, because nobody is ever going to see these anymore.


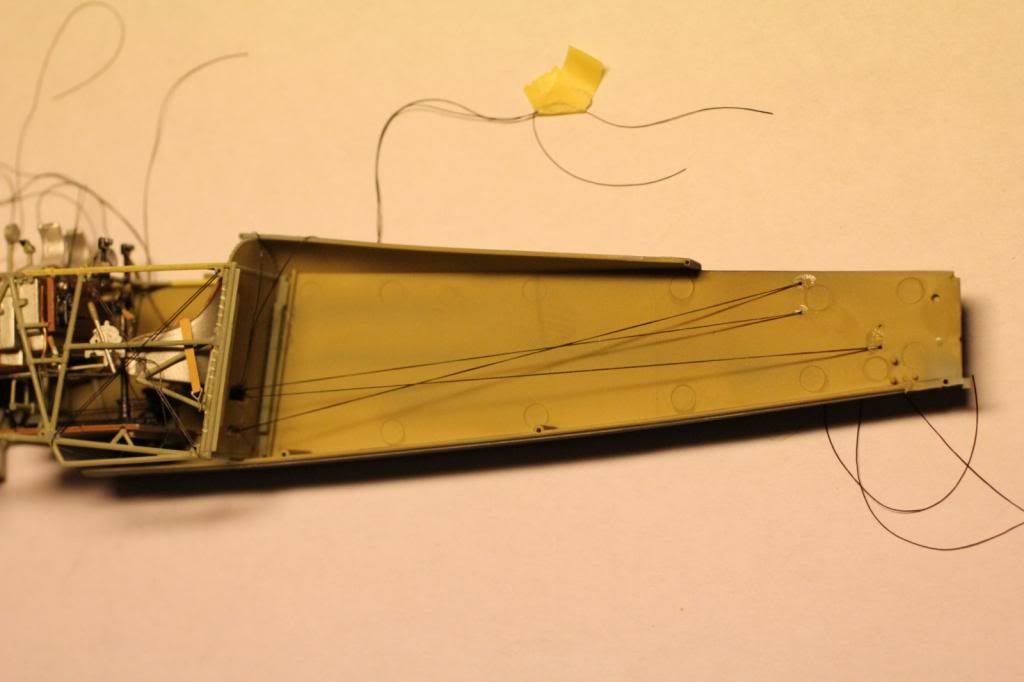
Then I laid the other fuselage halve, after dry fitting it to the frame turned above and guides all other control cables through their respective holes:


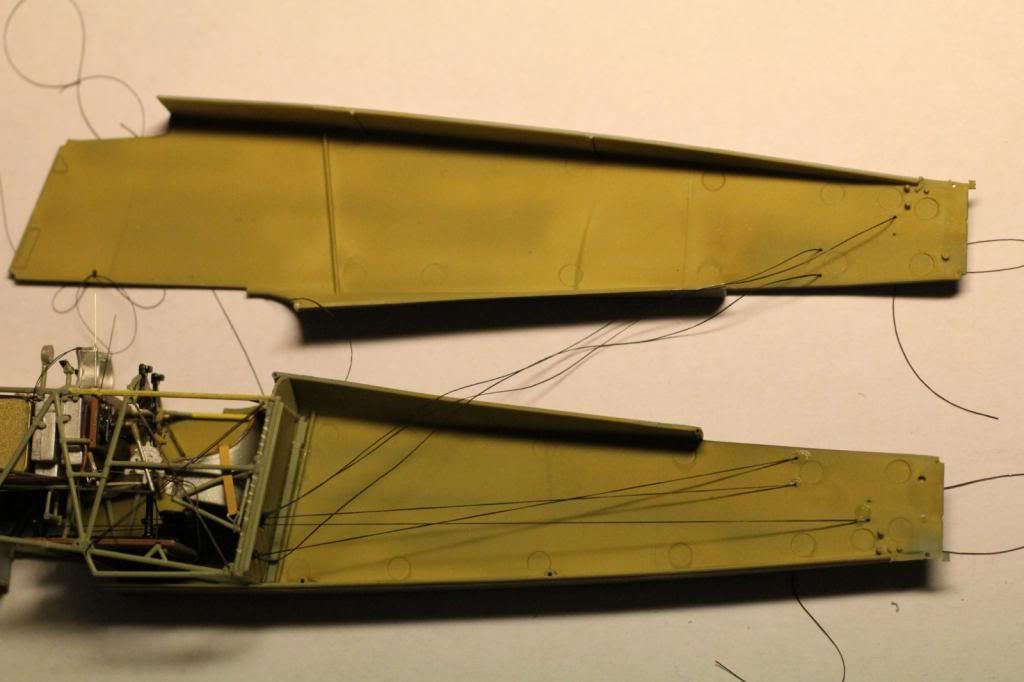
Then just add glue to the top first (and to the sides as well) as instructed in the manual and close the fuselage:


If you now look at the fuselage sides fitted to the frame, you see that mine fitted ok. I did find the 2 locator pins on the back rather small and lost them during dry fitting. The 2 in the bottom are fine and the one in the back too and thus the halves sit snugly together. I will apply some filler and start sanding it down, because I want a perfect backside. It was one wooden piece. I have the impression that WNW gave us only a model of a wooden fuselage. The LVA Fokkers had all steel frame covered with linen fuselages with ofcourse the wooden top. Apart from the completely flat fuselage I also notice this because the WNW paint instructions suggest painting the inside area behind the cockpit in light wood color.

Just dry fitting of other parts:


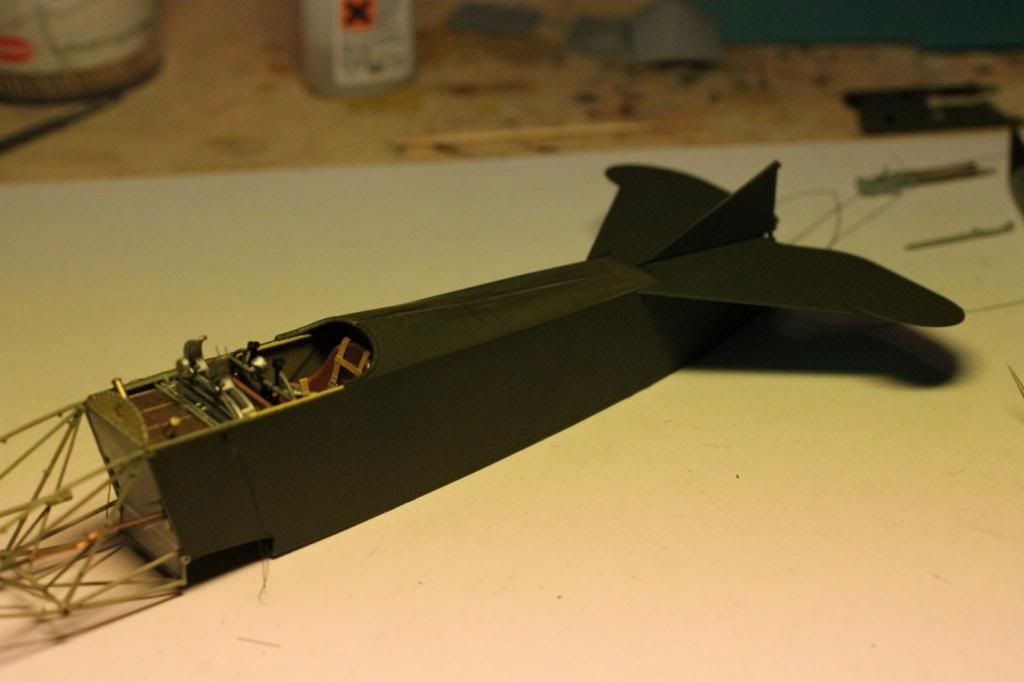
After the top had set I fixed the bottom too:


Next step is giving the fuselage a final coat of paint (LVA blue en LVA khaki) before proceeding. As all other panels are separate pieces I like to finish this before adding other parts. Now it is all easy to mask and you can reach everything.

Perhaps the next step is making the spark plugs as today the Vectorcut nuts arrived from NY. I also ordered parts from Taurusmodels, but they will be still trying to find me by mail.

regards,
Ivo
« Last Edit: January 19, 2013, 09:08:17 AM by IvotB »

Offline pepperman42

  • Hero Member
  • *****
  • Posts: 4447
  • Sergeant, my brown pants.......
Re: LVA Fokker D.VII from Wingnut Wings
« Reply #49 on: January 19, 2013, 10:52:45 AM »
Nice update. Shes shaping up well. The two build threads for this machine will be kept in a safe place for future use!!

Steve

Offline GAJouette

  • Hero Member
  • *****
  • Posts: 3579
  • " Beware of the Spanish Inquisition"
Re: LVA Fokker D.VII from Wingnut Wings
« Reply #50 on: January 19, 2013, 11:16:29 AM »
  Ivo,
Excellent progress my friend. I believe your control wires look great,Well done.
Highest Regards,
Gregory Jouette
" What Me Worry"

Offline IvotB

  • Sr. Member
  • ****
  • Posts: 426
Re: LVA Fokker D.VII from Wingnut Wings
« Reply #51 on: January 20, 2013, 06:24:09 AM »
Today the parts from Taurus Models arrived too:


There are the spark plugs,valves lifters and timing gear and the intake manifold nuts. Underneath you see the Vectorcut nuts in the middle, for making sprak plugs with different brass tubes. I expect that the brass version is easier to fit into the cylinders than the resin version as there isn't much left to use for glueing it in the cylinders. It will be more on than in  ;)  They are beautiful though and very small and they look the part.

regards,
Ivo

« Last Edit: January 20, 2013, 06:55:01 AM by IvotB »

Offline Softscience

  • Full Member
  • ***
  • Posts: 246
Re: LVA Fokker D.VII from Wingnut Wings
« Reply #52 on: January 20, 2013, 06:47:34 AM »
Wow, what a beautiful machine!


I really like all the cockpit rigging you've done. Very fragile looking.

Offline Epeeman

  • Hero Member
  • *****
  • Posts: 1419
Re: LVA Fokker D.VII from Wingnut Wings
« Reply #53 on: January 20, 2013, 09:39:39 AM »
Hello, Ivo -

You are making great progress - all your added details are really excellent.

Glad to see that you got a perfect fit getting the fuselage together.

Regards

Dave
As we say in fencing, what's the point?

Offline IvotB

  • Sr. Member
  • ****
  • Posts: 426
Re: LVA Fokker D.VII from Wingnut Wings
« Reply #54 on: January 22, 2013, 09:09:10 AM »
Not much progress with the engine yet. I started painting and decalling and applying a satin cote. So not much building progress to show. Just some parts lying around:


The LVA blue and orange isn't really a nice color combination, but they were painted this way.

I painted the machineguns too. My can of Humbrol 27004 was way too dark in my opinion, so I mixed it with steel metaliser paint from Modelmaster. Luckily it blended very well and the end effect is excellent. I'll show them mounted in a few days.

regards,
Ivo

Offline GAJouette

  • Hero Member
  • *****
  • Posts: 3579
  • " Beware of the Spanish Inquisition"
Re: LVA Fokker D.VII from Wingnut Wings
« Reply #55 on: January 22, 2013, 10:07:58 AM »
  Ivo,
Ah the makings of one beautiful Dutch kite. Keep up the excellent work my friend.
Highest Regards,
Gregory Jouette

PS: Great to see a Fokker D.VII in something other German colors.
" What Me Worry"

Offline IvotB

  • Sr. Member
  • ****
  • Posts: 426
Re: LVA Fokker D.VII from Wingnut Wings
« Reply #56 on: January 23, 2013, 07:32:03 AM »
Today I discovered two mistakes I made. They can be corrected, but can also easily be avoided. Others may not have made these mistakes, but perhaps these hints might help somebody.

First the Spandau Machine Guns fitted perfectly on the forward and rear mounts. But after proceeding, they didn't anymore. I glued the padding on the back, thus creating a good point for clamping it while airbrushing. This it did, but now I found that the padding should be mounted after the machine guns sit on their mounts. The padding has a small square hole in the middle, which fits over a square knob at the back of the rear mounts, thus securing the Spandaus to their mounts:


The lower gun has the padding still on, but I removed it from the upper one. You can also see the square hole.


Here you can see the square pen at the back of the rear mount, next to the rpm indicator.

The other mistake I made is with the engine mounts:


You can see the engine mounts protruding from the frame. There should be a small round knob at both mounts, but apparently I either clipped them of while removing them from the sprue or I just filed them flat as I thought how these parts should look. To the left you see the chin cowling with two holes on the inside. These should fit into the knobs of the motor mount.

Correction is easy, but as I said can be avoided by taking a little bit more care in clipping the parts form the sprue. I'm going to drill a small hole in the engine mounts, glue some metal wire in it and attach a small styrene tube, thus creating a connection for the chin cowl.

regards,
Ivo

« Last Edit: January 24, 2013, 05:46:26 AM by IvotB »

Offline pepperman42

  • Hero Member
  • *****
  • Posts: 4447
  • Sergeant, my brown pants.......
Re: LVA Fokker D.VII from Wingnut Wings
« Reply #57 on: January 23, 2013, 08:30:33 AM »
Thanks for the heads up. I suspect I would have done the same as you - wanting to build and paint the guns as complete units before installing.


Steve

Offline IvotB

  • Sr. Member
  • ****
  • Posts: 426
Re: LVA Fokker D.VII from Wingnut Wings
« Reply #58 on: January 23, 2013, 09:10:30 AM »
Steve,

My thoughts exactly.

First I should put the cowling in place, then give the fuselage its final satin cote, then I will paint the cockpit rim padding and after all that I am going to install the MG's.

Just some dry fitting for fun:


Don't pay attention to the engine. It is beheaded, because I am going to install the Taurus parts. I need to cut away the valve springs first before I can proceed. Taurus models provides an ignition order, which I haven't seen yet on photo's of the real thing, but I guess he is correct as he has made such beautiful details.

regards,
Ivo

Offline miamiangler

  • Full Member
  • ***
  • Posts: 194
Re: LVA Fokker D.VII from Wingnut Wings
« Reply #59 on: January 23, 2013, 11:55:36 AM »
  The spark plugs are not to difficult to put on the engine .just take your time ! hen cutting off the valve springs notice the angle .I drilled holes on my engine and cut the resin part near the base .That way you have some resin plug the glue to the engine .Also take plenty of time with this part so that the timing gear fit in the right place. HTH

                                                                                                                Willi

Looks great so far .
« Last Edit: January 23, 2013, 12:29:15 PM by miamiangler »