Author Topic: Martinsyde S.1, '30 Sqdn' Mesopotamia, 1915, in 1/72  (Read 6624 times)

Offline Mark

  • Sr. Member
  • ****
  • Posts: 258
Re: Martinsyde S.1, '30 Sqdn' Mesopotamia, 1915, in 1/72
« Reply #15 on: September 10, 2014, 12:54:13 PM »
An excellent job, Mr. Man  ;) Fantastic modeling!

Mark G

Online RAGIII

  • Hero Member
  • *****
  • Posts: 18918
Re: Martinsyde S.1, '30 Sqdn' Mesopotamia, 1915, in 1/72
« Reply #16 on: September 11, 2014, 12:19:36 AM »
Excellent progress! Your talent in scratch building is awesome!!
RAGIII
"A man has to know his limitations": Harry Callahan

"Don't slop it on" Lynda Geisler

Offline rhallinger

  • Hero Member
  • *****
  • Posts: 1976
Re: Martinsyde S.1, '30 Sqdn' Mesopotamia, 1915, in 1/72
« Reply #17 on: September 11, 2014, 06:35:09 AM »
The fuselage looks just right OM!  Looking forward to seeing this one take shape under your skilled hands. :D

Cheers,

Bob


Offline Old Man

  • Hero Member
  • *****
  • Posts: 600
Re: Martinsyde S.1, '30 Sqdn' Mesopotamia, 1915, in 1/72
« Reply #18 on: September 16, 2014, 01:28:41 AM »
Thank you all very much for you interest and your kind comments.

That is a long process to get the complex curves on the nose. Personally I would have moulded it but then I would have to carve the shape in wood first.

I have not been comfortable working wood since a bad cut in the tip of my left thumb whittling for a 'balsa and putty' conversion when I was a boy. Grain and I do not get along, I decided then, and have stuck with it. One idea I have seen, and thought of taking my first try at here, is making the shape, a little undersized, in some solid medium, then coating it in petroleum jelly or something similar, and using rolled sheets of Milliput or similar stuff to form the part over this. One of these days I will give this a shot.

Offline Old Man

  • Hero Member
  • *****
  • Posts: 600
Re: Martinsyde S.1, '30 Sqdn' Mesopotamia, 1915, in 1/72
« Reply #19 on: September 16, 2014, 01:33:32 AM »
Some more progress on this, my friends, but first, here are some pictures of where things had gotten to after the last set of pictures....


The motor is simply pressed into the cowling area. There are some underside bits to the cowling, but adding them will have to wait until the motor is detailed and in place, as I doubt I could get it in once they are added.


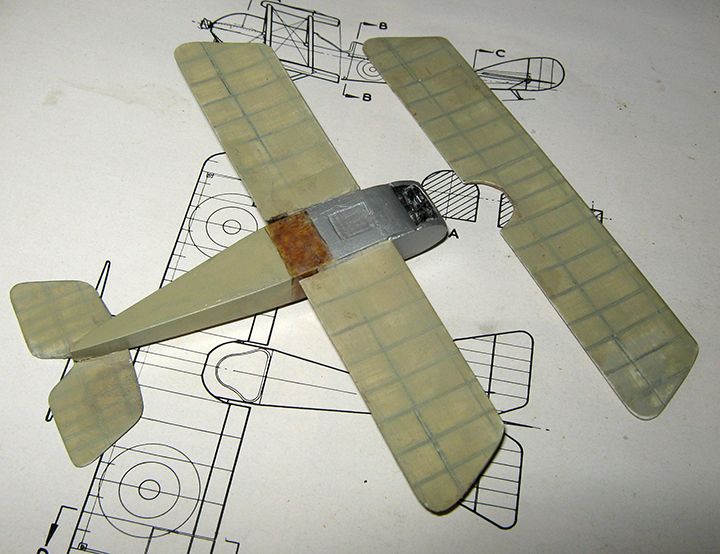
Here are the wings, still as more or less identical blanks, with the ailerons scribed in, and under-surface ribs and spars marked for painting.

From this point, I put aside the motor and cowling and fuselage, and got onto the tricky bit with the wings:


Though it is not too apparent, dihedral has been put in. On the lower wing, it does not start quite at the root, so it was put in before the center section was removed. To put dihedral in, I simply scored along an upper-surface rib marking, and bent to suit. Glue does not seem necessary. Locator holes for the interplane struts are in, but not yet those for the cabanes. I will be assembling the cabanes to the fuselage first here, since there are some finishing elements where they attach I could not get to readily otherwise.

Here are things with the lower wings resting very roughly in place:


I expect on the next bound to get the engine and cowling finished, and some paint on....

Offline lone modeller

  • Hero Member
  • *****
  • Posts: 5342
Re: Martinsyde S.1, '30 Sqdn' Mesopotamia, 1915, in 1/72
« Reply #20 on: September 18, 2014, 02:58:08 AM »
This really is coming on nicely. Isn't it wonderful how a coat of paint makes such a difference to a model - makes you think that you are getting somewhere at last…..

Offline rhallinger

  • Hero Member
  • *****
  • Posts: 1976
Re: Martinsyde S.1, '30 Sqdn' Mesopotamia, 1915, in 1/72
« Reply #21 on: September 18, 2014, 06:26:10 AM »
She's looking like an aeroplane now OM!  Very inspiring work. :D  Well done.

Cheers,

Bob

Offline coyotemagic

  • Hero Member
  • *****
  • Posts: 7710
  • "Here's to not buggering it up." -Winston Chuchill
    • My Models
Re: Martinsyde S.1, '30 Sqdn' Mesopotamia, 1915, in 1/72
« Reply #22 on: October 19, 2014, 04:25:25 AM »
Another one of your little gems in the works, OM!  Looking forward to this one.
Cheers,
Bud
"All men dream: but not equally. Those who dream in the dark recesses of the night awake in the day to find all was vanity. But the dreamers of day are dangerous men, for they may act their dreams with open eyes, and make it possible." -T. E. Lawrence

Offline Des

  • Administrator
  • Hero Member
  • ******
  • Posts: 9325
    • ww1aircraftmodels.com
Re: Martinsyde S.1, '30 Sqdn' Mesopotamia, 1915, in 1/72
« Reply #23 on: October 19, 2014, 06:42:54 AM »
Lovely work on the fuselage OM and your technique for scratch building the cowls is quite interesting, the wings are also starting to really look the part now, I will be following your progress.

Des.
Late Founder of ww1aircraftmodels.com and forum.ww1aircraftmodels.com

Online RAGIII

  • Hero Member
  • *****
  • Posts: 18918
Re: Martinsyde S.1, '30 Sqdn' Mesopotamia, 1915, in 1/72
« Reply #24 on: October 19, 2014, 08:42:00 AM »
Another one of your little gems in the works, OM!  Looking forward to this one.
Cheers,
Bud

Dittos from Amigo # 3.
RAGIII
"A man has to know his limitations": Harry Callahan

"Don't slop it on" Lynda Geisler

Offline Old Man

  • Hero Member
  • *****
  • Posts: 600
Re: Martinsyde S.1, '30 Sqdn' Mesopotamia, 1915, in 1/72
« Reply #25 on: October 29, 2014, 07:31:21 AM »
Thank you for the kind words, my friends.

It has been a while since I could post an up-date, but there has been considerable progress, and most of it I did manage to get pictures taken of, if not processed through until recently. So this will be a fairly long post....


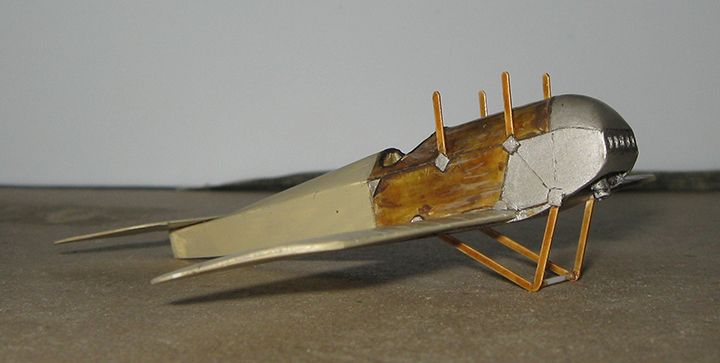
The first item was getting the cowling completed. This involved cutting in some surface detail down low on the forward fuselage sides, and piecing together the lower portions of the cowling after the motor had been affixed.
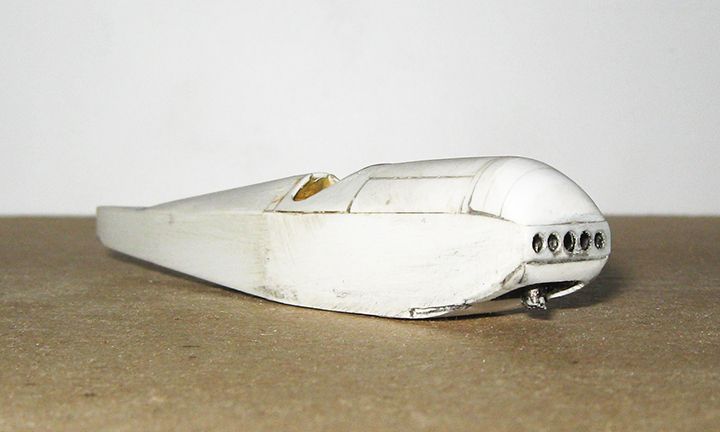
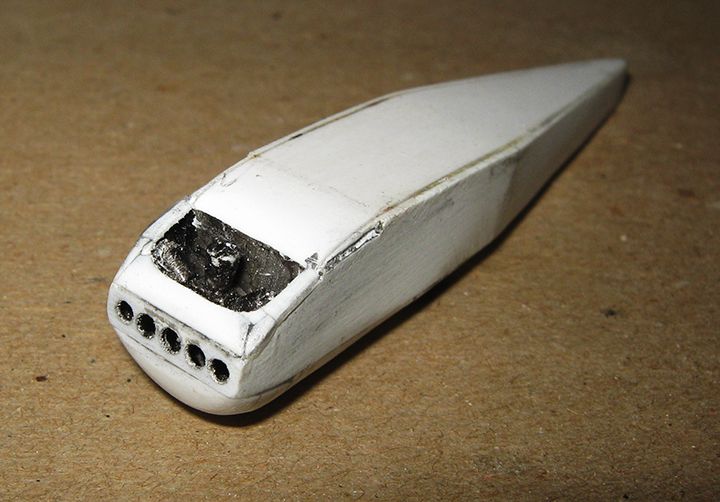
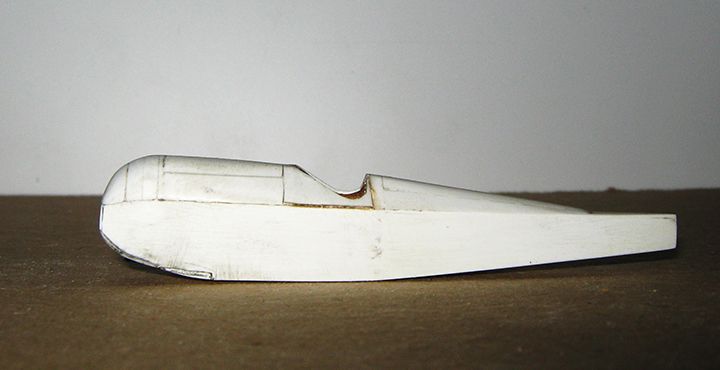


It was necessary to replace the front strip; it took several attempts before I managed one with satisfactory perforations. The underpart of the cowling is built up from a total of seven small pieces (five 'parts'; and two 'patches' where angles were sanded through). This took quite a while, though a lot of the time was spent figuring out how to do it and how to make it work. If I were to do it again, it would be a fairly direct process and not take more than an hour or two. I am not sure what is going on on the lower fuselage sides, but I suspect there is a fuel and oil tank directly behind the engine. The deliberately thick sides and bottom gave ample play for the cutting.


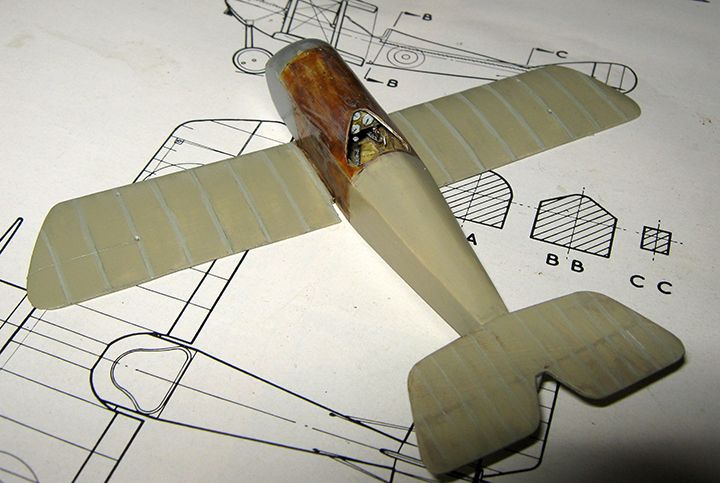
Next step was finishing the horizontal tail-plane and attaching this and the lower wings to the fuselage.
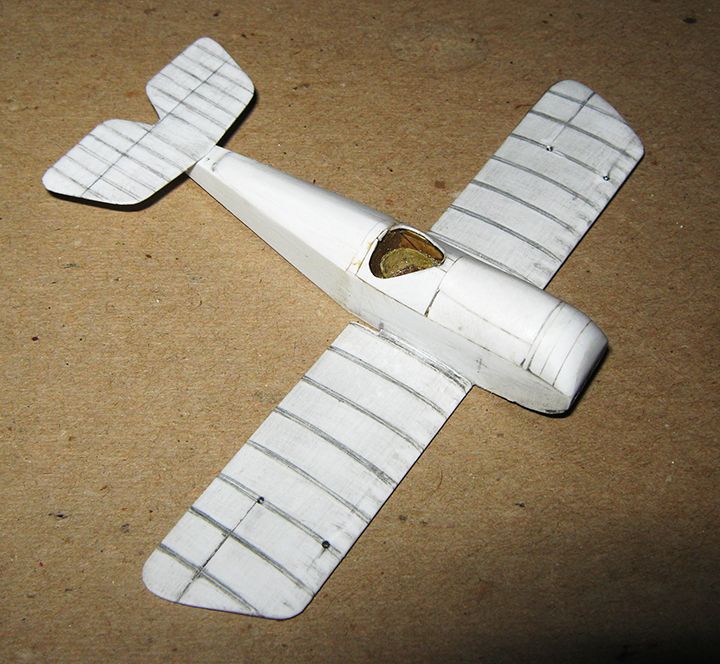
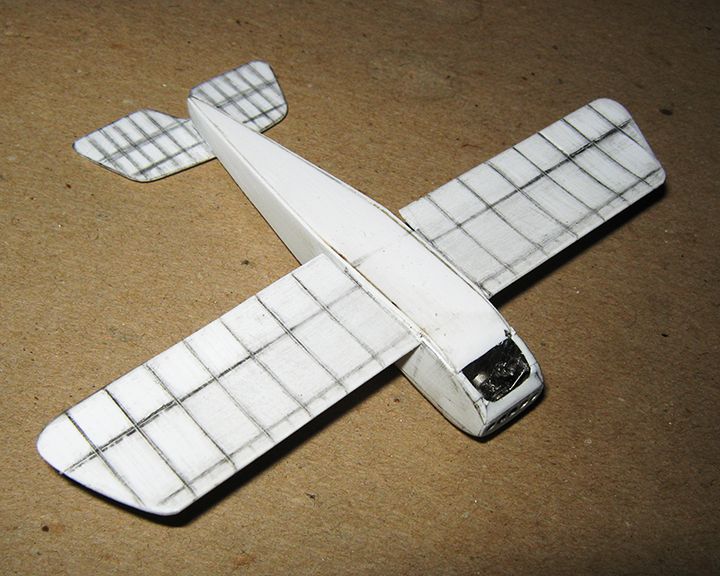
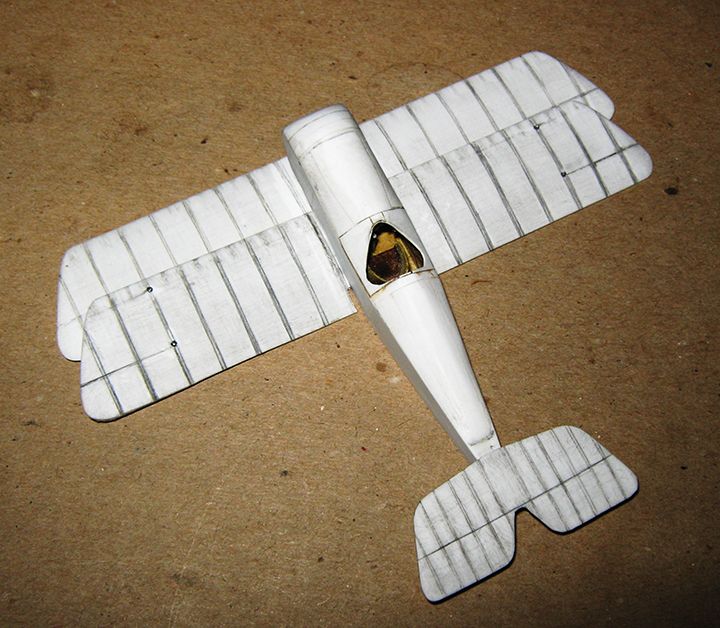
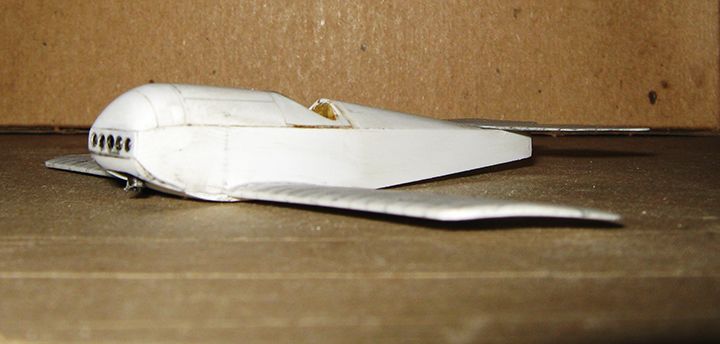


This went fairly smoothly, and I feel good about the prospect of locator holes lining up, and that sort of thing. There has been some more refining of the sculpting on the nose.


After putting in cabane locator hole in the fuselage, painting has commenced....
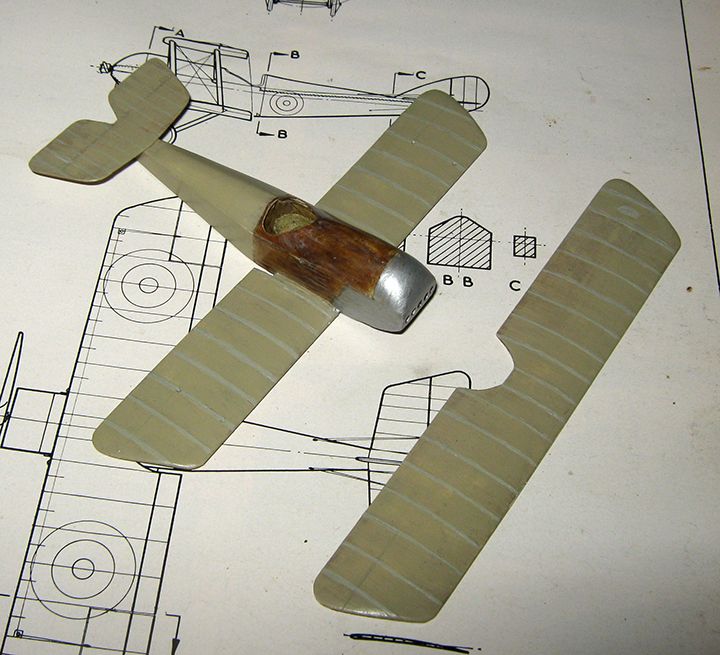


The linen colour is PollyScale 'Old Concrete' cut with some 'IJA Grey'. I do not intend to weather this machine as heavily as I did the Short 827. The only major piece left to make is the vertical tail surface (this has to fit over the tailplane, and goes up to the end of the triangular decking). Wheels and propeller will come from the spares box; I am very glad to note in the in-service up the Tigris picture, wheel covers are in place.

Here is how things stand now, after a solid session this weekend....
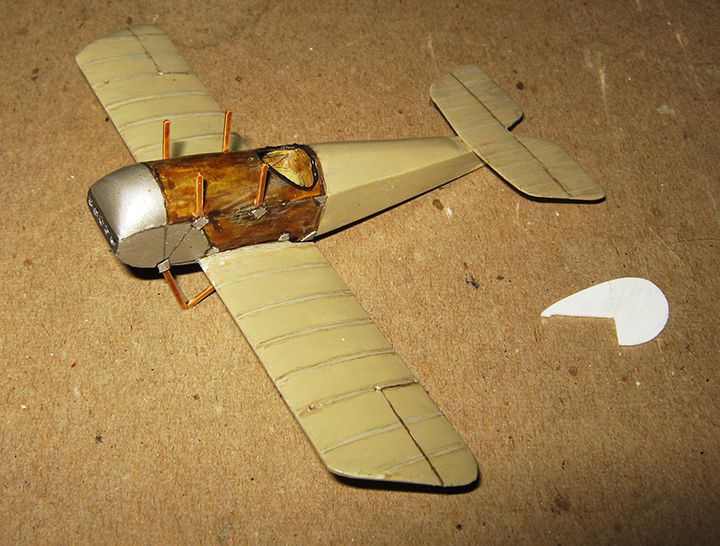


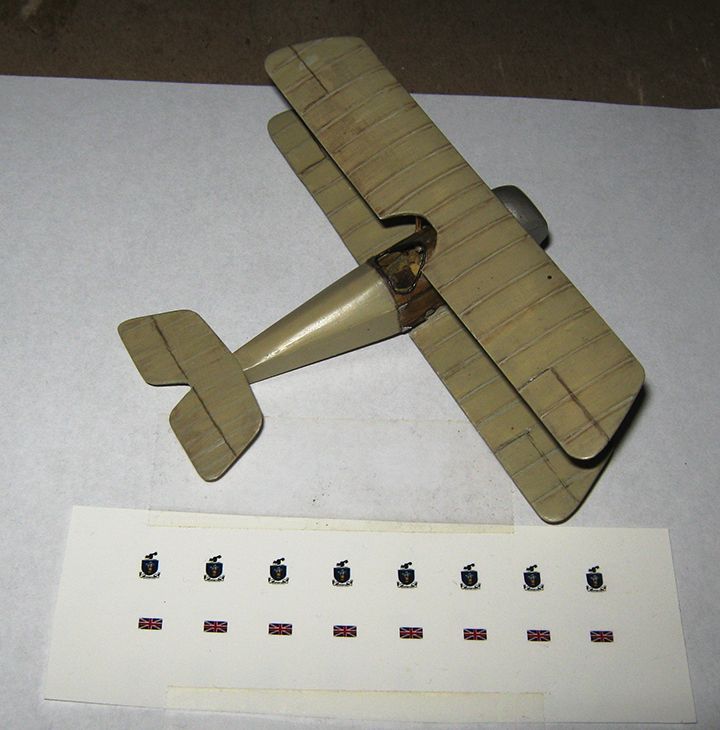
Undercarriage and cabanes are on, as are the various 'fish-plates' at critical joints, and a coaming for the cockpit, and the vertical tail surface has been made. The fish-plates are a bit over-scale in thickness, but such is life in 1/72. Finish over-all has been tightened up a bit. One nice thing about the design is that there is no splay to the undercarriage or the cabanes, which makes them easier to set up. I thought it best to put in the cabanes first this time, as I think getting in the fish-plates would have been trickier with the upper wing on. I will rig the cabanes before attaching the upper wing. Last picture shows the upper wing resting on the cabanes in a test-fit (it slipped a little askew, I am only going to press the strut ends in solidly once...). This picture shows the miniature Union Jacks wife set up for me (two will go on the rudder, one each side), as well as shield emblems for the U.S.A.A.C. Air Corps Technical School, for an OT build I am also working on (an early P-40 in bare metal finish).


Offline radio

  • Hero Member
  • *****
  • Posts: 3952
Re: Martinsyde S.1, '30 Sqdn' Mesopotamia, 1915, in 1/72
« Reply #26 on: October 29, 2014, 09:13:45 AM »
Exellent work and paint.
Martin

Offline Alexis

  • Hero Member
  • *****
  • Posts: 7947
  • Love the self
Re: Martinsyde S.1, '30 Sqdn' Mesopotamia, 1915, in 1/72
« Reply #27 on: October 29, 2014, 09:58:32 AM »
Coming along really well Oldman . Nice job on getting the cowl shape  ;)


Terri
Hurra ! , Ich Leben Noch
Body and life is a vessel we use to travel the planet . Femininity is the gift , The miracle comes from what we do with it .

Online RAGIII

  • Hero Member
  • *****
  • Posts: 18918
Re: Martinsyde S.1, '30 Sqdn' Mesopotamia, 1915, in 1/72
« Reply #28 on: October 29, 2014, 01:09:57 PM »
You certainly have made terrific progress! I wish I had half of your skill!
RAGIII
"A man has to know his limitations": Harry Callahan

"Don't slop it on" Lynda Geisler

Offline PrzemoL

  • Hero Member
  • *****
  • Posts: 4910
  • There was Eru... and he made first the Ainur...
    • Przemysław Litewka
Re: Martinsyde S.1, '30 Sqdn' Mesopotamia, 1915, in 1/72
« Reply #29 on: October 29, 2014, 09:03:10 PM »
Very fine progress, indeed, OldMan. You are going to build a beauty!
Ash nazg durbatuluk, ash nazg gimbatul,
Ash nazg thrakatuluk, agh burzum-ishi krimpatul.