Author Topic: wnw sopwith pup RNAS  (Read 14976 times)

Offline lcarroll

  • Administrator
  • Hero Member
  • ******
  • Posts: 8565
Re: wnw sopwith pup RNAS
« Reply #30 on: February 17, 2013, 10:14:29 AM »
Very good - but what is YQR? - no googling.....

Jeez Steve, good to know nothing has changed since my Ticket expired; Controllers are still "all questions!!" ;) ;)
Cheers,
Lance

Offline LindsayT

  • Hero Member
  • *****
  • Posts: 844
  • "Somehow it didn't seem like war at all..."
Re: wnw sopwith pup RNAS
« Reply #31 on: February 17, 2013, 11:58:07 AM »
Very good - but what is YQR? - no googling.....

Ooh! Ooh! Pick me! The Saskie!

There's your hint... ;)

LT

Offline michael

  • Sr. Member
  • ****
  • Posts: 464
Re: wnw sopwith pup RNAS
« Reply #32 on: February 17, 2013, 11:37:20 PM »
got the cockpit completed  :)

i just hope i can get it fitted and the two halves together without any major issues!


cheers
michael
“An ounce of action is worth a ton of theory.”

Offline rhallinger

  • Hero Member
  • *****
  • Posts: 1976
Re: wnw sopwith pup RNAS
« Reply #33 on: February 18, 2013, 12:09:34 AM »
Looking good Michael!  When i did mine, I made sure there was nothing sticking out beyond the edges of the side frames, and I very gently and lightly sanded the exterior sides of the frames.  Also take note of the bottom wing/fuselage fit issue noted by Des in his build log on the main site.  I test fit all of this and lightly sanded edges before gluing, and had no problems, thanks to Des's forewarning.

You're moving along nicely.  Keep up the good work!

Regaprds,

Bob

Offline pepperman42

  • Hero Member
  • *****
  • Posts: 4454
  • Sergeant, my brown pants.......
Re: wnw sopwith pup RNAS
« Reply #34 on: February 18, 2013, 02:00:57 AM »
Very good!! Will you leave the cabane strut painting until after the fuselage is together?...and the Saskie has the advantage -  YQR is The Queen's City Regina.

Steve

Offline michael

  • Sr. Member
  • ****
  • Posts: 464
Re: wnw sopwith pup RNAS
« Reply #35 on: February 18, 2013, 04:16:57 AM »
Steve,

yea i will paint the struts later, that is if i ever get the thing closed up.

it's giving me no end of grief, i need more hands i think.

gonna put it away for the day and see if tomorrow brings me better luck  ;)

cheers
michael

“An ounce of action is worth a ton of theory.”

Offline rhallinger

  • Hero Member
  • *****
  • Posts: 1976
Re: wnw sopwith pup RNAS
« Reply #36 on: February 18, 2013, 06:12:43 AM »
Hi Michael.  When I enlarge your cockpit photos, I think I can see a potential source of fit problems. Your PE turnbuckles for the cockpit rigging appear to be affixed to the outside of the frame corners. While they look great, there may not be sufficient clearance to allow the fuselage halves to close with those parts on the outside of the frames. You may need to drill holes in the inside corners of thr frames to accommodate the turnbuckles. I hope I'm wrong, because it will mean extra work for you. Good luck!

Regards,

Bob

Offline mgunns

  • Hero Member
  • *****
  • Posts: 2255
Re: wnw sopwith pup RNAS
« Reply #37 on: February 18, 2013, 07:36:42 AM »
Hello Michael:

I scoped out your pictures as well, and I would have to agree with Bob.  It appears as if your problems are the turnbuckles outboard of the framework.  If you can move them inboard, or as Bob recommended, file a recess in each fuselage half, I think you will be okay and on the road to buttoning it up.  WNW tolerances are pretty tight and any variations can and will result in fit problems.

Good Luck

Mark
Mark

We few, we happy few.....

Offline michael

  • Sr. Member
  • ****
  • Posts: 464
Re: wnw sopwith pup RNAS
« Reply #38 on: February 19, 2013, 01:41:40 AM »
Bob and Mark you are both spot on it was the hgw turnbuckles causing the problem even though they are paper thin.

i might have read the drawing for them wrong (it would not be the first time :-[)


anyhow i did not want to start cutting into the fuselage halfs knowing me that would have only gone one way.
so all that was left was to remove the turnbucles and get it closed up.

i managed to get some of the bracing done with fishing line not that much will be visible when completed. at least i hope so  ;)

no fun removing work that took a while to do but there you go i suppose. we live and learn


cheers
michael


“An ounce of action is worth a ton of theory.”

Offline rhallinger

  • Hero Member
  • *****
  • Posts: 1976
Re: wnw sopwith pup RNAS
« Reply #39 on: February 19, 2013, 08:18:33 AM »
Glad to see you got her closed up Michael!  In my experience, once you have the fuselage cockpit top on, very little is visible inside unless you shine a flashlight directly in.  I think you will be fine. :)

Regards,

Bob

Offline pepperman42

  • Hero Member
  • *****
  • Posts: 4454
  • Sergeant, my brown pants.......
Re: wnw sopwith pup RNAS
« Reply #40 on: February 19, 2013, 08:59:29 AM »
Sorry you had to remove the turnbuckles but thanx for the heads up. Shows how close the tolerances are on these kits.

Steve

Offline mgunns

  • Hero Member
  • *****
  • Posts: 2255
Re: wnw sopwith pup RNAS
« Reply #41 on: February 20, 2013, 12:33:59 AM »
Hello Michael:

Glad that it worked out for you.   I had that problem on my SE5a.  The first WNW kit I did and it was frustrating to pull out the PE bracing, scrape and put it back in.  As has been mentioned, once buttoned up a lot of the work becomes "You can't see it, but I know it's there".  I try to simplify the things that are barely visible and spend time on other things.

Good job and looking forward to more.

Best

Mark
Mark

We few, we happy few.....

Offline michael

  • Sr. Member
  • ****
  • Posts: 464
Re: wnw sopwith pup RNAS
« Reply #42 on: February 20, 2013, 01:54:45 AM »
cheers guys  :)

yea no point getting worked up about something that will hardly be seen.

i got the ones that might be visible fitted in and that will do for me.

the hgw super detail has been a bit of a waste of money so far apart from the seat belts.

cheers

michael
“An ounce of action is worth a ton of theory.”

Offline michael

  • Sr. Member
  • ****
  • Posts: 464
Re: wnw sopwith pup RNAS
« Reply #43 on: March 11, 2013, 11:59:54 PM »
Been a while since i had a update, so here goes...

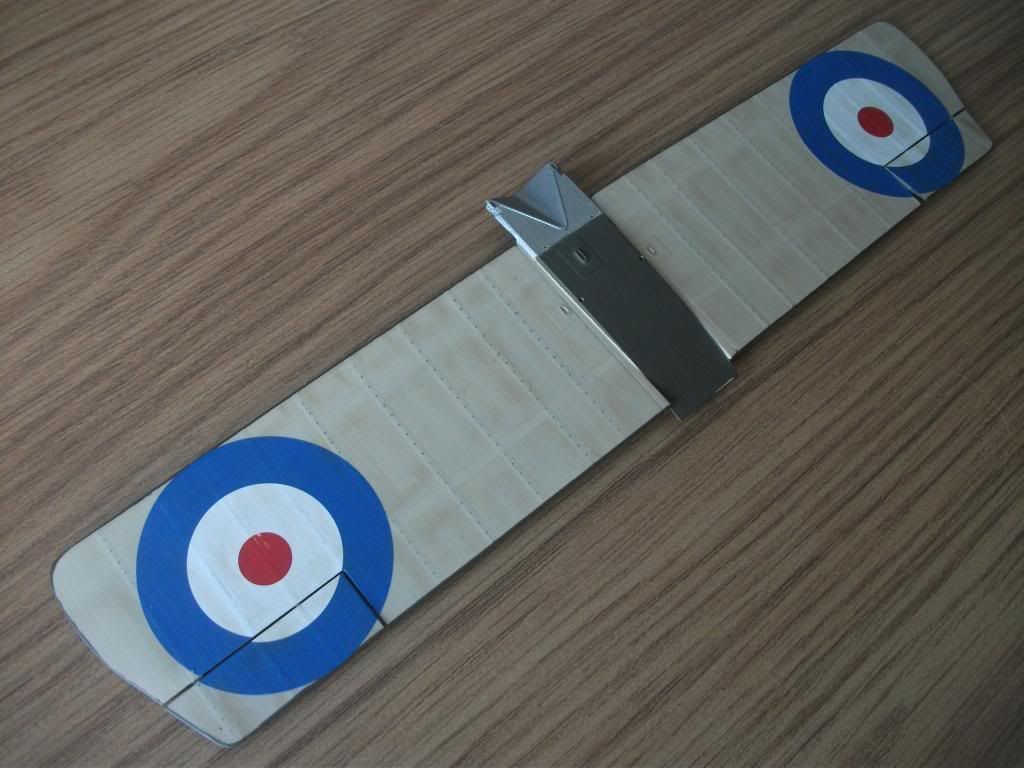
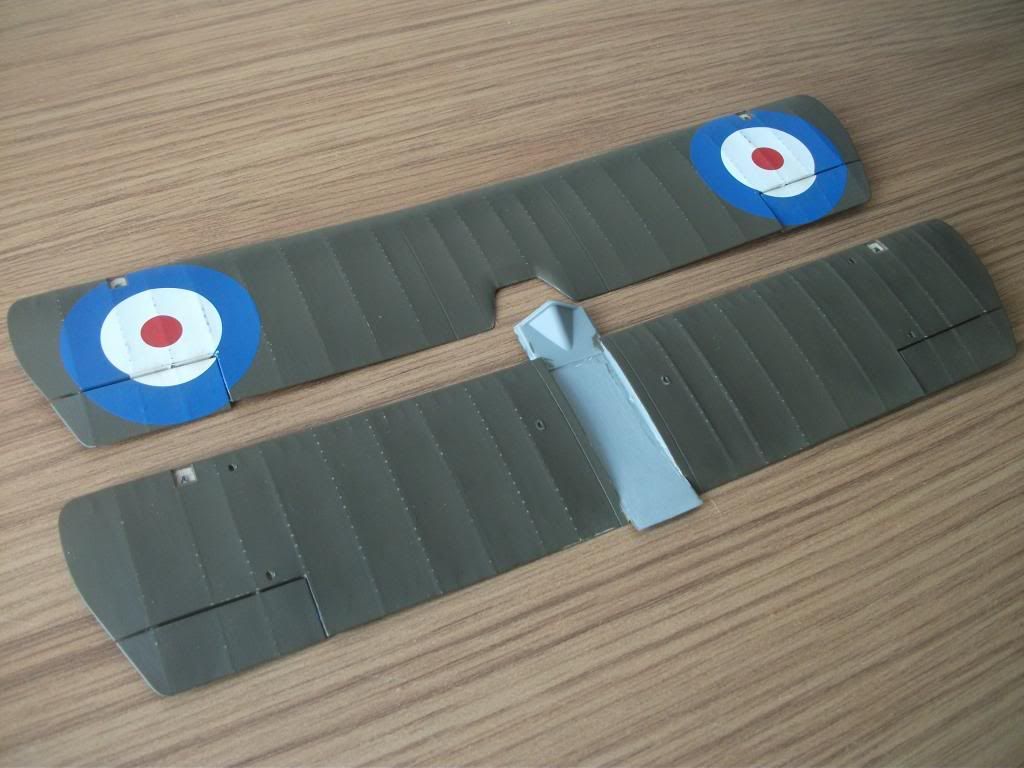
mixed fortunes realy i had a go at shading underneath the wings with pastels and made a bit of a horlicks of it to be honest  :(

then noticed that the decal on the left flap is way off where it should be so double  :( :o

sordid details following..


my wife made this helpfull comment "you've made a proper mess of that" - so there you go ;)

on the plus side i am quite pleased with fuselage side of things, the wood grain decal that came with the hgw detail set went on not too bad.
i think i had a bit of beginners luck there!
though as some have said they are very fragile indeed.

And like most who build the pup i have had to sand quite a lot off the underside of the cockpit floor to allow it to fit into the lower wing


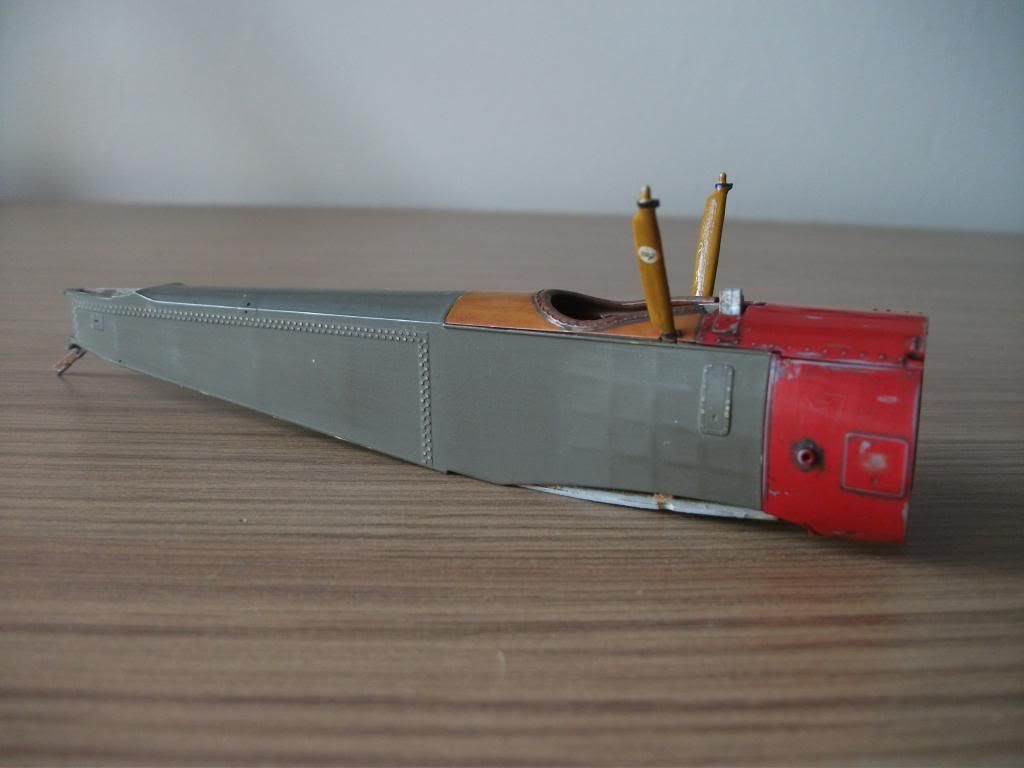
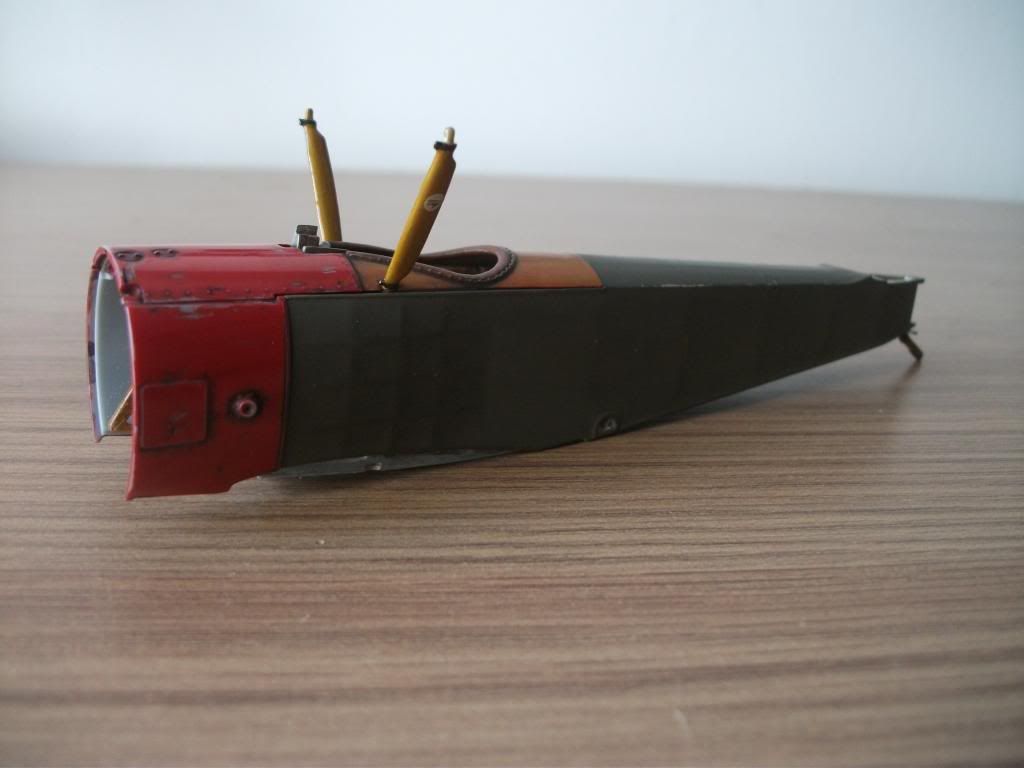
next up is the tail section...

cheers

michael

« Last Edit: March 12, 2013, 12:29:29 AM by michael »
“An ounce of action is worth a ton of theory.”

Offline Ian from Doncaster

  • Hero Member
  • *****
  • Posts: 1164
Re: wnw sopwith pup RNAS
« Reply #44 on: March 12, 2013, 02:15:58 AM »
The underwing pastels look pretty good to me Michael! 

I always struggle to get the aileron decals to match.  Could you set the ailerons deflected, when you finish the assembly?  This would detract from any decal mis-alignment.  Does the control stick have any deflection?