Hi again!
Thank you for your interest and supportive comments Stephen, Zac, Rick, Edo, Paul and Alexis!
So, I wasn't really happy with the colour of the wings even if I did like the effect I had managed to achieve. To make a long story short, I repainted all of the fabric areas in a yellow beige tone and redid all of the masking to make the ribs show and the light effect again. It came out ok, but at some point in the build I had decided to glue the observers hatch (a nice little hole in the upper wing) shut, but despite several attempts to fill the seams and make it invisible it kept cracking to reveal the joins.
So yesterday I decided to strip all of the paint from the upper wing and make a proper attempt to close the hatch once and for all. That exercise ended with the top wing breaking into four (!) parts, i.e. one more than it was originally. It simply split along the joins and also in the middle where there is fairly little plastic to begin with. And the two parts for the observers hatch also fell out. So after having drilled and pinned the wing I now have a sturdy top wing and the option of leaving the obervers hatch open - which I'm leaning towards.
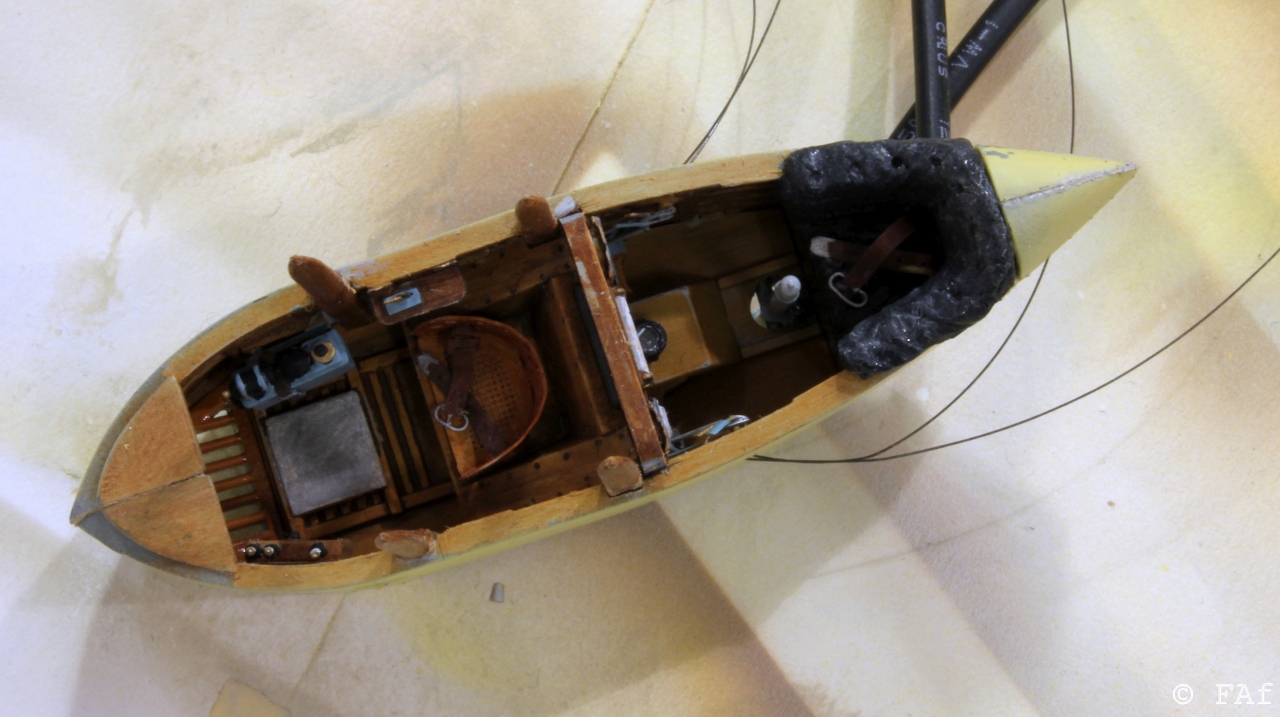
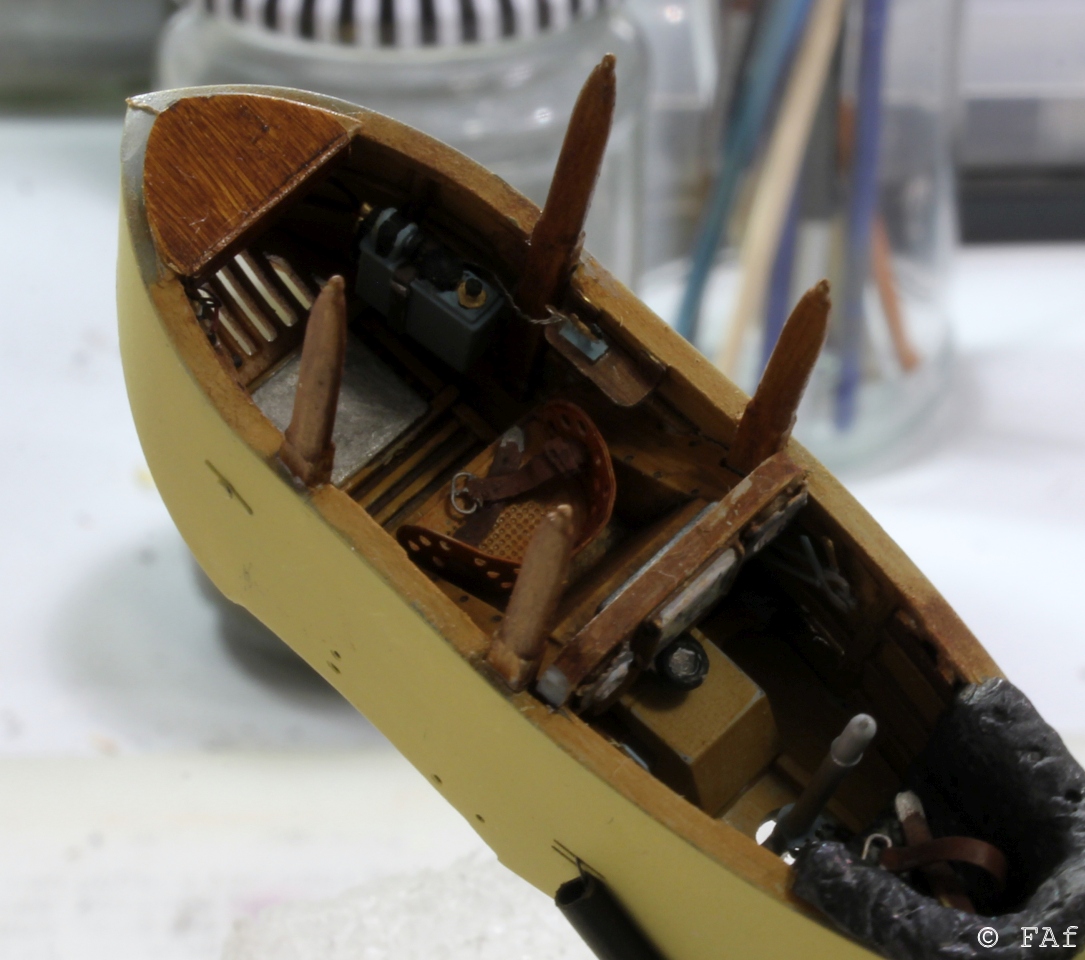
There would be two clear benefits with leaving the hatch open. First I wouldn't have to work hard to get a good fit and second there would be more visible of the interior of the crew compartment. In the two pictures below you can especially note the triangular wooden area towards the front. Instead of filling the seam and sanding, I made a solid piece out of plastic card. Much easier I think. There are other additions made to the interior - some wiring between the radio and telegraph key and the battery(?), seat belts are made from Tamiya tape and thin wire, the pilot's seat is built up with magic-sculp.
Apart from trying to get the top wing right I've also spent some time on the engine nacelles. The engine covers are quite thick, so I thinned the edges quite a bit.
The nacelles are fabric covered with metal covers/hatches covering the front end. There are photo etch pieces included apart from the bottom part. So I made two of those using tin from a food tray. Last picture shows the present state. Next will be some clear coat and a bit of weathering.
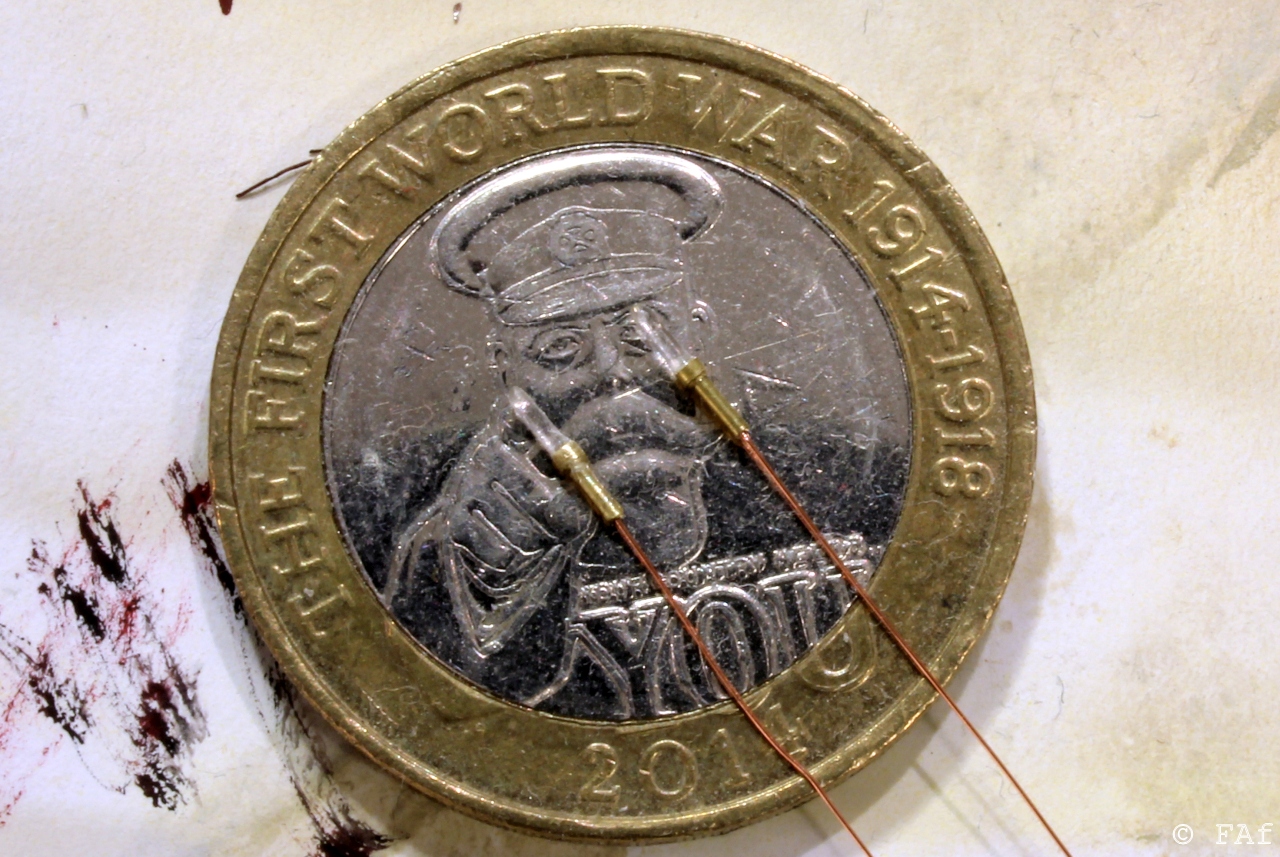
I also made a couple of things - a fail to come up with a term here - that will be added to the engines. I suppose they show that there is petrol flowing?! Made out of Albion Alloys brass tubing, 0.6, 0.8 and 1.0 mm bits, a piece of copper wire and some stretched clear sprue.
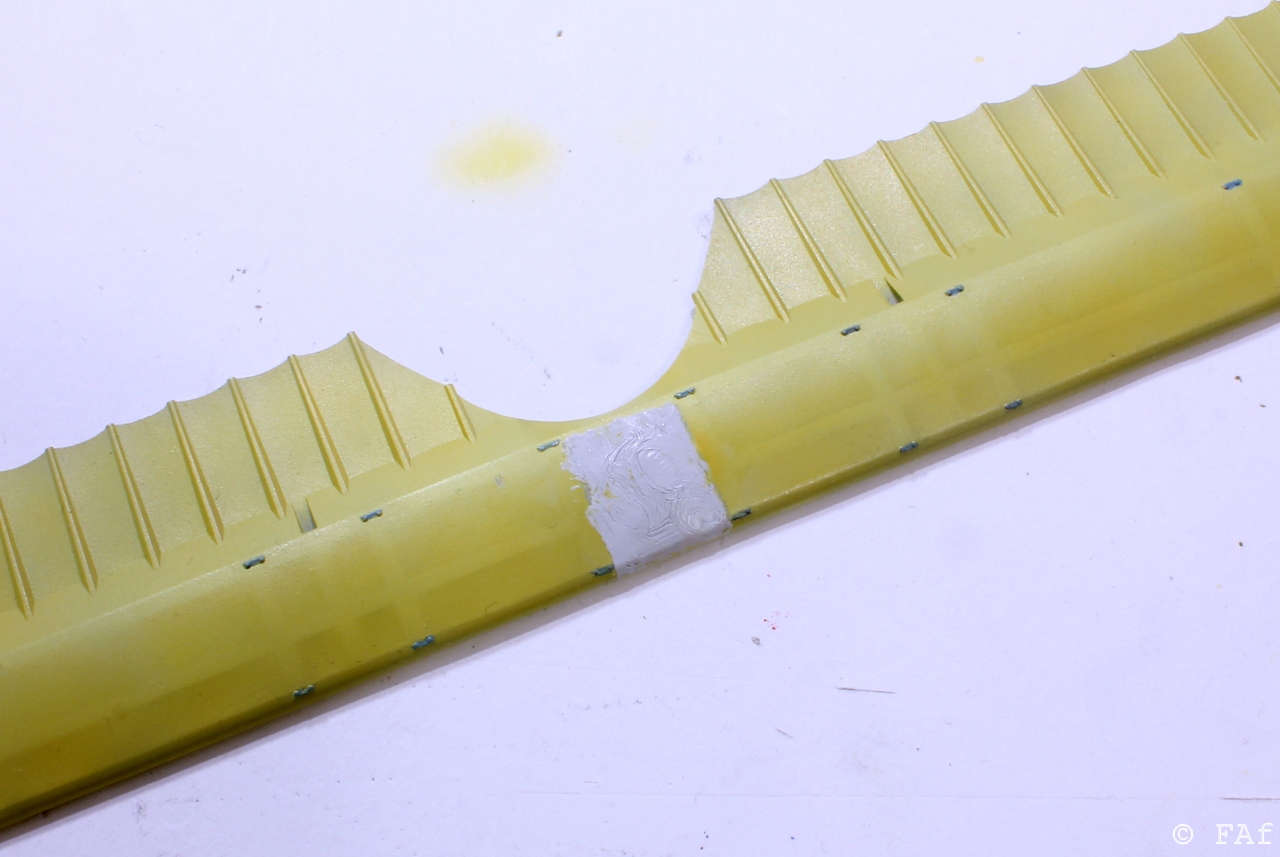
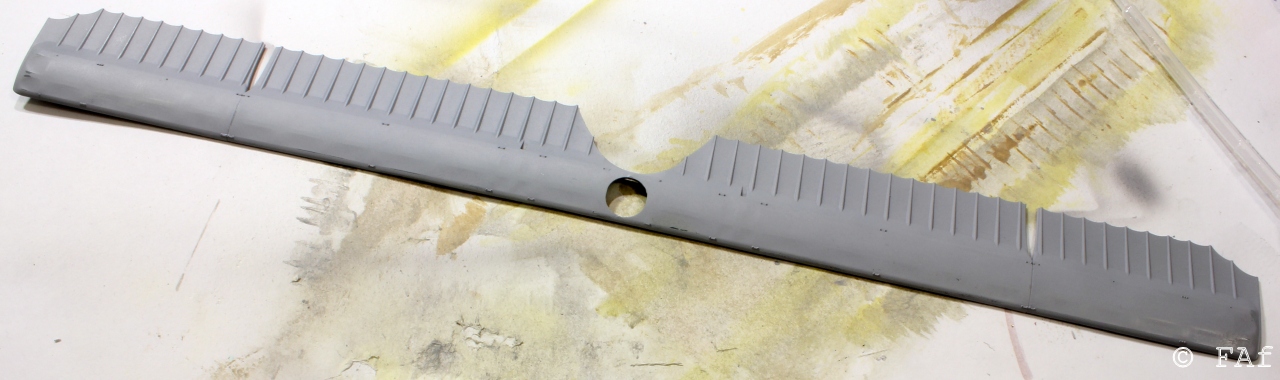
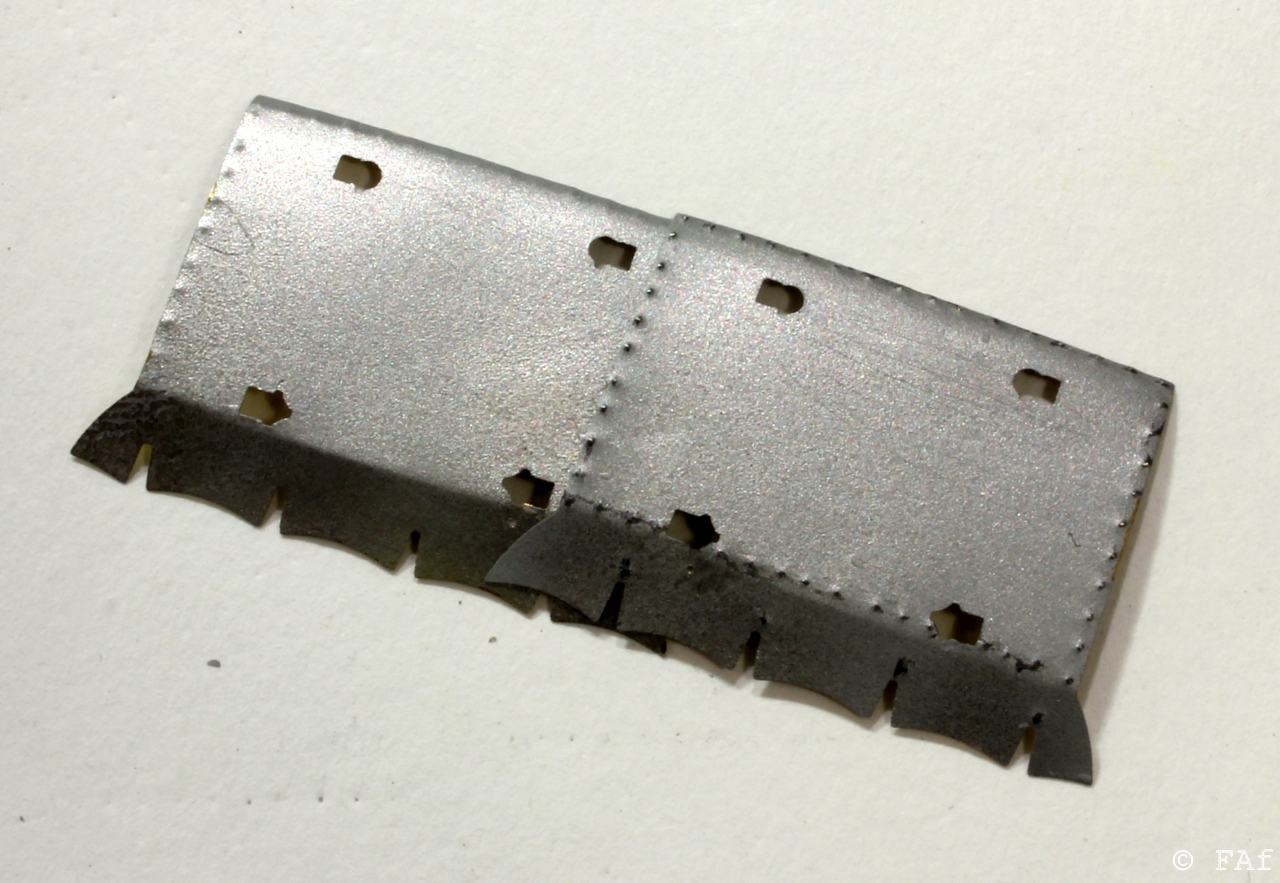
Last for this report. There are aluminium sheets under the engines and on top of the bottom wing. They also come as photo etch parts but they lacking a bit of detail. There should be a number of nails or bolts holding them to the wing and I added them by pressing a needle from the back to make a protusion that could pass for a nail head. You can see the painted version to the right, the unpainted nail heads on the left plate and the lack of them on the bottom of the left plate.
Moving forward I think...

/F

