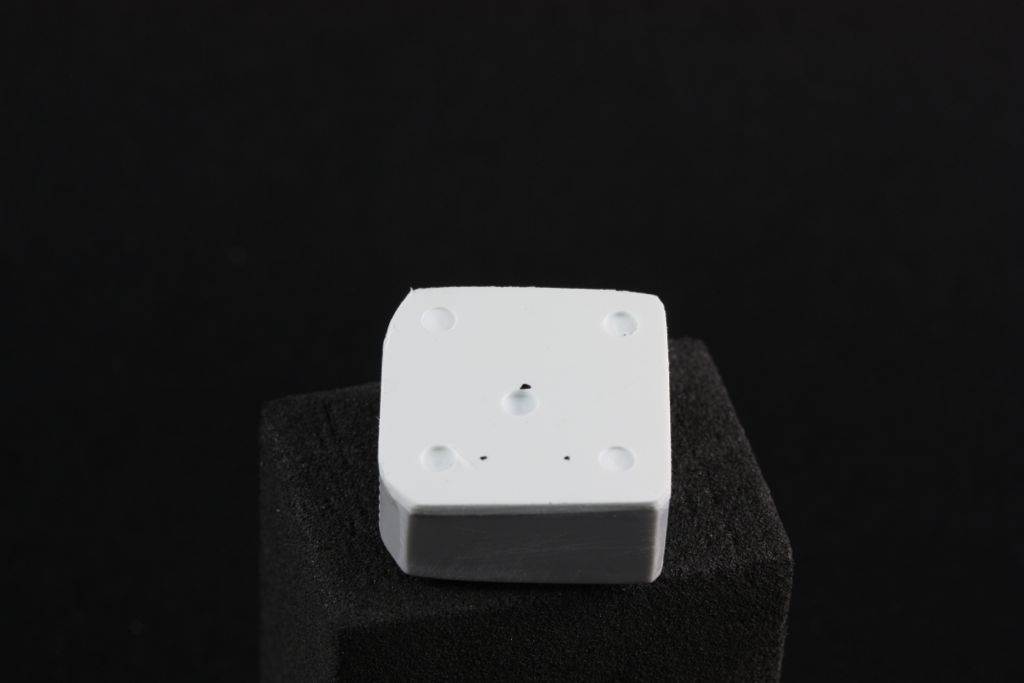
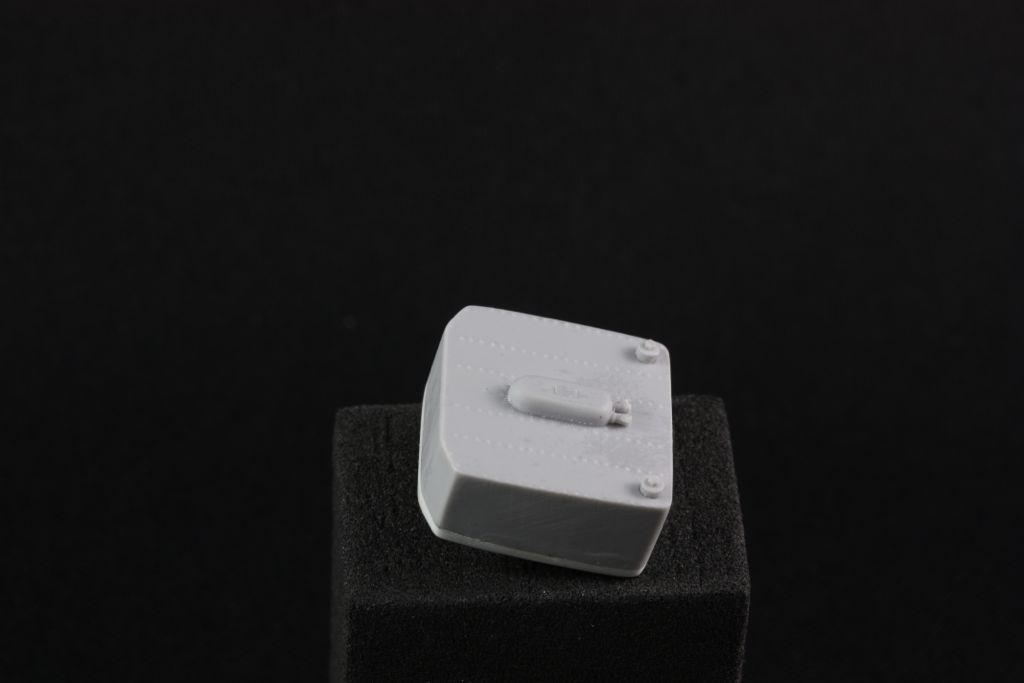
Author Topic: Ansaldo A.1 "Balilla" 1/32 Aviattic OOB  (Read 34353 times)

Offline uncletony

  • Hero Member
  • *****
  • Posts: 4350
    • Aircraft In Pixels
Re: Ansaldo A.1 "Balilla" 1/32 Aviattic OOB
« Reply #120 on: January 19, 2017, 01:04:40 PM »
At this point you also want to open up all the holes in the fuselage.

The vertical slots next to the cockpit should be 1mm wide x 8mm tall. I am advised that these are corrected on second run castings, but on first run castings, they will need to be enlarged as they are only about 6.75mm tall.

The hole near the nose should be reamed out to 3.9mm.

You'll find round rectangles embossed on either side of the fuselage for the engine compartment vents; these should be opened up. The width of these slots is 2.5mm.

You'll also want to ensure the holes for the stainless steel lower wing pins are large enough -- the pins are 1mm in diameter. You don't want to be fighting this when the fuselage is alll painted and decalled!

« Last Edit: January 20, 2017, 02:01:15 AM by Bo »

Offline uncletony

  • Hero Member
  • *****
  • Posts: 4350
    • Aircraft In Pixels
Re: Ansaldo A.1 "Balilla" 1/32 Aviattic OOB
« Reply #121 on: January 19, 2017, 01:29:30 PM »
Temporarily leaving the reservation.

To understand where I am going next (yes, a little south of OOB) it is important to understand a couple of things:

Thing 1: The fuel tank on the original aircraft was suspended in a cavity in the bottom of the airplane. A fragment from Juanita Franzi's illustration tells the story:


The default method of representing the bottom of the fuel tank is with a PE appliqué on the bottom of the fuselage. Meanwhile a resin part represents the internal side of the tank:


Thing 2: Painting the interior of the fuselage is going to be difficult. It's hard to spray paint into a hole, do wood grain, etc. Decals are an option, but still, really hard to get a great finish on the interior walls and floors with it already partially closed up.


Ergo...


... I've cut apart the fuselage sides.

Which revealed something I personally found remarkable: the 1mm holes for the wing spars go all the way thru the castings(!) Oh and yes, perfectly straight, to boot. How in the hell did Ron do this? Anyway, this fact greatly simplifies my problem of working out how to put this all back together!

 I've bored these holes out to 1.3mm, and fitted brass tubes inside:


so the whole thing falls back together...


oh, and the wings fit positively:

« Last Edit: January 20, 2017, 10:29:22 AM by Bo »

Offline uncletony

  • Hero Member
  • *****
  • Posts: 4350
    • Aircraft In Pixels
Re: Ansaldo A.1 "Balilla" 1/32 Aviattic OOB
« Reply #122 on: January 19, 2017, 04:07:45 PM »
So -- and I need to underline this -- the "default" PE appliqué method of representing the fuel tank is one "official" way to do things, but Aviattic have provided parts to model the tank in a more realistic fashion if desired. (In particular, full length support straps for the "exposed" tank, vs. segments)

I am deviating from the official build guide in splitting the fuselage, though. This is definitely not in the instructions!

fuel tank cut out

Area for the fuel tank brutally cut out:


approximation of fuel tank -- resin & PE -- but will require 1mm wafer to get to correct height:


basic idea of how it will sit in the fuselage (meanwhile, floor seam has been mended with styrene)


« Last Edit: January 20, 2017, 10:30:39 AM by Bo »

Offline AndrewS

  • Full Member
  • ***
  • Posts: 241
Re: Ansaldo A.1 "Balilla" 1/32 Aviattic OOB
« Reply #123 on: January 20, 2017, 07:16:09 PM »
Not so OOB  ;D but it's an amazing work!  :)

I'm saving all pages as a pdf for reference.

I'm looking forward to start mine, and the fuel tank mod is tempting me  ::)

Bye

Andrew

Offline uncletony

  • Hero Member
  • *****
  • Posts: 4350
    • Aircraft In Pixels
Re: Ansaldo A.1 "Balilla" 1/32 Aviattic OOB
« Reply #124 on: January 21, 2017, 12:41:43 AM »
Not so OOB  ;D but it's an amazing work!  :)


Actually, when you think about it, it still counts as OOB if I cut it apart and then glue it back together again! Right? :)

Offline AndrewS

  • Full Member
  • ***
  • Posts: 241
Re: Ansaldo A.1 "Balilla" 1/32 Aviattic OOB
« Reply #125 on: January 21, 2017, 02:26:32 AM »
Not so OOB  ;D but it's an amazing work!  :)


Actually, when you think about it, it still counts as OOB if I cut it apart and then glue it back together again! Right? :)

yeah... you are just messing with what's inside the box :o ;D

Offline lone modeller

  • Hero Member
  • *****
  • Posts: 5350
Re: Ansaldo A.1 "Balilla" 1/32 Aviattic OOB
« Reply #126 on: January 21, 2017, 03:39:55 AM »
I rather like Bo messing around with what is in the box…. am waiting in anticipation for more!

Offline uncletony

  • Hero Member
  • *****
  • Posts: 4350
    • Aircraft In Pixels
Re: Ansaldo A.1 "Balilla" 1/32 Aviattic OOB
« Reply #127 on: January 21, 2017, 01:45:35 PM »
Fuel Tank

tank height is padded with 1mm wafer (actually two .5mm panels -- I didn't have any 1mm styrene sheet):


shallow holes drilled into wafer to aid gluing in upcoming step when PE panel is applied:


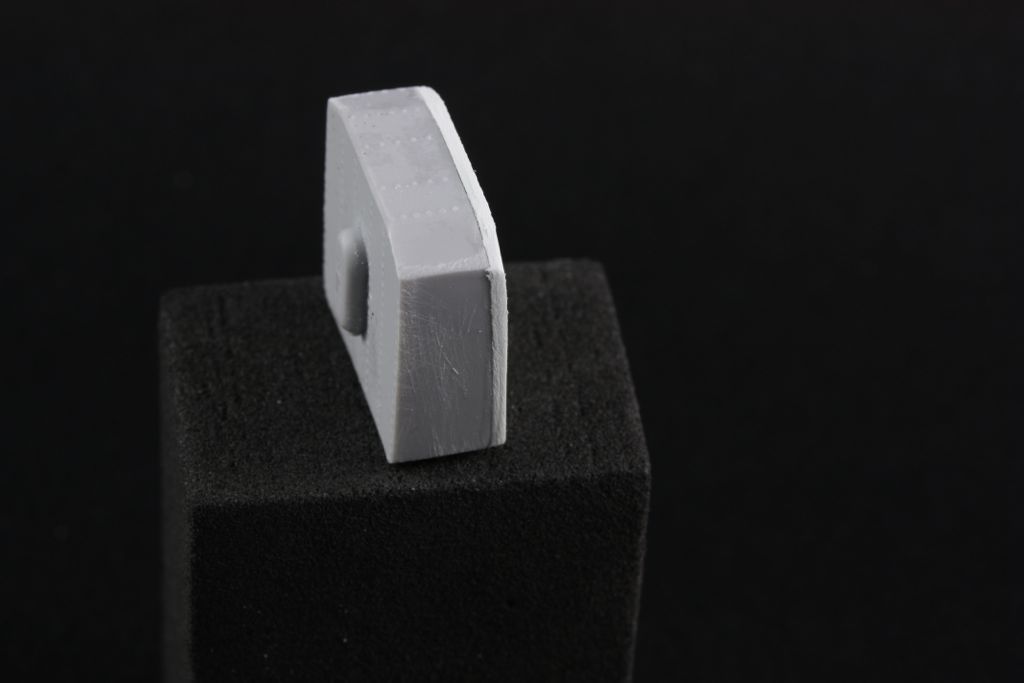
meanwhile, 2x parts F1 are fitted into .9mm holes in bump on top of tank...


And you need to cut out the exquisite floor piece, H1 now. Once cut from the block and cleaned up, it should look like this:


We need to fit the fuel tank temporarily into the fuselage:


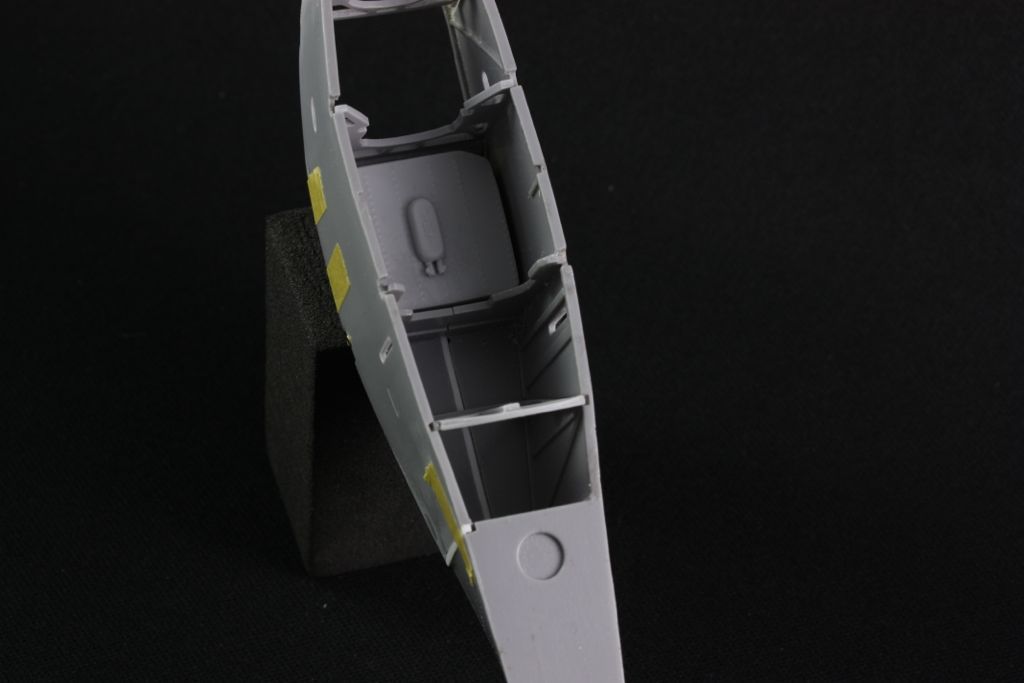
...and set the floor piece on top of it...


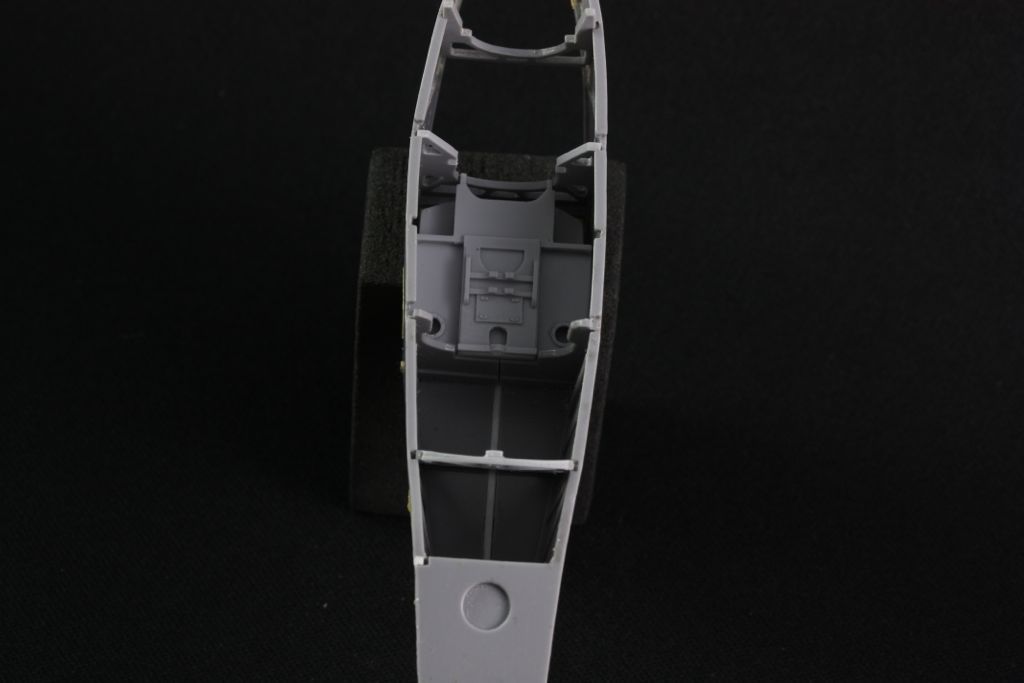
... in order to mark the position of the large holes, which is done with a 2.5mm bit, by gently turning just a few times.


At the positions just marked, 1.8mm holes are drilled to just .5mm depth:


...and 2x parts F3 glued in:


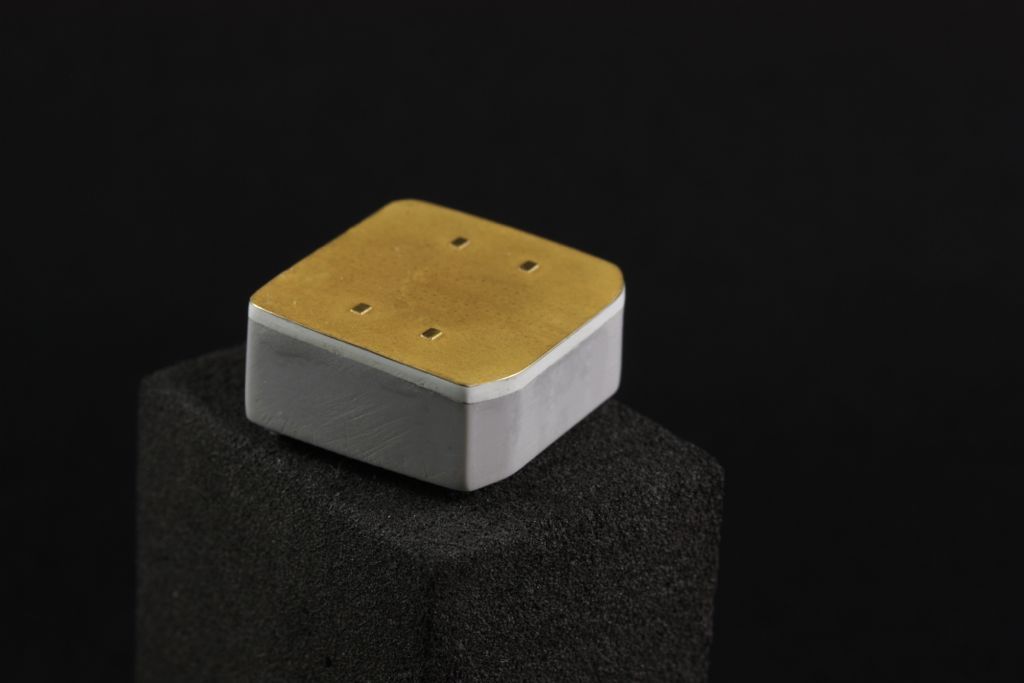
The PE "appliqué" is glued on the bottom of the tank:


And finally the resin sump part F2 is added to the bottom of the tank:


I'll add the straps and buckles, which are provided as PE parts, when I get closer to installing the tank.


Offline RAGIII

  • Hero Member
  • *****
  • Posts: 18959
Re: Ansaldo A.1 "Balilla" 1/32 Aviattic OOB
« Reply #128 on: January 21, 2017, 09:16:17 PM »
Outstanding progress Bo!
RAGIII
"A man has to know his limitations": Harry Callahan

"Don't slop it on" Lynda Geisler

Offline Nigel Jackson

  • Hero Member
  • *****
  • Posts: 2608
Re: Ansaldo A.1 "Balilla" 1/32 Aviattic OOB
« Reply #129 on: January 22, 2017, 05:45:00 AM »
These updates are really interesting and will prove invauable, so thanks Bo. It seems almost trite to say that I love the way in which you photograph and present the work; very classy.

Best wishes
Nigel

Offline aliluke

  • Hero Member
  • *****
  • Posts: 510
Re: Ansaldo A.1 "Balilla" 1/32 Aviattic OOB
« Reply #130 on: January 22, 2017, 06:32:50 PM »
Hi Bo
Incredible work and perfectly explained and illustrated. Your courageous deviations from the instructions seem very worthwhile but I fear, if I follow them when I get around to this wonderful aircraft/model, that I'll totally screw cutting it up! I hope that Aviattic have a few spare fuselages to distribute to those that try your course and...well, need one...Anyway my fears are months if not years away and it may seem less fearsome when I get there.

I look forward to your progress with ongoing interest.

Best regards,
Alistair
It ain't a hobby if you have to hurry.

Offline uncletony

  • Hero Member
  • *****
  • Posts: 4350
    • Aircraft In Pixels
Re: Ansaldo A.1 "Balilla" 1/32 Aviattic OOB
« Reply #131 on: January 24, 2017, 10:38:31 AM »
many of the parts for the next steps are on this casting block, which proved a bit of a challenge to get parts off without marring the others, as they all rather diabolically overlap. But taking it slowiy...


The complex aileron control horns are made from the PE parts seen here:


And will be mounted to this cross piece, which first needs some small holes drilled to accept pins:


these parts form the interior structure:


But before I can go any further, I need to wood grain the cabinetry.... base coat...


oil coat started...


Offline Alexis

  • Hero Member
  • *****
  • Posts: 7947
  • Love the self
Re: Ansaldo A.1 "Balilla" 1/32 Aviattic OOB
« Reply #132 on: January 24, 2017, 10:51:52 AM »
 8) 8) 8)


Terri
Hurra ! , Ich Leben Noch
Body and life is a vessel we use to travel the planet . Femininity is the gift , The miracle comes from what we do with it .

Offline steveb

  • Full Member
  • ***
  • Posts: 237
Re: Ansaldo A.1 "Balilla" 1/32 Aviattic OOB
« Reply #133 on: January 24, 2017, 12:56:43 PM »
Looks great! I always wonder if there would be a better solution than that huge chunk of resin under those parts? I realize it may be the caster's answer to a sprue, but that is an awful lot to have to cut away. Maybe the parts count makes gang molding of individual parts too cumbersome. No disrespect to the manufacturer intended at all, this model is something that I believe, none of us have ever seen before. The bar has definitely been raised.

Steve

Offline uncletony

  • Hero Member
  • *****
  • Posts: 4350
    • Aircraft In Pixels
Re: Ansaldo A.1 "Balilla" 1/32 Aviattic OOB
« Reply #134 on: January 24, 2017, 02:05:15 PM »
Looks great! I always wonder if there would be a better solution than that huge chunk of resin under those parts?

One the positive side, the parts are exquisitely cast on this block (i) as they are on others. Much thought appears to have been given into ensuring that cutting / sanding occurs where it will show the least. But it is a challenge finding a way to cut the parts off without affecting the neighbors. (It can be done though!)