Hello All
Well, here are some shots of the 1/24 Typhoon I mentioned in another thread. I don't offer it as something down to the finest level of accuracy in finish or detail, but making it gave me a lot of pleasure and kept me off the streets.
It was two or three years ago at the Scale Mode World exhibition at Telford that Airfix unveiled this magnificent kit; it looked stunning. I knew immediately that I would want to build one at some stage. Last year, I noticed that it could be picked up at a bargain price and, by December, I felt the need to take a break from rigging the Great War aircraft I loved so much. Unfortunately, I don't have much of a photographic record of the build, but here are some shots.
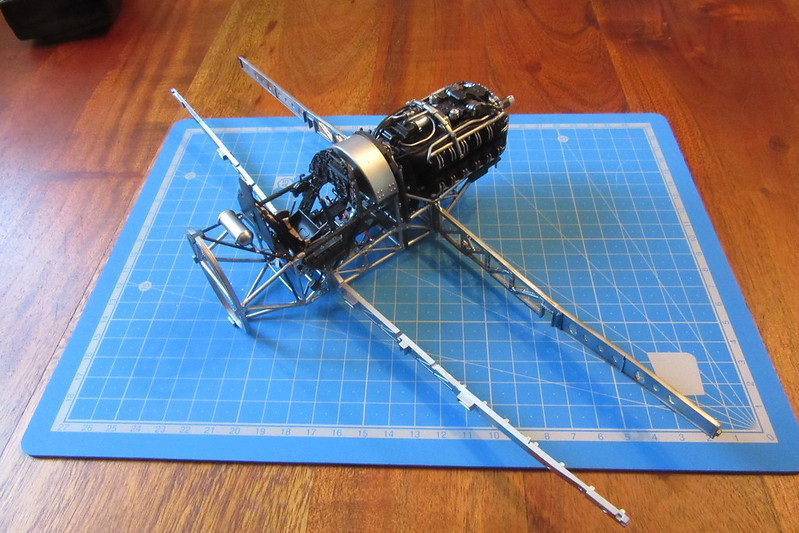
This first photo is one of the earliest and is just to show the basic frame around which the kit is made. The fit is almost exemplary, but clearing the fine lines seams, where they could subsequently be visible, proved a bit tedious. From the start I recognised a slight warpage on the port side wing. Correcting it would have saved me some problems later. You'll notice how it is already dwarfing my 30 x 22 cm cutting pad.
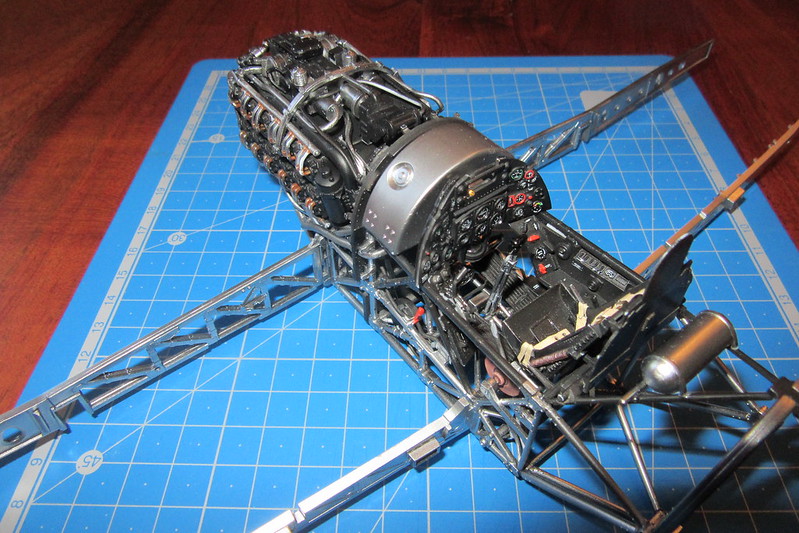
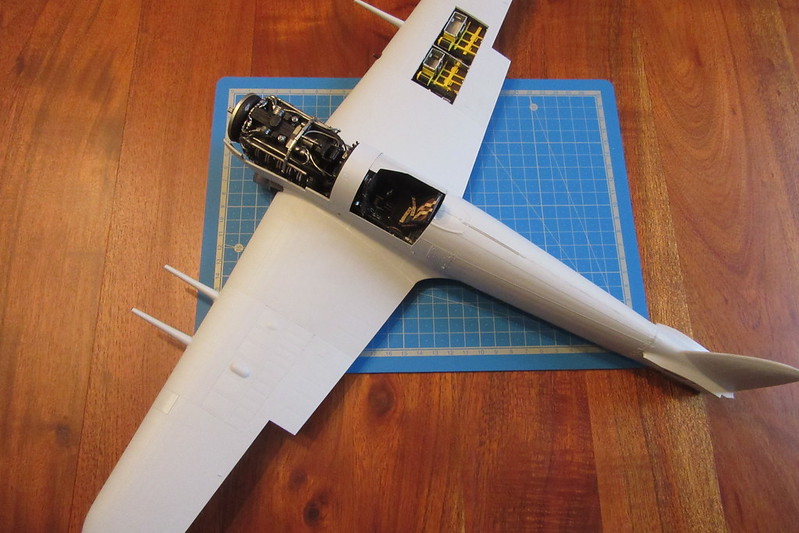
Next is one of my favourite shots. The engine lacks one front to back piece of plumbing and the exhausts come later, but the cockpit is pretty much done. When beginning the model I felt that the plastic was a bit soft. It was only really as I worked on the engine that I came to appreciate Airfix's foresight here. Every piece in the kit is plastic, even the 'wiring' which twists and loops here there and everywhere. A more brittle plastic would have been catastrophic. Closely following the instruction sequence was essential, but it was amazing how 'wiring' could be threaded through to find precise end-on location points. The drawback was that removing seam lines took a long time. Where brown oil paint has been used on certain leads, the intention was that, through the build, it would gradually rub away on exposed parts and subsequently provide the greater depth I wanted. The Airfix instrument dials and placards for the cockpit seemed pretty good, but I chose to replace them with the dedicated set from Airscale. I also used a set of HGW seat belts designed for this model. They seem a bit wide to me, but looked so much better than the kit's originals. The copper colour on the cylindrical tank behind the armour plating is simply the result of light from the camera flash reflecting from aluminium.
The central part of the lower wing has been installed, together with gun bays and various fuel tanks. At this stage, I had yet to decide what would be left open to view.
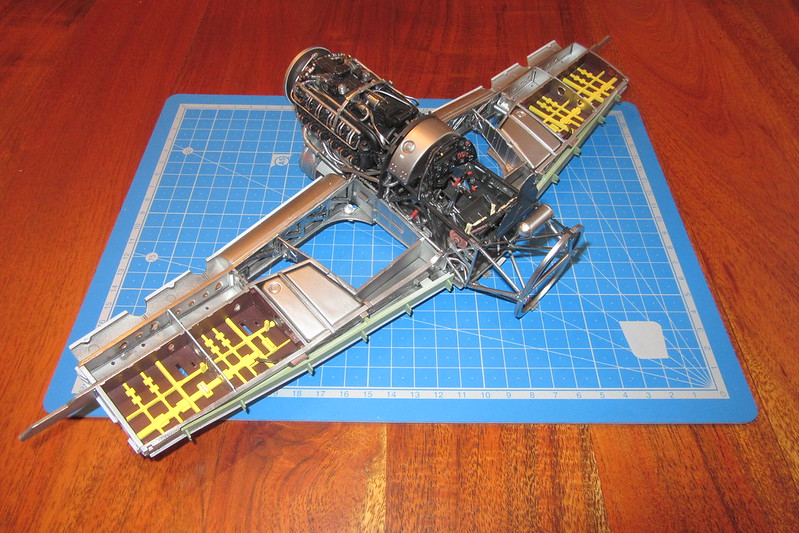
Cannons have been installed as have wing tips and undercarriage bay roofs. I have read about people being very afraid of accidentally snapping the cannons. The choice of a flexible plastic really helped overcome this fear. In fact, their very flexibility is only what makes it possible to slide the cannon through the holes in the wing spars.
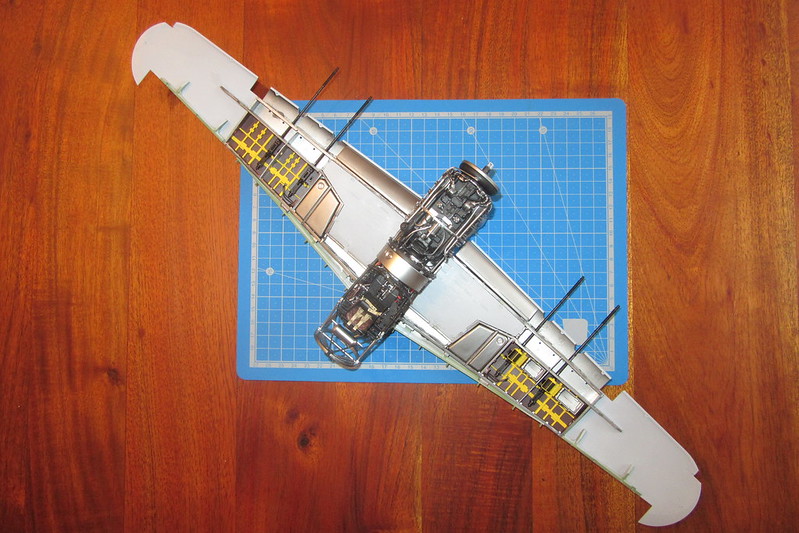
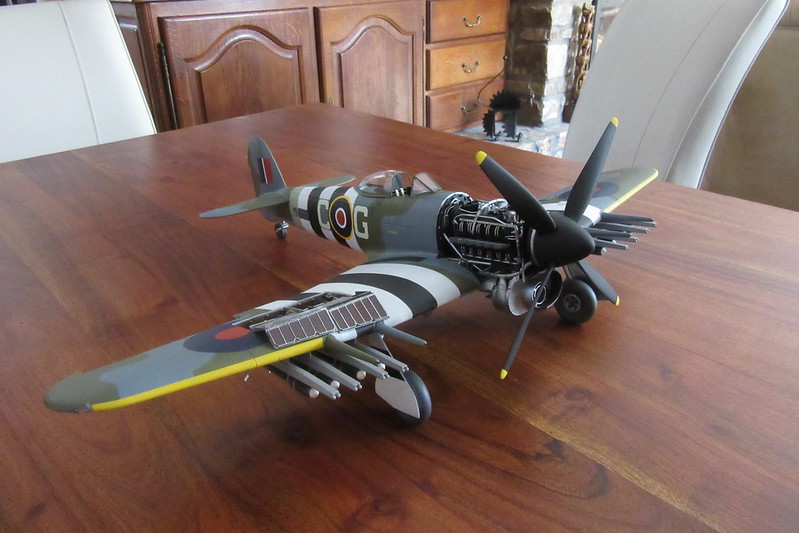
And now things are sealed up. Decisions made. I needed to chamfer the fuels tanks and the undercarriage bay roofs to get a nice fit - but then the instructions did make it clear that, at least in part, the former were optional. The eagle-eyed will notice that the starboard, inner cannon is missing. I didn't have a mishap and break it off after all. Rather I wasn't happy with the way the cannon was causing a slight misalignment of the fairing. So, it was a deliberate action to overcome a problem of my own making.
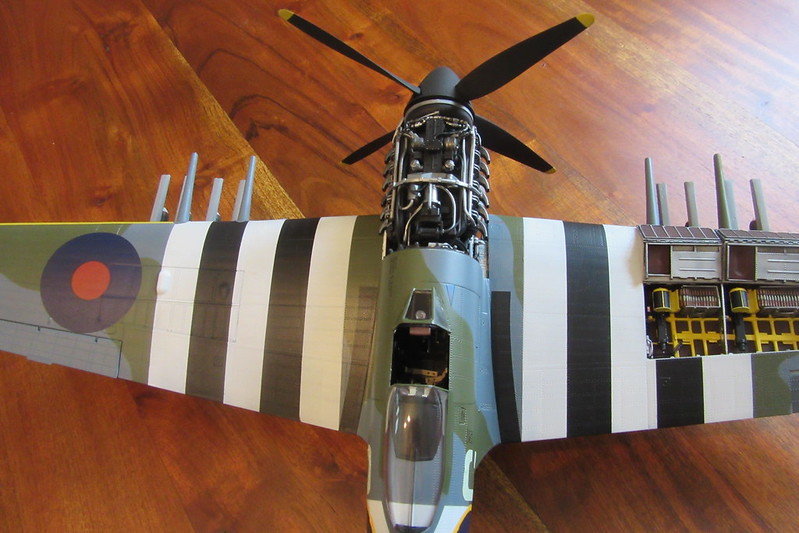
The cannon fairing is restored and a coat of Tamiya surfacer applied to highlight any wrinkles and give the paint something to grip onto. Logic has then been turned on its head by beginning work on the invasion stripes before the camouflage. I also couldn't resist building the massive propeller and plugging it in to reinforce the sense of a Typhoon's power. The cutting mat certainly looks small.
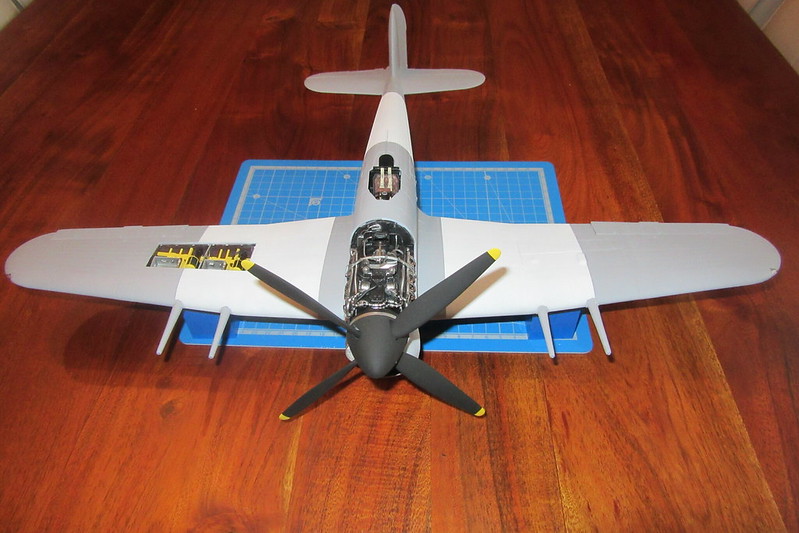
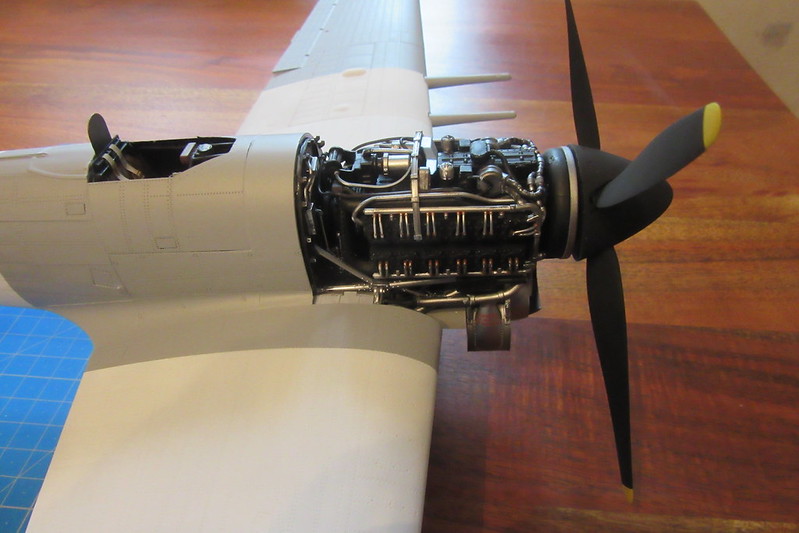
Another shot of the engine, though with the exhausts still to be added. Again the propeller is loosely plugged in, though it is not quite sitting perfectly yet.
A compass has been added and some leather padding to protect the pilot's face.

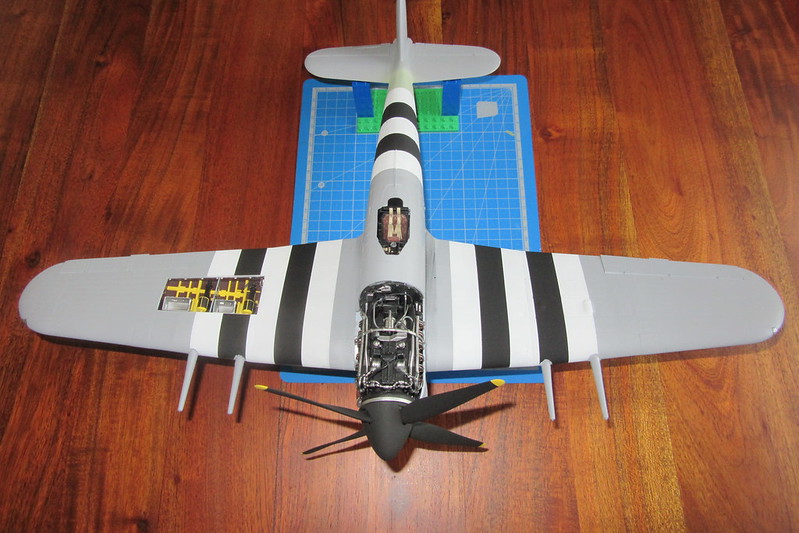
On with the invasion stripes. Was it a good idea to do them before the camouflage? I think not. My aim to avoid having to build up coats of white paint. I realise that 'in the field' such paintwork often failed to cover completely underlying camouflage, and to their credit, Airfix show this in the painting guidelines, but I still decided against it.
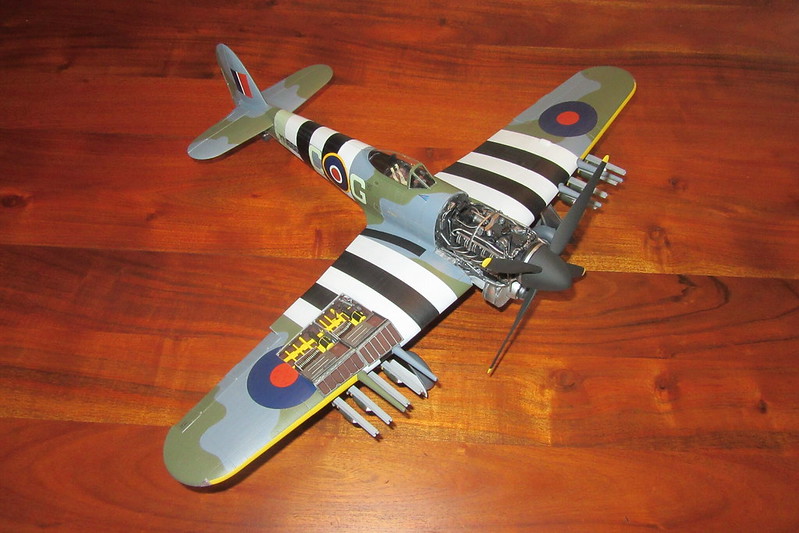
A bit of a jump now as camouflage and various other external surface painting details have been completed. Decals have been applied and the underwing rocket rails added.
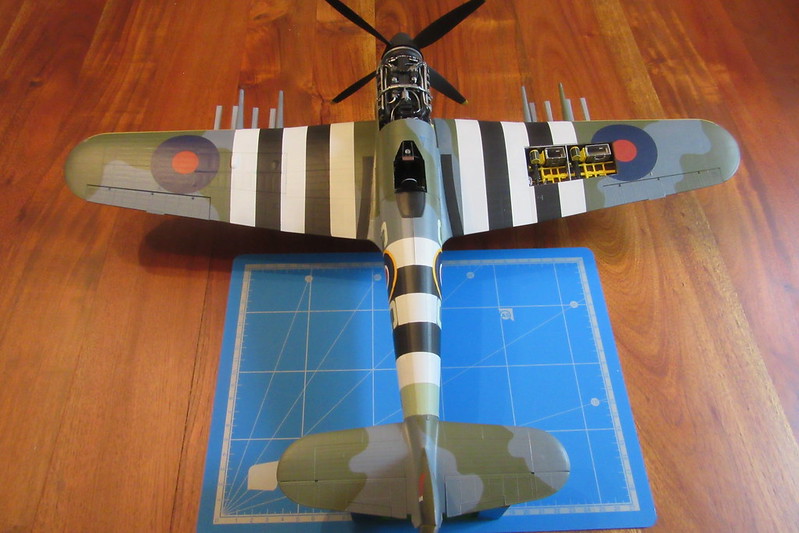
The open starboard gun bay covers in place and the canopy, sitting in place, unglued, before a final polish up.

I spy, just about, an undercarriage and some underwing rockets - painted as called out by Airfix, though I'm not so sure...
Who's your little friend? Why it's a 1/48 scale (Eduard) Fokker Dr.I, the only thing I had to hand to give a sense of the size of the mighty 1/24 scale Typhoon.

The exhausts are there.
And it also comes with wheels. The rockets are primed (?) with their little pigtails. One thing to note is that the excellent Airfix painting guidance makes it clear that on this particular aircraft the ground crew somehow painted the invasion stripes on the undercarriage doors in such a way that, when retracted, they did not match up at all with the stripes on the wings.
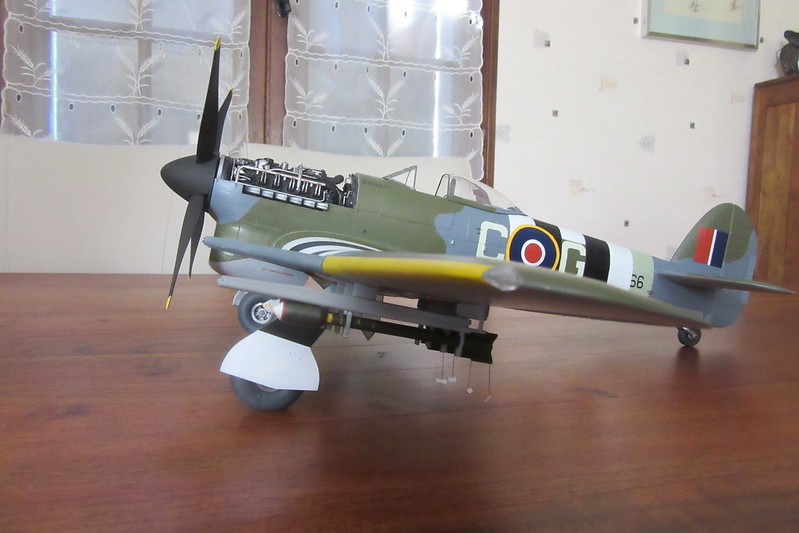
Pretty much ready for take-off. Oh apart from a pilot!
Thanks for indulging me in this build. This Typhoon was just the tonic I needed and I will return to 1/48 now, rigging, and that gorgeous Copper State Caudron. But as an aside, the fact that one retailer is offering the 1/24 Mosquito at half price has not gone unnoticed. Thanks for the heads up on that, Sandy.
Best wishes
Nigel

