Author Topic: Nieuport 17 - Back on the bench  (Read 7050 times)

Offline pepperman42

  • Hero Member
  • *****
  • Posts: 4437
  • Sergeant, my brown pants.......
Re: Nieuport 17 - Back on the bench
« Reply #15 on: April 05, 2017, 10:34:34 AM »
They look like they worked out great!!

Steve

Offline Radarman

  • Hero Member
  • *****
  • Posts: 688
Re: Nieuport 17 - Back on the bench
« Reply #16 on: April 05, 2017, 01:41:50 PM »
Okay, I have applied the logos to my prop. I had to overlay one over another to
get enough colour to show through.The golds are too faint and the red blends in
with the prop.


I suppose the logos faded anyway. Thanks for the kind remarks,
                                                                                              Kevin
We are all victims of history!

Offline RLWP

  • Hero Member
  • *****
  • Posts: 1494
  • Bodger
Re: Nieuport 17 - Back on the bench
« Reply #17 on: April 06, 2017, 08:33:09 AM »
Okay, I have applied the logos to my prop. I had to overlay one over another to
get enough colour to show through.The golds are too faint and the red blends in
with the prop.


I suppose the logos faded anyway. Thanks for the kind remarks,
                                                                                              Kevin

I would say that is a good result. For me, the logos on props are usually something I have to look for, not something that shouts 'look at me!'

Richard
Hendon for flying - the fastest way to the ground!

Offline Radarman

  • Hero Member
  • *****
  • Posts: 688
Re: Nieuport 17 - Back on the bench
« Reply #18 on: April 09, 2017, 07:06:31 AM »
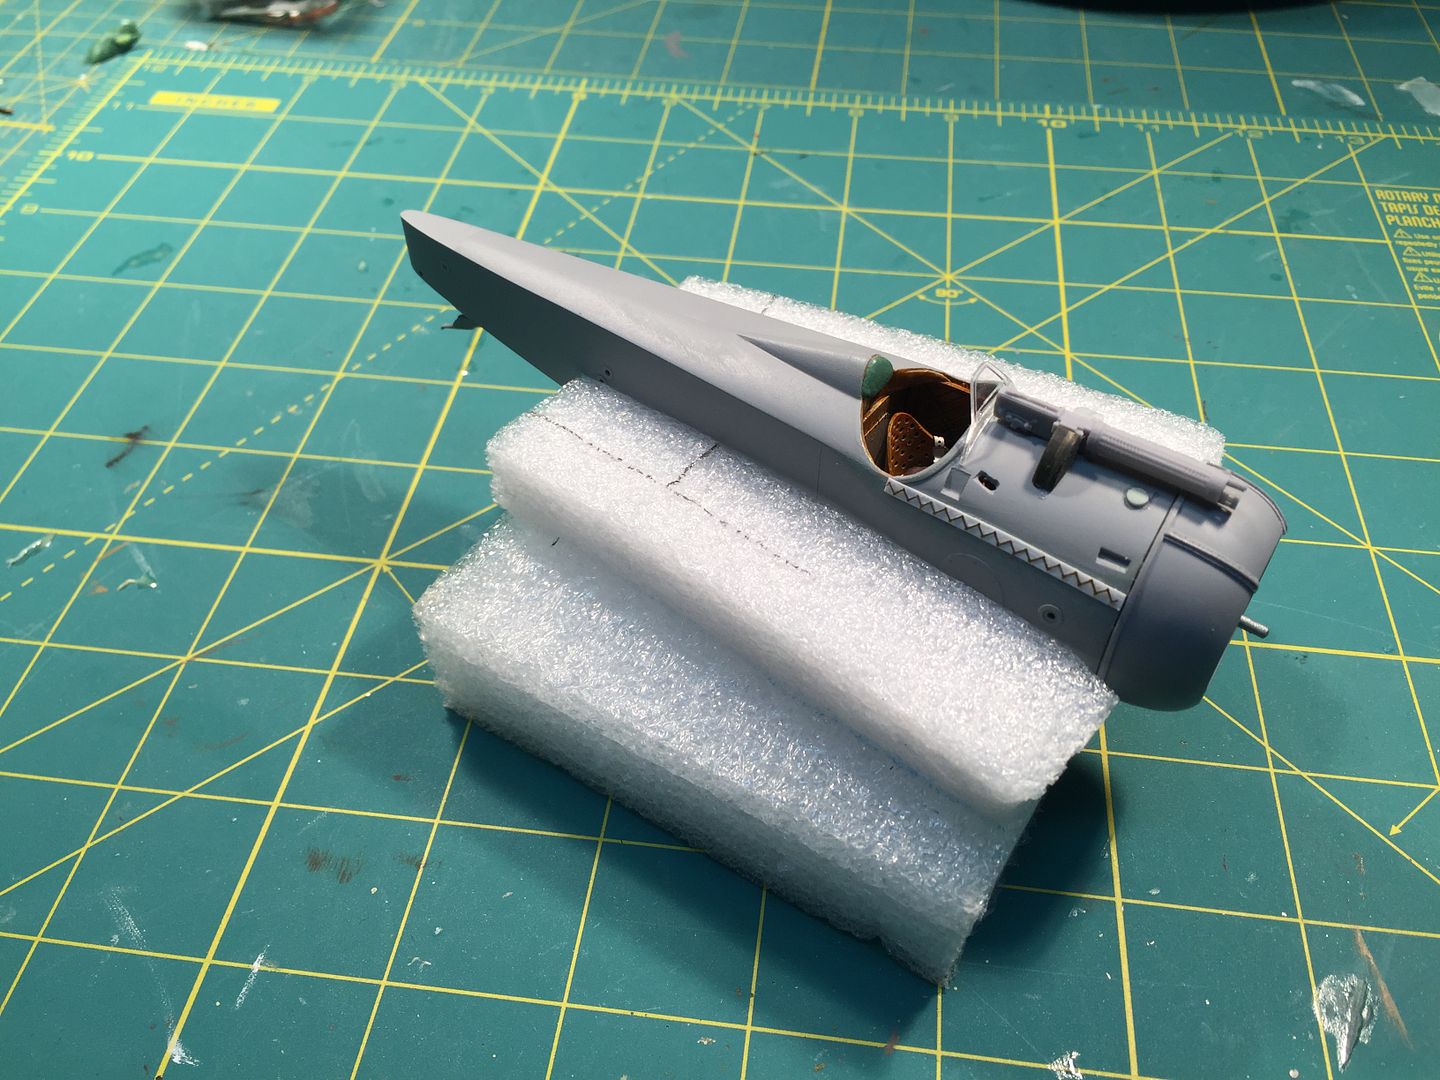
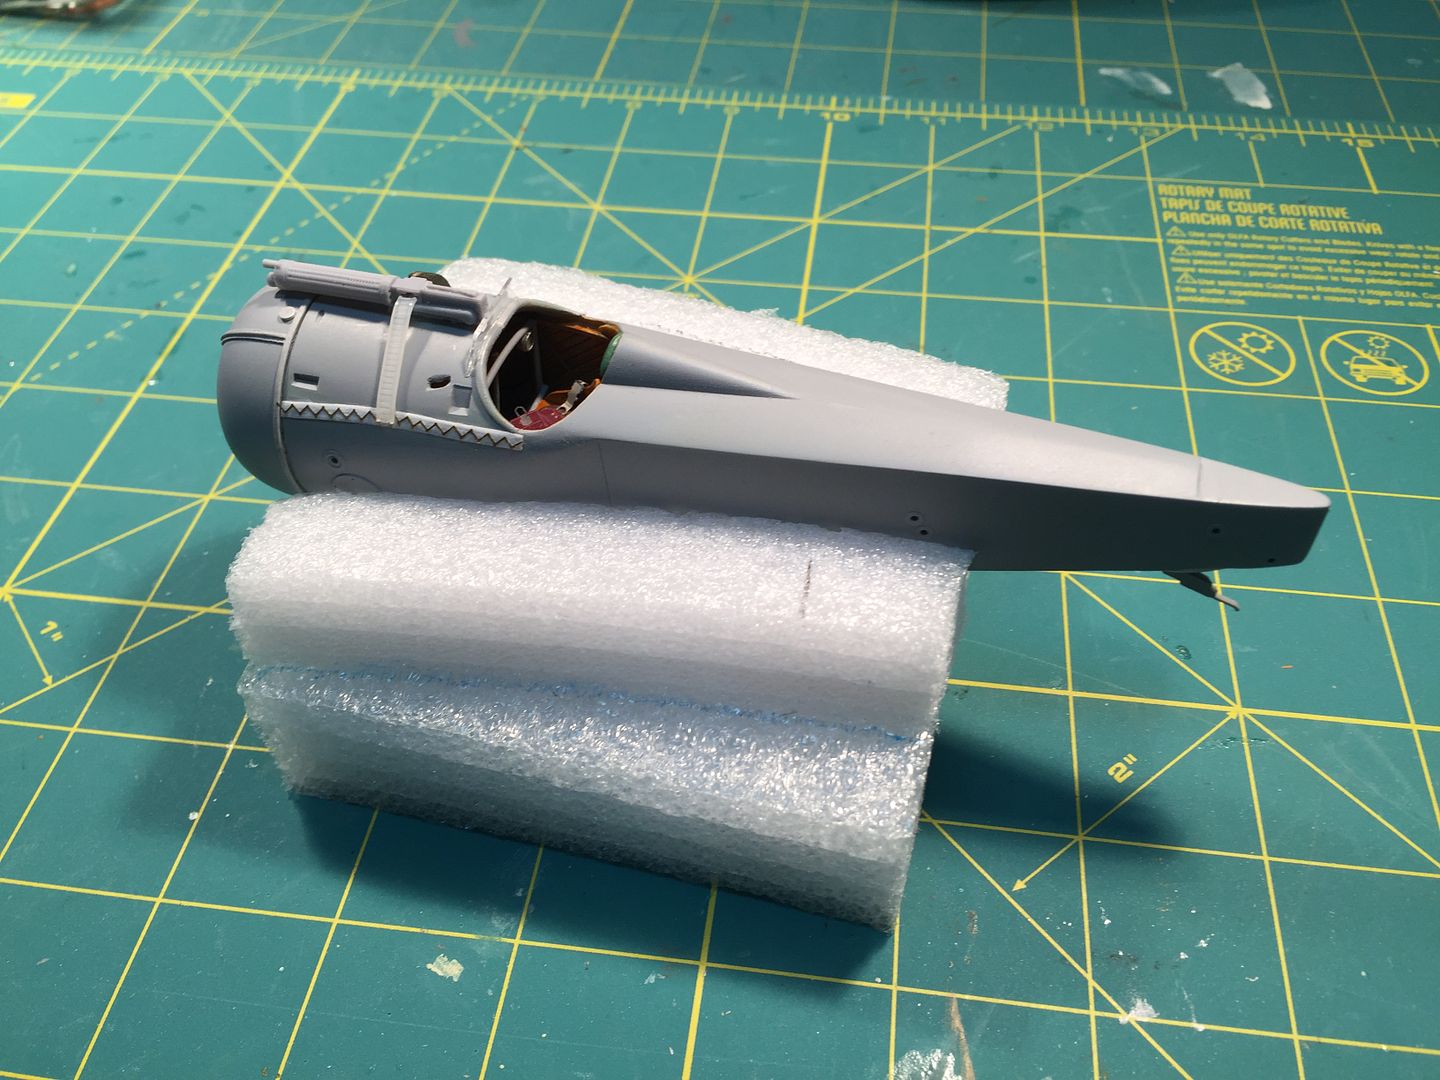
Hello everyone. I've been doing a bit of work on the fuselage and the Vickers Gun installation.
I've used Tom's Modelworks Fotoetch for the stitching and have temporarily attached the engine,
cowling, and windscreen to aid in alignment. For this I like to use Microscale Micro Liquitape.


I'm using a Gas Patch French Modified Vickers. The kit ammo feed and belt track were not very
realistic so I made new ones from scrap plastic and a very small cable tie.


                                                                                That's it for now, Kevin
We are all victims of history!

Offline jean-chris

  • Newbie
  • *
  • Posts: 7
Re: Nieuport 17 - Back on the bench
« Reply #19 on: April 09, 2017, 07:01:52 PM »
Very nice .
Good luck for your build .

Offline RLWP

  • Hero Member
  • *****
  • Posts: 1494
  • Bodger
Re: Nieuport 17 - Back on the bench
« Reply #20 on: April 10, 2017, 08:26:01 AM »
What are you representing with the cable tie?

Richard
Hendon for flying - the fastest way to the ground!

Offline Radarman

  • Hero Member
  • *****
  • Posts: 688
Re: Nieuport 17 - Back on the bench
« Reply #21 on: April 10, 2017, 10:39:34 AM »
What are you representing with the cable tie?

Richard

Richard,
On the Nieuport 17 armed with the Vickers Gun the ammo was fed via a canvas belt from the right side
and the empty belt was fed to a spring loaded spool out the left side. The cable tie represents the track
that the belt ran through to enter the left side of the fuselage. The kit part was a strait ramp where in real
life there were two bends in the track.

                        Thanks for the question, Kevin
We are all victims of history!

Offline RLWP

  • Hero Member
  • *****
  • Posts: 1494
  • Bodger
Re: Nieuport 17 - Back on the bench
« Reply #22 on: April 14, 2017, 12:11:13 AM »
Got it!:


http://www.ctie.monash.edu.au/hargrave/nieuport.html

I must admit, it isn't a material I would choose to use, cable ties seem to be made of stuff that you can't cut, stick, bend or form. Handy for lots of other things though

Richard
Hendon for flying - the fastest way to the ground!

Online RAGIII

  • Hero Member
  • *****
  • Posts: 18851
Re: Nieuport 17 - Back on the bench
« Reply #23 on: April 15, 2017, 03:13:17 AM »
Your work on the fuselage is really outstanding. You are inspiring me to take a look at my kits!
RAGIII
"A man has to know his limitations": Harry Callahan

"Don't slop it on" Lynda Geisler

Offline Radarman

  • Hero Member
  • *****
  • Posts: 688
Re: Nieuport 17 - Back on the bench
« Reply #24 on: May 01, 2017, 05:05:38 AM »
Hello everyone. I've made a little bit of progress on my Nieuport.

After reshaping and adding a bit of detail to the undercarriage, I've assembled
it and added the Sandows using soft beading wire. I've also attached the wheels
I cast in resin.


I hope to start painting and assembly of the major componants soon.

                               Thanks much, Kevin
 
We are all victims of history!

Online RAGIII

  • Hero Member
  • *****
  • Posts: 18851
Re: Nieuport 17 - Back on the bench
« Reply #25 on: May 07, 2017, 11:21:51 PM »
In a word, AWESOME!
RAGIII
"A man has to know his limitations": Harry Callahan

"Don't slop it on" Lynda Geisler

Offline Radarman

  • Hero Member
  • *****
  • Posts: 688
Re: Nieuport 17 - Back on the bench
« Reply #26 on: May 08, 2017, 03:41:33 AM »
Thanks RAGIII and everyone else out there. I've got some silver dope on the top wing and added
the internal rigging in the center section.


Next, I'll decal the the wing and ailerons and then attach something clear over the center skylight. I must say, the wing is
very delicate and I hope and pray I don't break it in half.

                                                         Thanks again, Kevin
We are all victims of history!

Offline RLWP

  • Hero Member
  • *****
  • Posts: 1494
  • Bodger
Re: Nieuport 17 - Back on the bench
« Reply #27 on: May 08, 2017, 04:02:43 AM »
Hey, woah now - wait up a minute!

How did you do that centre section? It's something I have been thinking about for a Nieuport 17 I have in my stash. Have you any more details?

Richard
Hendon for flying - the fastest way to the ground!

Offline Radarman

  • Hero Member
  • *****
  • Posts: 688
Re: Nieuport 17 - Back on the bench
« Reply #28 on: May 08, 2017, 04:37:39 AM »
Hey, woah now - wait up a minute!

How did you do that centre section? It's something I have been thinking about for a Nieuport 17 I have in my stash. Have you any more details?

Richard

Hi Richard,
I measured and drilled the four corners then cautiously cut with a micro saw. I cleaned it up with
sanding sticks. The inner framework was made with Evergreen Strip and the rigging with music wire.
Here is a photo from back when i first started this build.


I've kept this wing taped to a strip of bass wood to keep from breaking it. Once it's attached to the cabane and vee struts the problem should
be solved.

                            Thanks, Kevin
We are all victims of history!

Offline RLWP

  • Hero Member
  • *****
  • Posts: 1494
  • Bodger
Re: Nieuport 17 - Back on the bench
« Reply #29 on: May 08, 2017, 05:01:46 AM »
That's one of the two methods I had been pondering. The other is to chop the whole section out, then replace it with a new built up part with steel rods passing through the spars and into the remaining wing

Yours looks really good Kevin

Richard
Hendon for flying - the fastest way to the ground!