Author Topic: Another double build: Sopwith Pup (HR Models) and Triplane (Revell), 1:72  (Read 23985 times)

Offline IanB

  • Hero Member
  • *****
  • Posts: 2441
This is more of a notice of intention at the moment, as I want to finish the Muromets before getting involved in anything else.
  I have decided on my next build, and as I have also decided to repaint the roundals on the Muromets, I want something to do while waiting for the previous colour to dry enough to be masked. A little reasearch and parts clean up fits the bill, so here is what I'm starting with.

The HR Models Pup is a really nice kit. The detail is well moulded and crisp. The decals let it down a little as the blue is far too light, but that's easily remedied. So here are the standard sprue shots.....


 I think most 1:72 scale modellers are familiar with Revell's Triplane. My kit has new decals which are very nicely done, but the kit does need some work.....


 The fuselage will be reskinned on the cockpit sides and on the rear decking to give a better rendition of the ribbing under the fabric. I will be using an Aeroclub engine (if it fits!), prop and Vickers gun, and either my own 3d printed wheels or the spare set from the Pup kit, I haven't looked closely at them yet to see if they will work. The cowling will also need some work to open up the vents and add a little more depth to it, and the struts may be modified and used, or scratchbuilt...again I need to look a little closer at what I have. The tail surfaces will probably be scratchbuilt, the undercarriage definitely will be! And then there are the ejector pin marks....

See you soon!

Ian
« Last Edit: March 30, 2017, 10:42:31 AM by IanB »

Offline Des

  • Administrator
  • Hero Member
  • ******
  • Posts: 9325
    • ww1aircraftmodels.com
Very nice Ian, looking forward to you making a start on these two kits.

Des.
Late Founder of ww1aircraftmodels.com and forum.ww1aircraftmodels.com

Offline steveb

  • Full Member
  • ***
  • Posts: 237
Very cool start! That HR Pup looks to be a kit with a few options, right? I never knew about it, thanks for the heads up.

Steve

Offline RAGIII

  • Hero Member
  • *****
  • Posts: 18846
As always I will follow your build with great interest...and anticipation!
RAGIII
"A man has to know his limitations": Harry Callahan

"Don't slop it on" Lynda Geisler

Online Juan

  • Hero Member
  • *****
  • Posts: 2457
  • All gave some, some gave all.
Looking forward to your progress Ian.

Offline IanB

  • Hero Member
  • *****
  • Posts: 2441
Very cool start! That HR Pup looks to be a kit with a few options, right? I never knew about it, thanks for the heads up.

Steve

It's been out for a while now, Steve, but they sold out very quickly! I think Hannants still has a couple of versions in stock, but there were a few more options available that are hard to find - the Aces boxing was one, a Japanese one, and an RNAS one which I have.

Ian

Offline Borsos

  • Hero Member
  • *****
  • Posts: 3324
Looks like another very interesting double from your bench. I'll follow that closely. Me too, I never heard before of the HR injected Pup. It looks very nice and as if the old Airfix Pup has its predecessor.
Borsos
"Deux armées aux prises, c'est une grande armée qui se suicide."
Barbusse.
"Ein Berg in Deutschland kann doch einen Berg in Frankreich nicht beleidigen. Oder ein Fluß oder ein Wald oder ein Weizenfeld."
Remarque.

Offline lone modeller

  • Hero Member
  • *****
  • Posts: 5322
Good to see another project on the stocks Ian. An interesting pair which I think are about to be greatly improved.

Stephen.

Offline IanB

  • Hero Member
  • *****
  • Posts: 2441
Thanks for the interest everyone! I did the last of the painting on the Muromets national insignia this afternoon so that left me to start looking at the Triplane a little more closely....

After cleaning up the flash, the first thing I noticed was that there was very pronounced rib detail on the UNDERSIDE of the wings! So that was the first job - to remove it all!

Here's one of the centre wings done, and the second one waiting for attention.........


 There were also a lot of sink marks/ejector pin marks on the wings, so these were then either sanded off or filled accordingly.

 I then looked at the fuselage, and the first thing I noticed was the cockpit.


The front was too far back by about 3mm and the rear by about 1mm. I marked out where the front should be and filed/sanded it out..


It's difficult to get the correct perspective on both the front and rear with my camera, but this is close.


So after a few hours fiddling about today, this is what I achieved:


 A fair improvement to be getting on with, more to come soon!

Ian

Offline RAGIII

  • Hero Member
  • *****
  • Posts: 18846
Outstanding work on the wings and fuselage/cockpit opening! You have made your usual outstanding start to this project!!
RAGIII
"A man has to know his limitations": Harry Callahan

"Don't slop it on" Lynda Geisler

Offline IanB

  • Hero Member
  • *****
  • Posts: 2441
I got a little carried away on the Triplane today, after sorting out the Muromets roundels!

First I looked at the struts - I removed the lumps on the sides for locating the wings, and sanded them to a more aerodynamic shape (more aerodynamic than the plank shape they were moulded in at least!). I then added a piece of .015"x.030" strip to the edges of the middle wings, as the struts should pass through the wing, not butt up against it.


The remainder of the gap will be filled with PPP once the wings are mounted on the struts. I may even do that before mounting the wings, we'll see.... The cut outs at the rear of the middle wings were also enlarged by sanding them out to the second rib. The kit, for some reason, has the cutouts end somewhere between the first and second ribs!

 My thoughts then turned to the interior, and since I want to add a reasonable amount of detail, I wanted to make sure I could do that without any problems from the lower wing. I therefore taped the fuselage together, then taped the lower wing in place to see how much, if any, of the wing edges might need to be removed to ensure that the cockpit framing would not stop me adding the wing later! I stuck a pencil in through the cockpit and marked the inner wing edges so that I could sand them off to be level with the fuselage sides..


Not too bad, but a little sanding needed!
 Once that was taken care of I added the basic framework with .020"x.020" rod and measured up for the false floor using dividers. This will hide the edges of the lower wing fitment and enable the cockpit to be built in situ before closing up the fuselage. The framework so far is just top and bottom longerons, and the 3 vertical formers each side in the cockpit area, care being taken of course to ensure that both sides matched!


The floor was then cut from .010" sheet and glued in place....


A perfect fit!

 The formers were then added on the floor to match the side ones, and the cockpit sidewall framework was added using .010" rod for the longitudinal ones, and .010"x.030" strip for the vertical ones. I added the horizontal ones first, then when dry, I used a scalpel blade to cut slots for the vertical formers to fit into. This worked fine on one side, but on the side I'd added the floor it was virtually impossible. If you use this method, do the sidewalls before adding the floor!


 I haven't added the foremost vertical former as it won't be visible, and I'd had enough by then anyway!


Ian
« Last Edit: April 01, 2017, 11:59:12 AM by IanB »

Offline RAGIII

  • Hero Member
  • *****
  • Posts: 18846
Your usual excellent added details, and as always in record time!
RAGIII
"A man has to know his limitations": Harry Callahan

"Don't slop it on" Lynda Geisler

Offline pepperman42

  • Hero Member
  • *****
  • Posts: 4437
  • Sergeant, my brown pants.......
Nice start!!!

Steve

Offline Monty

  • Hero Member
  • *****
  • Posts: 1643
That is a great start on a really difficult kit, Ian! It needs lots of work but you have achieved miracles so far! Regards, Marc

Offline IanB

  • Hero Member
  • *****
  • Posts: 2441
Thanks to Rick, Steve, and Marc for the comments. The Revell kit is a reasonable representation, but as you say Marc, it needs a lot of work to really make it accurate - it's a good starting point though!

 I reached the point yesterday where I was ready to spray the interior of the Triplane, so today I dug out the Pup and sprayed them both together.


Ready for a start on painting the wood frames now, then I will be able to add the lower part of the struts on the Triplane, and the rest of the interior detail on both of them.

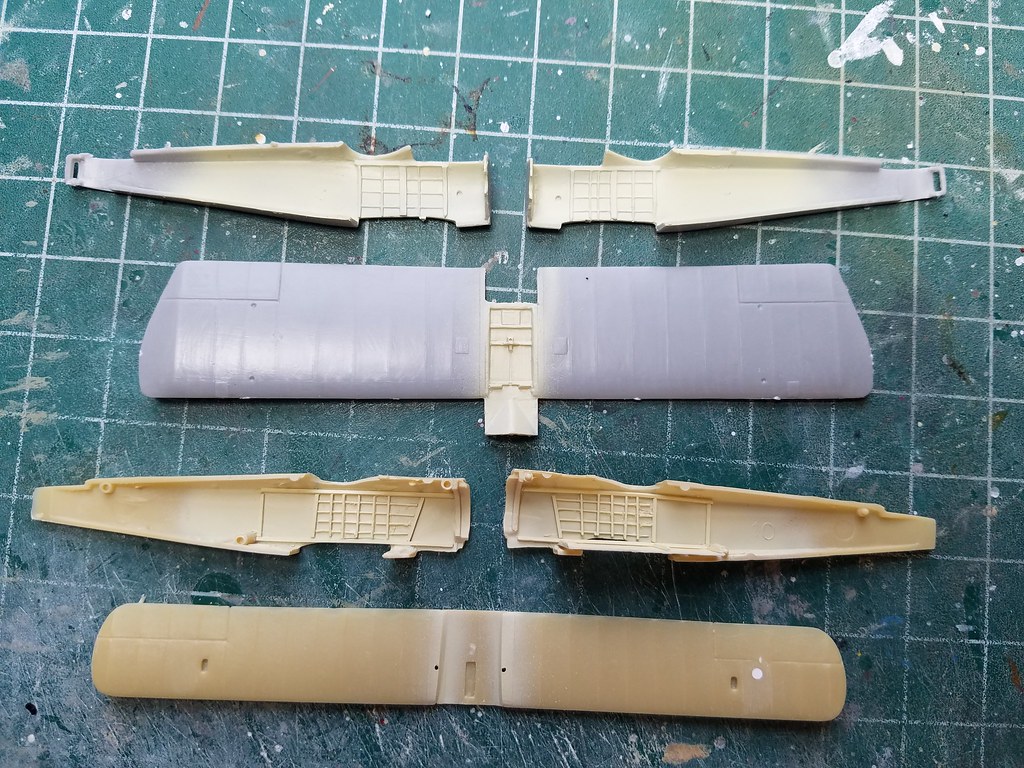
 Since the Pup was now out of its box, i clipped all the main parts off and did a dry run to see how everything fitted together It's really not bad at all, especially for a short run kit! There are a couple of small areas which need attention though....

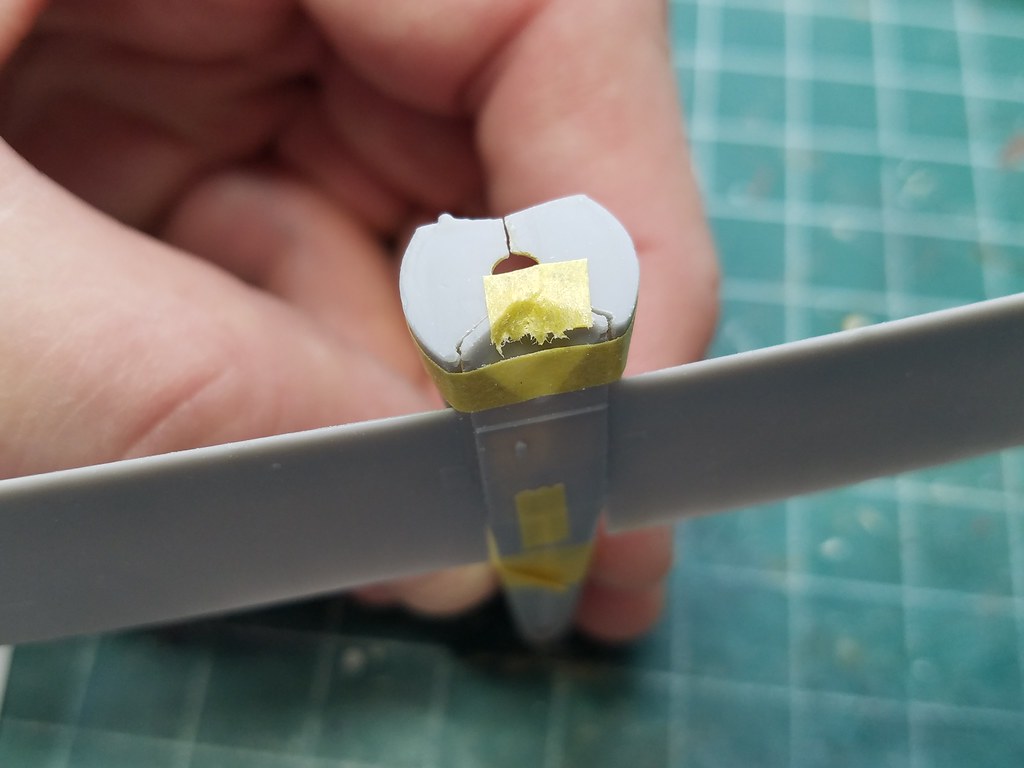
The fit of the lower wing is a little tight, so I had to carefully file out the gap between the wings to get them to fit over the fuselage, and also square off the rear part of the opening in the fuselage.


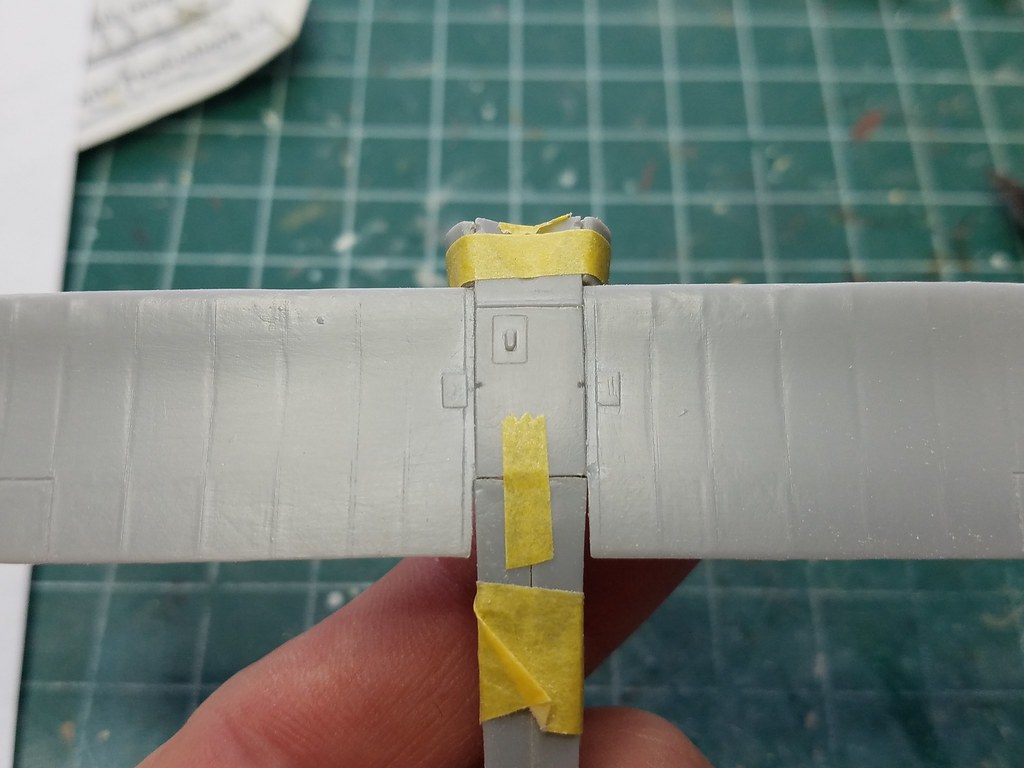
Note too, that the front part of the wing is the lower drip channel under the engine, and this part fits between the fuselage sides, so the bottom edge of the firewall needs to be filed to give a nice square,close, fit.


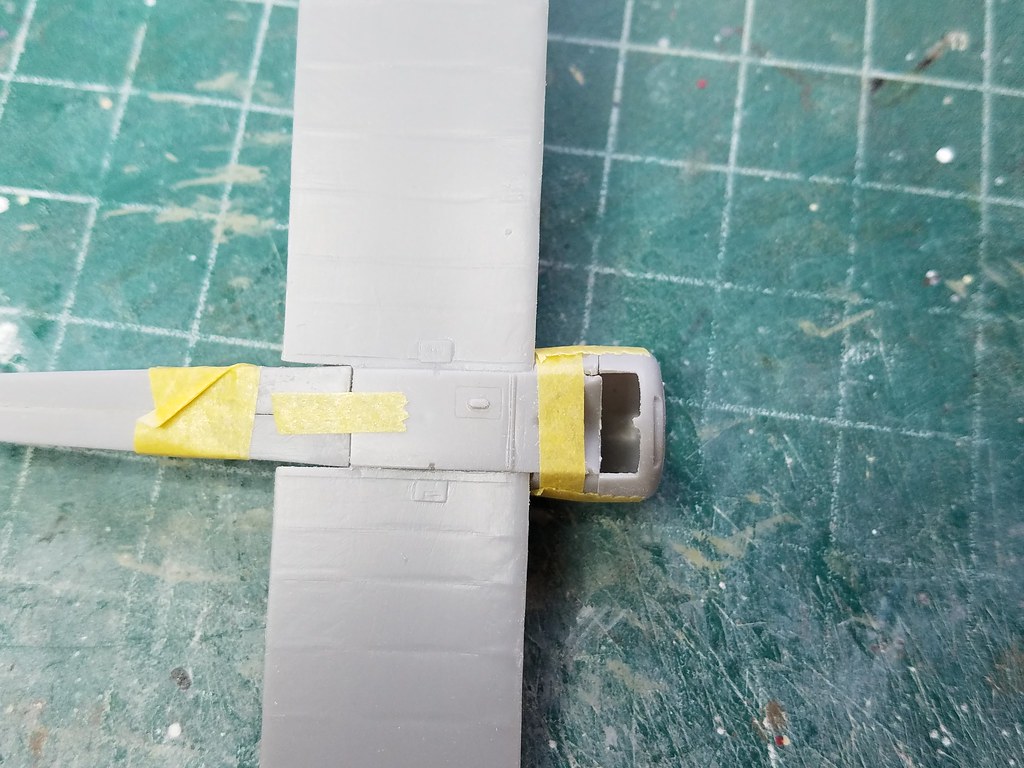
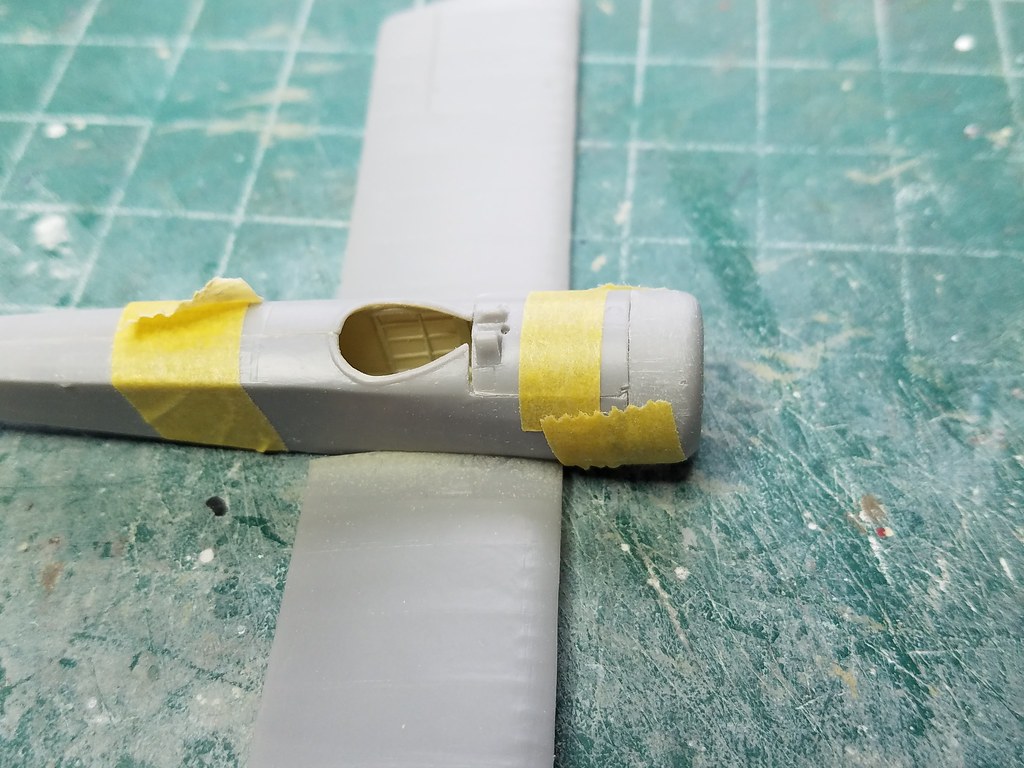
 The other part that needed a little attention was the upper front fuselage panel. Two are provided in the kit, one for an armed, and one for an unarmed, version. Place this part on a flat sanding stick and gently sand the mating surfaces to give a flush fit on top of the fuselage halves - particularly at the rear end, where it meets the front of the cockpit.

 This is what I ended up with after that little session..


 There are also 3 cowlings in the kit: Sopwith, Standard, and Whitehead, along with 2 sets of wheels, one showing the spoke pattern through the fabric, and one not, so even if you can't find the specific kit you want to build the version you desire, you should be able to build it from any kit and just source decals from elsewhere.

 The wing tips need a little attention and reshaping, but nothing major. They are also a fraction too long, but I'm not going to bother with that.

 Back to the painting!

Ian