Author Topic: Another double build: Sopwith Pup (HR Models) and Triplane (Revell), 1:72  (Read 23989 times)

Offline lone modeller

  • Hero Member
  • *****
  • Posts: 5322
My you move quickly Ian. Two kits on the go here and the Muromets still not finished! How do you keep all of these balls in the air? I would forget what to do next!!

Stephen.

Offline IanB

  • Hero Member
  • *****
  • Posts: 2441
Thanks Stephen, I need a little change of focus during a big build, to stop it getting monotonous, so this is serving that purpose! The plan is to finish the interiors, button them up and then get back to the Muromets.

 A fair bit of progress has been made to that end, especially on the Triplane. The interior paintwork is done, and I made up the seat supports and foot boards, painted, and added those. The seats for both are Barracuda resin, with Eduard PE belts. I have also made an instrument panel, easily done as it's almost identical in size to the one in the Pup kit, and the small wooden panels behind the cockpits on both.


and the Pup....


 Tomorrow I hope to get the controls in and then I can button them up!

Thanks for looking in!

Ian

Offline malaula

  • Sr. Member
  • ****
  • Posts: 267
Nice! Are those seats still available?I always thought Barracuda only do 32nd scale stuff...

Offline pepperman42

  • Hero Member
  • *****
  • Posts: 4437
  • Sergeant, my brown pants.......
Great work!! Nice tones on the interior.

Steve

Offline IanB

  • Hero Member
  • *****
  • Posts: 2441
Nice! Are those seats still available?I always thought Barracuda only do 32nd scale stuff...

 Yes, they are. They do 2 different sets of seats, this style and one with the open back and lacing. They also do Albatros wheels in 1:72. I use them a lot, they are very well moulded!

 Thanks Steve!

 I did take some pics of the interior after fitting the control column and rudder pedals, but my phone seems to have eaten them....not the first time pics have disappeared! Anyway, the fuselages are now closed up!


 The Triplane cockpit opening was then adjusted by carefully adding a little Mr Dissolved Putty around the rear edge with a small brush, to bring it forward, and the rest of the leather combing was added in the same way.


 The underside of the nose also needed some attention...this is as it comes, but the recess needs to extend to each side, so that was opened out with a file.


 It is also a TERRIBLE fit, and will need some major fettling and filling to get it looking good...oh joy!

 Finally today, I looked at the cowling. It will need the vents drilled out, but my first job was to narrow the frontal opening as it is too wide. Opening a cowling up is not too bad, but narrowing it?


 I decided to cut a small circle with my circle cutter - here's a tip - rotate the cutter backwards! If you try to cut a small circle by rotating the blade in the correct direction, the blade pushes outwards and the radius is always too big! Do it backwards and scribe the circle rather than cutting it. (I won't say how long it took to figure that out....) Finally I managed to get a disc of around 10mm inner diameter and just under 1mm thick, which I placed into the cowling front, then glued with PlasticWeld.....


 1mm doesn't sound much, but it makes a huge difference! A little Mr Dissolved Putty and the next step will be marking and drilling the slots for cooling......

Thanks for looking in!

Ian

Offline steveb

  • Full Member
  • ***
  • Posts: 237
Very cool! It's taking shape for sure!

Stwvw

Offline Borsos

  • Hero Member
  • *****
  • Posts: 3324
Really great, Ian, I love your builds. You show what can be done with those old kits in 1/72. I am keen on seeing both of these Sopwiths together.
Borsos
"Deux armées aux prises, c'est une grande armée qui se suicide."
Barbusse.
"Ein Berg in Deutschland kann doch einen Berg in Frankreich nicht beleidigen. Oder ein Fluß oder ein Wald oder ein Weizenfeld."
Remarque.

Offline IanB

  • Hero Member
  • *****
  • Posts: 2441
Thanks Steve, Borsos!

 Did I mention that the nose and under cowl was a bad fit?


 Not even close! So out with the .020" card. I added 2 pieces each side to level the bottom, then one more each side to reprofile the drip channel. I also added one of my rejects from yesterday's cowling work to clean up the firewall face....


 Some PPP and sanding, and we have a much more acceptable front end...


 Much better, I'm happy with that!

 I also tidied up the top of the cowling area which was pretty poor. More PPP to fill the sink marks and get rid of the slight dip which was visible in the profile view, and I think the nose is about right! Some minor details to take care of such as the carb air intakes and rescribing the access panels, but mostly done in that area now.


Thanks for looking in!

Ian


Offline pepperman42

  • Hero Member
  • *****
  • Posts: 4437
  • Sergeant, my brown pants.......
Some great corrections there!!

Steve

Offline IanB

  • Hero Member
  • *****
  • Posts: 2441
Thanks Steve, more to come, hopefully!

 The next step with the Triplane was to reskin the cockpit sides and turtle deck To do this, I stuck a piece of masking tape on the area I was working on and cut it to size. That was then stuck on a sheet of .005" card and cut out. The ribs/longerons were marked onto the back side with a ballpoint pen, with enough pressure to leave a mark on the outside face.


 It worked out ok for the Pup and the cockpit sides, but the rear decking on the Triplane was not the best....


 I really wasn't happy with the Triplane decking so off it came. I then realised that the rear of the fuselage was too narrow, so added some pieces of .010" card to the sides to thicken it.


A little filler, some sanding, a little more filler, a little more sanding etc, etc, and the fuselage was thick enough and ready for reskinning..


 Two more attempts were made at the rear decking before I was happy with it, and then I applied another coat of white to see what else might need attention....


 There are still some small areas which need a little more filler and sanding, but I'm happy with the overall result, and after taking care of those tomorrow I can move on!

Thanks for looking in!

Ian

Offline ALBATROS1234

  • Hero Member
  • *****
  • Posts: 2657
Fantaastic start ian this will be another interesting dual build to follow.

Offline IanB

  • Hero Member
  • *****
  • Posts: 2441
Thanks Alby!

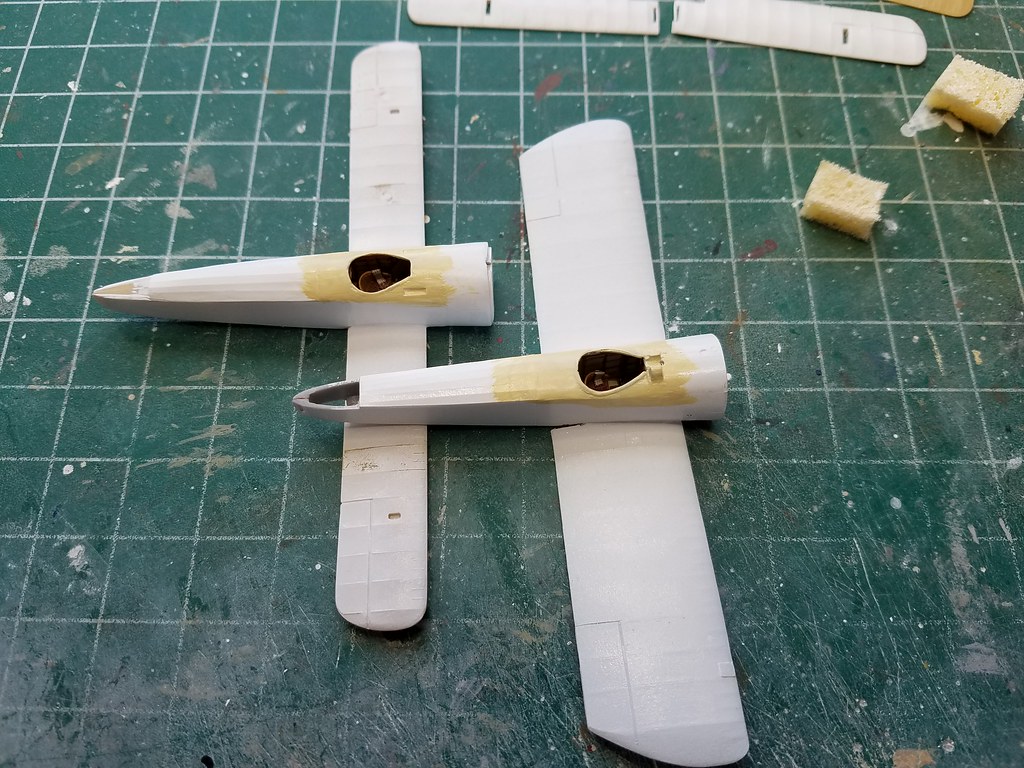
 I have been distracted by the garden these last few days, getting to that time of year again, thankfully! However, I do now have the "wood" done on the cockpit decking For those looking for ideas on how to do it, here is how I do it for small areas such as these.

 First, a coat of CDL, or any other light beige colour... (I used Misterkit Acrylic RFC CDL)


The second step involves the following: acrylic "leather", thinner, and a wide brush..


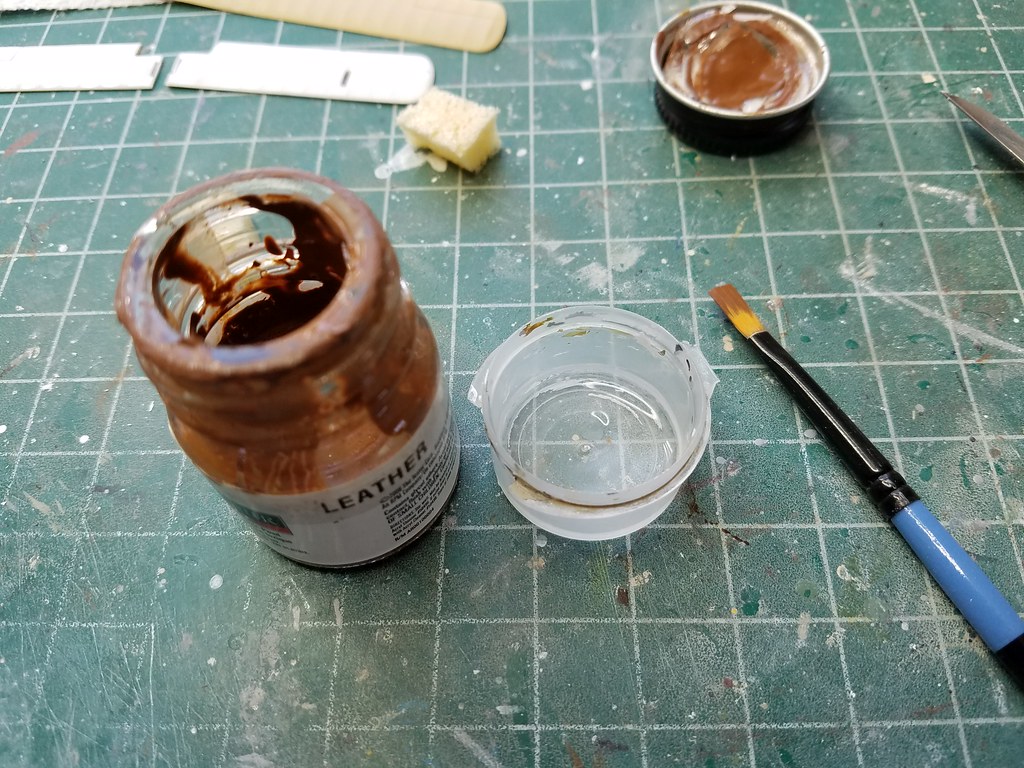
I dip the brush in the thinner, then the paint, and use a piece of scrap plastic to test it on to see that it's not too thin and covers as I want it If it's too thin it will pool on highlights and run around corners on props or struts leaving dark blobs....too thick and it won't be translucent enough to give the right effect - just a matter of practice (and it took me 3 efforts to get this acceptable on these!) The trick is to do very thin coats and add more if necessary, advice I often find hard to follow myself! Don't try to work the paint as you would oils, it will cause dark streaks and/or remove too much paint leaving dark streaks and bare patches. Just make one, even, pass of the brush from one end to the other.


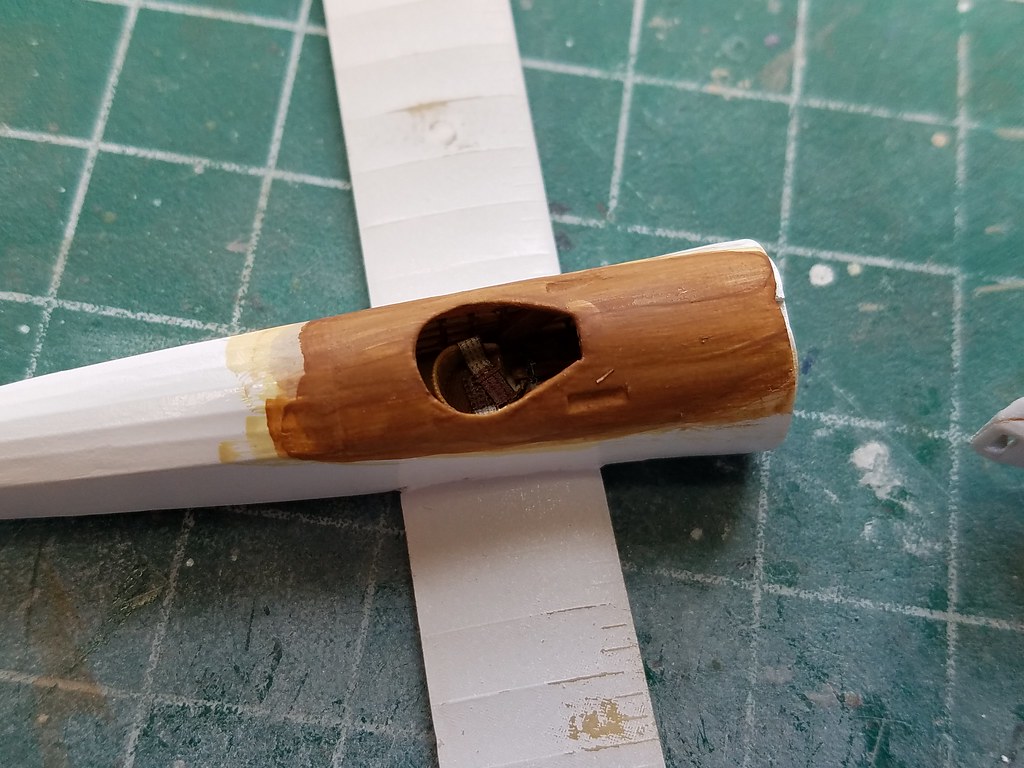
 It's still a little darker than I would like but it's acceptable.

 Stage 3...


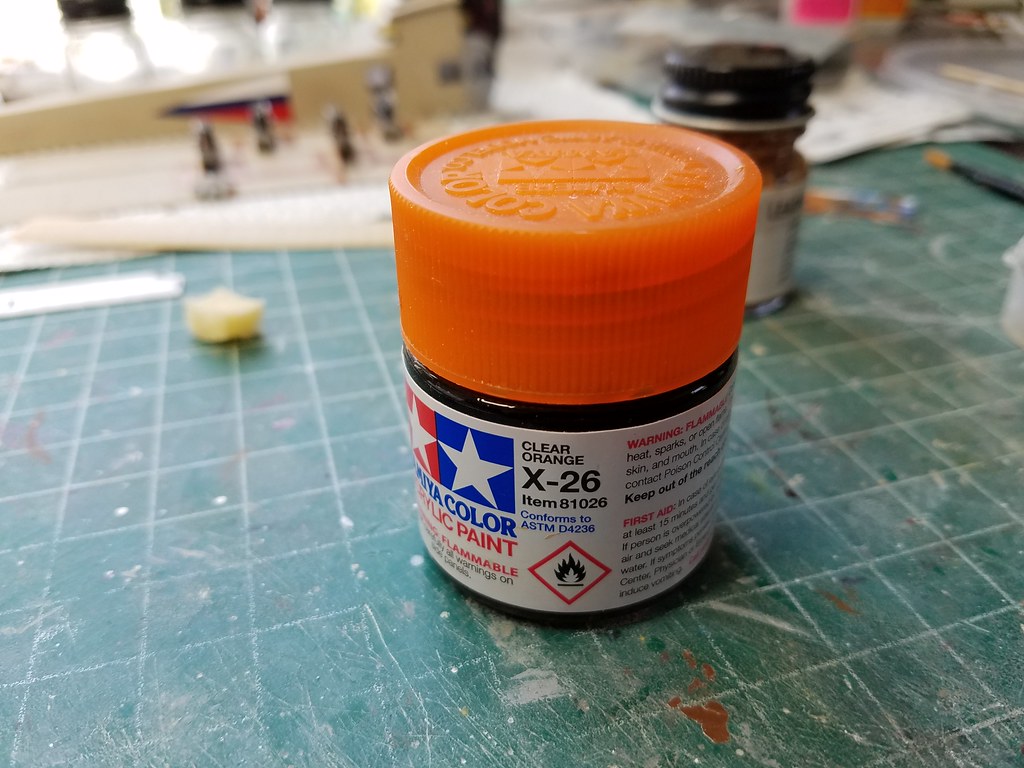
 Again, apply with thinner on the brush first and don't add too much...and you should end up with a reasonable (in 1:72) wood effect


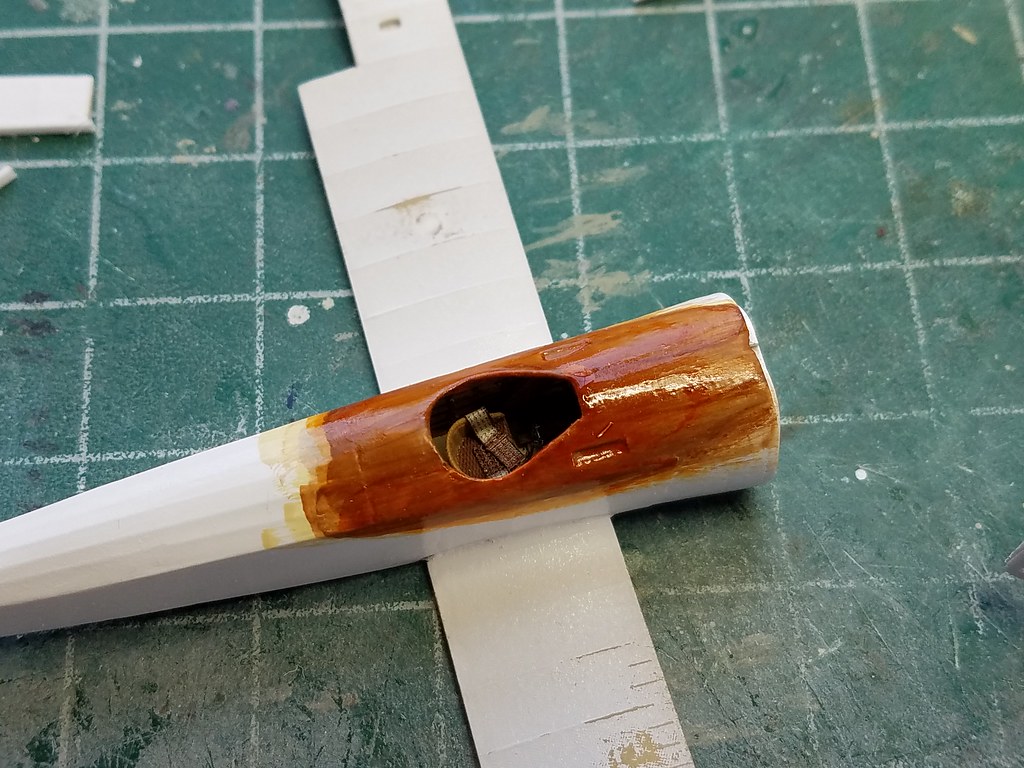
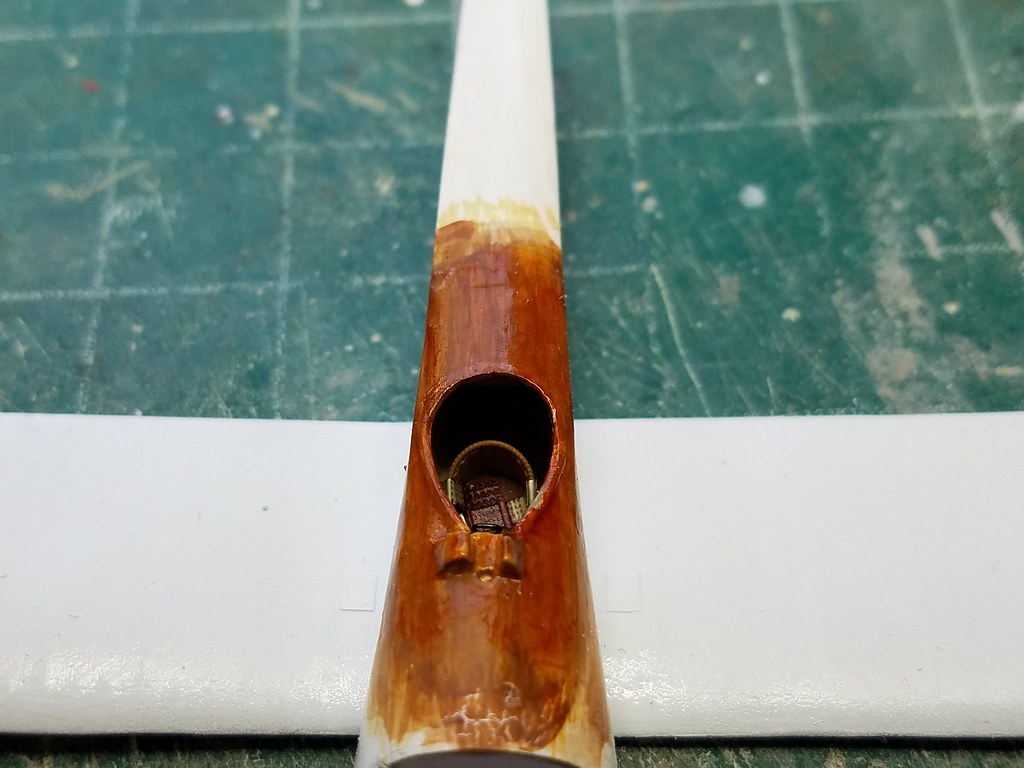
 Once it's tidied up around the edges by the surrounding colours that should look ok.

 In other news, I have removed the ailerons (all 10 of them) and am preparing those for pinning and reattaching

Thanks for looking in!

Ian

PS does anyone know why some of my pics are now coming out bigger? They are all the same size on the other forum I post on, and the settings are the same for all of them. It only started doing this recently and I would like to stop it if I can!

Offline lone modeller

  • Hero Member
  • *****
  • Posts: 5322
Can't help with the pictures Ian but I can write that the wood effect looks very good. You are extremely patient to resin the turtle deck and add all of the other details - great modelling indeed.

Stephen.

Offline IanB

  • Hero Member
  • *****
  • Posts: 2441
Thanks Stephen!

 Just a little update this time around....I added .020" x .040" strip where needed on the ailerons to reshape them after removal from the wings. The Pup ones didn't need any correcting, but because of the moulded gaps on the Triplane, I had to add strip to regain the correct dimensions.

 I have also opened up the rear fuselages on both, and added .016" brass rod for the stern posts....


 Those posts will help support the fins and tail skids.

Ian

Offline TobyCoulson

  • Hero Member
  • *****
  • Posts: 610
Beautiful work Ian on a scale that I'm no longer building due to the fact you've got to be good and you most certainly are.
Ale should be drunk out of a glass. Lager should be drunk out of desperation