Author Topic: Ansaldo A.1 "Balilla" 1/32 Aviattic OOB  (Read 33941 times)

Online Juan

  • Hero Member
  • *****
  • Posts: 2457
  • All gave some, some gave all.
Re: Ansaldo A.1 "Balilla" 1/32 Aviattic OOB
« Reply #135 on: January 24, 2017, 09:25:04 PM »
Beautiful woodwork Bo.  Really like how you handled the fuselage, I would not have the guts to do that.   :D

Online RAGIII

  • Hero Member
  • *****
  • Posts: 18846
Re: Ansaldo A.1 "Balilla" 1/32 Aviattic OOB
« Reply #136 on: January 25, 2017, 12:16:39 AM »
Continuing to be n education as always Bo. As for the moldings on the block I remember when resin parts were cast on a very thin almost break away bedding. really easy to separate the parts but huge cast seems and sloppy detail. I think I like the more modern way better  8)
RAGIII
"A man has to know his limitations": Harry Callahan

"Don't slop it on" Lynda Geisler

Offline lone modeller

  • Hero Member
  • *****
  • Posts: 5322
Re: Ansaldo A.1 "Balilla" 1/32 Aviattic OOB
« Reply #137 on: January 25, 2017, 03:36:44 AM »
Blazing a trail as ever Bo - those resin parts look very small but very well cast. Ireally like your wood painting - very realistic. Did you use oils?

Stephen.

Offline uncletony

  • Hero Member
  • *****
  • Posts: 4349
    • Aircraft In Pixels
Re: Ansaldo A.1 "Balilla" 1/32 Aviattic OOB
« Reply #138 on: January 25, 2017, 01:04:08 PM »
Cheers guys! :)

Stephen -- yep, the grain is oils. Will probably add a filter layer of acrylic over it it pull it together a bit...

Tonight's mini-project was assembling the fairly complex aileron control rocker, which is mostly comprised of PE. First task was chasing the tiny holes in the triangular members, which, though etched from both sides, don't go all the way thru (at least not on my example):


Next I blackened the parts and cut them out:


I forgot to take pix mid assembly, but the central portion is held together with brass pins -- those on the ends made with .3mm brass wire, the lower, central one from .5mm brass rod.


and here is the whole thing, (temporarily) mounted to the crosspiece (the whole thing is upside-down in this photo) :

Offline gedmundson

  • Hero Member
  • *****
  • Posts: 1541
Re: Ansaldo A.1 "Balilla" 1/32 Aviattic OOB
« Reply #139 on: January 25, 2017, 01:41:31 PM »
Amazingly fine detail, Bo. Where do you get those huge novelty match sticks?  ;)
Cheers,
Gary

Offline aliluke

  • Hero Member
  • *****
  • Posts: 510
Re: Ansaldo A.1 "Balilla" 1/32 Aviattic OOB
« Reply #140 on: January 25, 2017, 04:24:37 PM »
Hi Bo
Thanks for another update.
I'd be interested in your blackening technique. I've down it a lot on ship models. I acid etch, then wash in water, then soak in Birchwood Casey Brass Black and then wash again in water. But getting it to hold on PE almost always defeated me - it would just rub off - whereas I had very good results with solid brass - cannon barrels, pins, bolts etc.

Best regards,
Alistair
It ain't a hobby if you have to hurry.

Offline uncletony

  • Hero Member
  • *****
  • Posts: 4349
    • Aircraft In Pixels
Re: Ansaldo A.1 "Balilla" 1/32 Aviattic OOB
« Reply #141 on: January 25, 2017, 10:01:58 PM »
I'd be interested in your blackening technique.

Hi Alistair -- I'm not sure what I do qualifies as much of a technique, but it seems to work to a certain extent. I simply soak the parts in lacquer thinner for a good little while to degrease them, let them dry, and then stick'em for 5 minutes in BlackenIt which I assume is more or less the same stuff you are using. I wash the parts in cold water and Dawn(tm) dish soap and let them dry overnight. The stuff does rub off a little when you handle the parts-- they are nice pure black when they come out of the soup-- but I figure it's a good base for a minimal amount of finishing paint. My goal is to coat the inside edges etc without gumming the whole thing up with paint, and to that end, at least, it seems to work pretty welll...

Offline uncletony

  • Hero Member
  • *****
  • Posts: 4349
    • Aircraft In Pixels
Re: Ansaldo A.1 "Balilla" 1/32 Aviattic OOB
« Reply #142 on: January 27, 2017, 07:36:24 AM »
Assembling the control column (and rudder bar)

Next pile of parts. 0.8mm x 22mm brass rod is suggested replacement for kit resin part -- but -- there really isn't any strain on this part when installed, so it's up to the modeler...
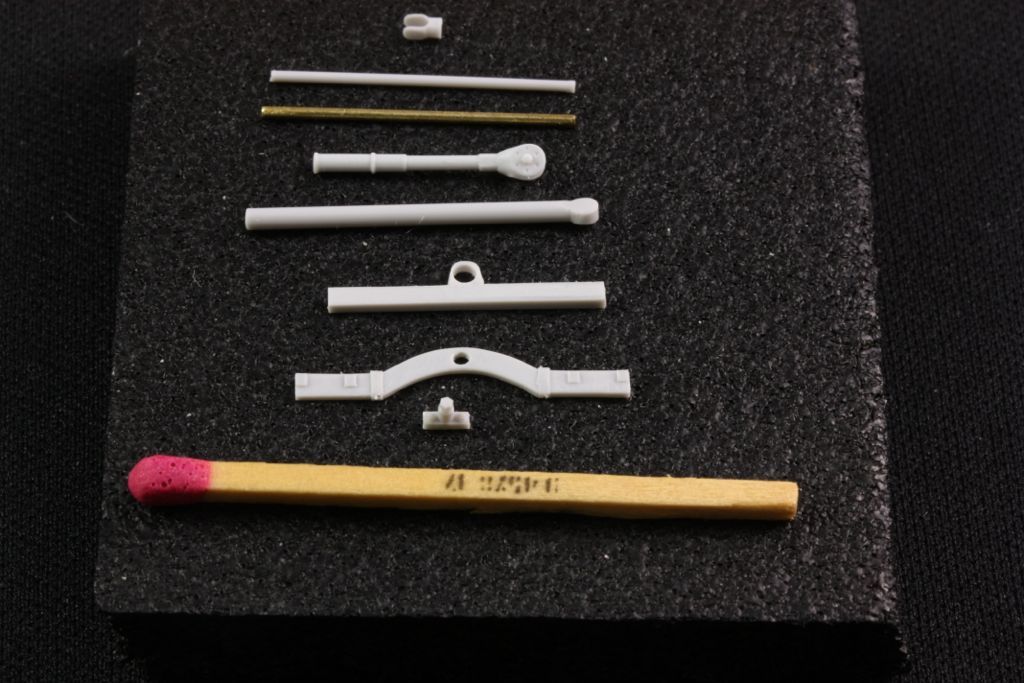


Rudder bar needs .3mm holes for eyelets:

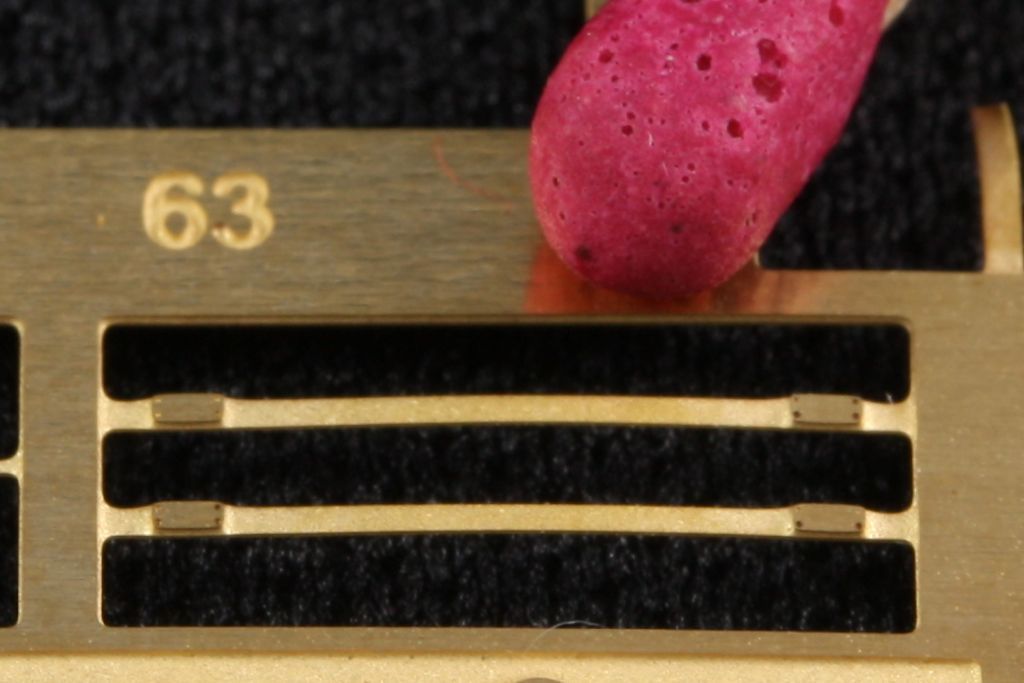
later, these PE parts #63 will be the straps, but I won't fit these until after I paint the bar.

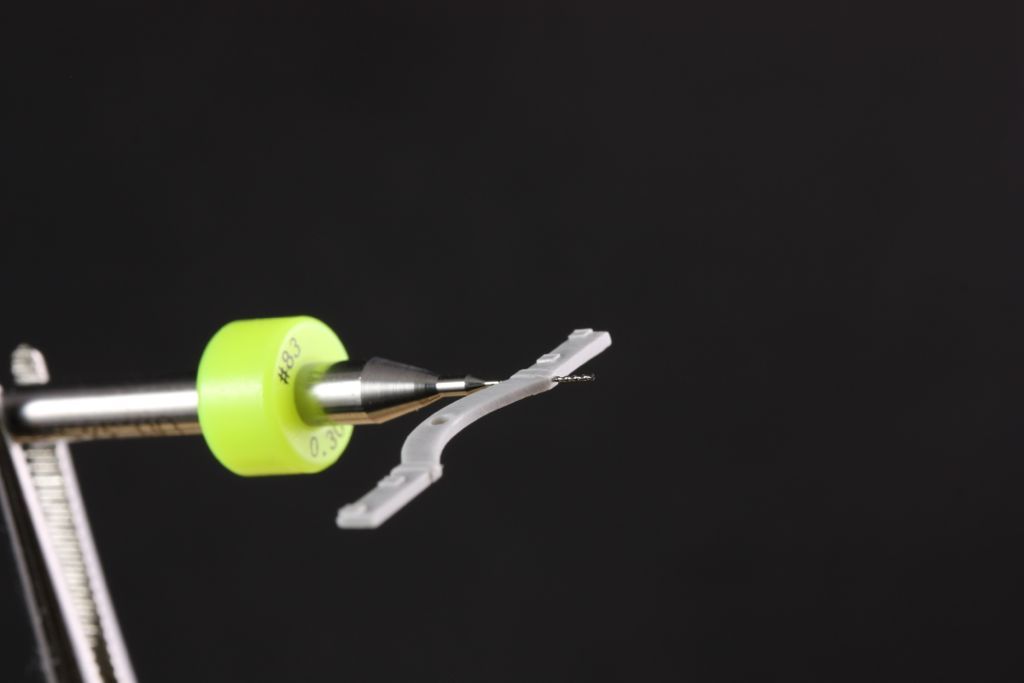
The (very!) small end fitting for the .8mm bar needs to be drilled to accept it. This is a tricky step.
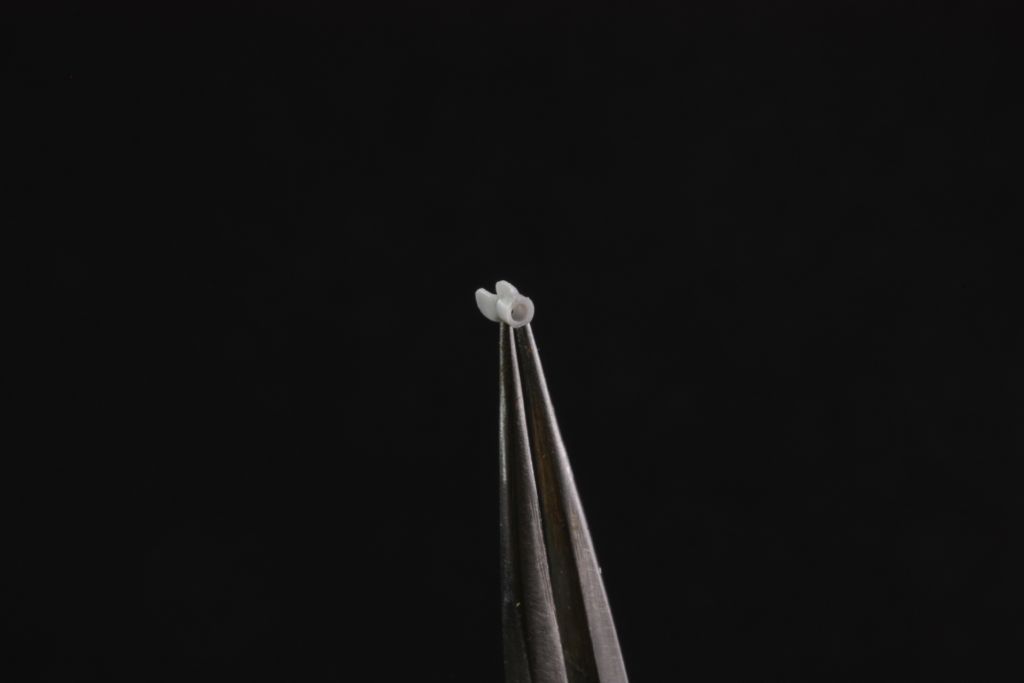

Ron suggests either simply gluing the main axle together, or cutting off the cast nuts and using .5mm resin bolt as an axle. I went a third route and carefully drilled through the center of the nuts so I can pin it with .3mm wire:
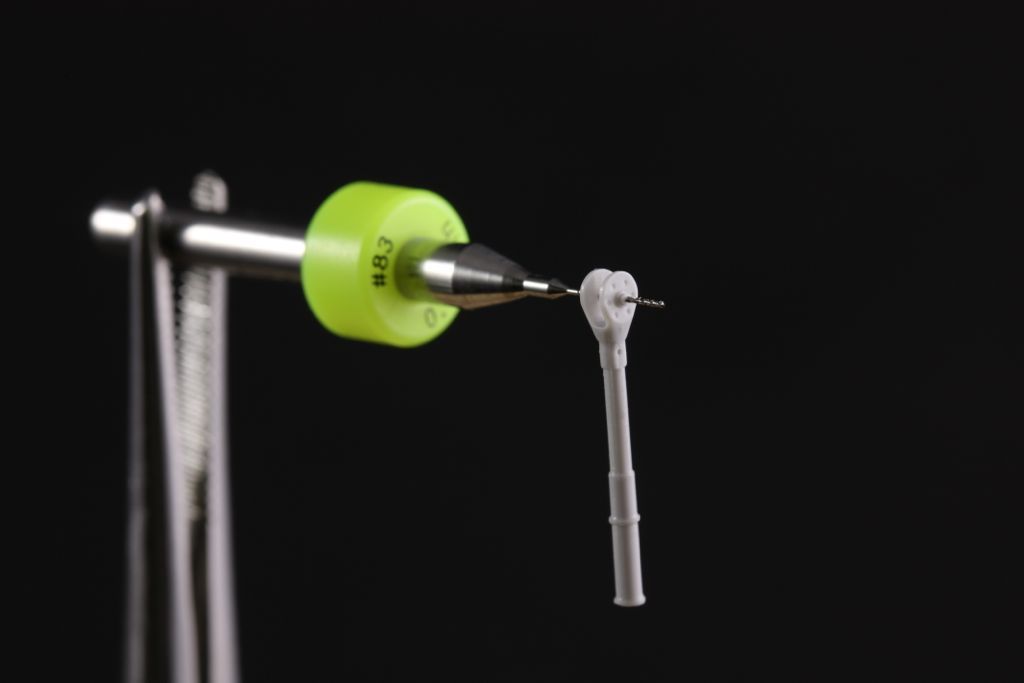

Same basic idea for upper bar (small fitting, shown earlier, now CA'ed to end of rod):
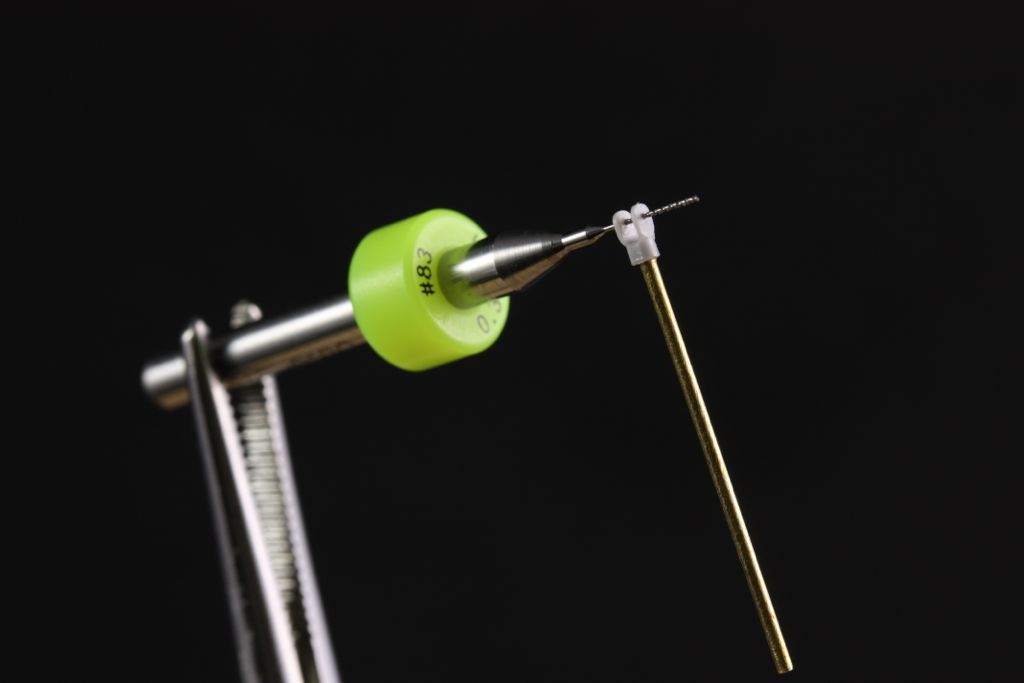

Basic components laid out:
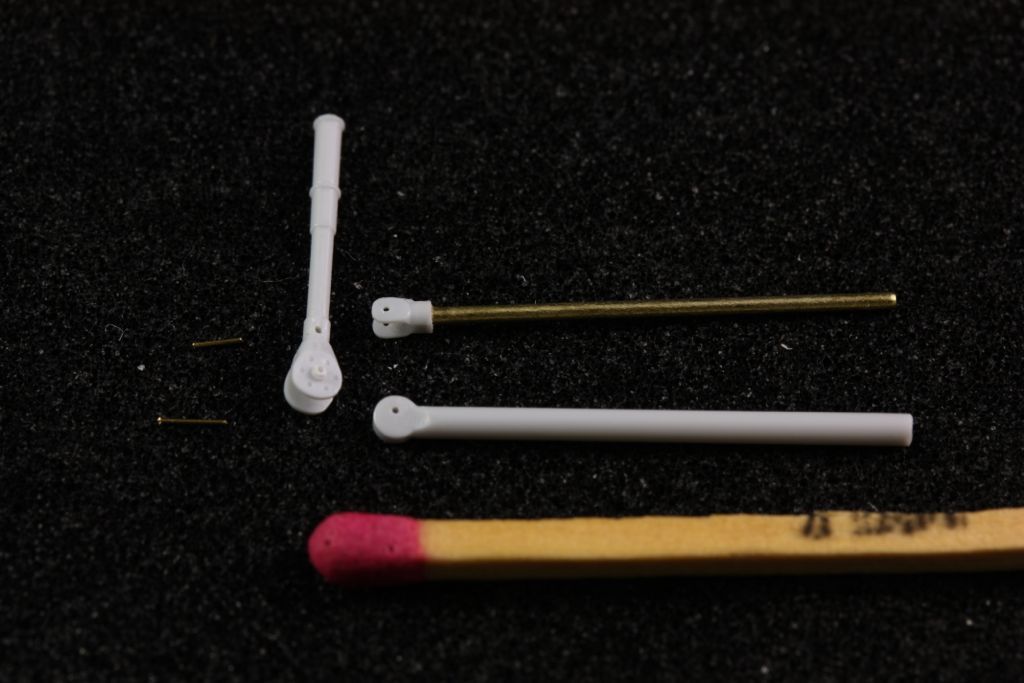

... and dry assembled:
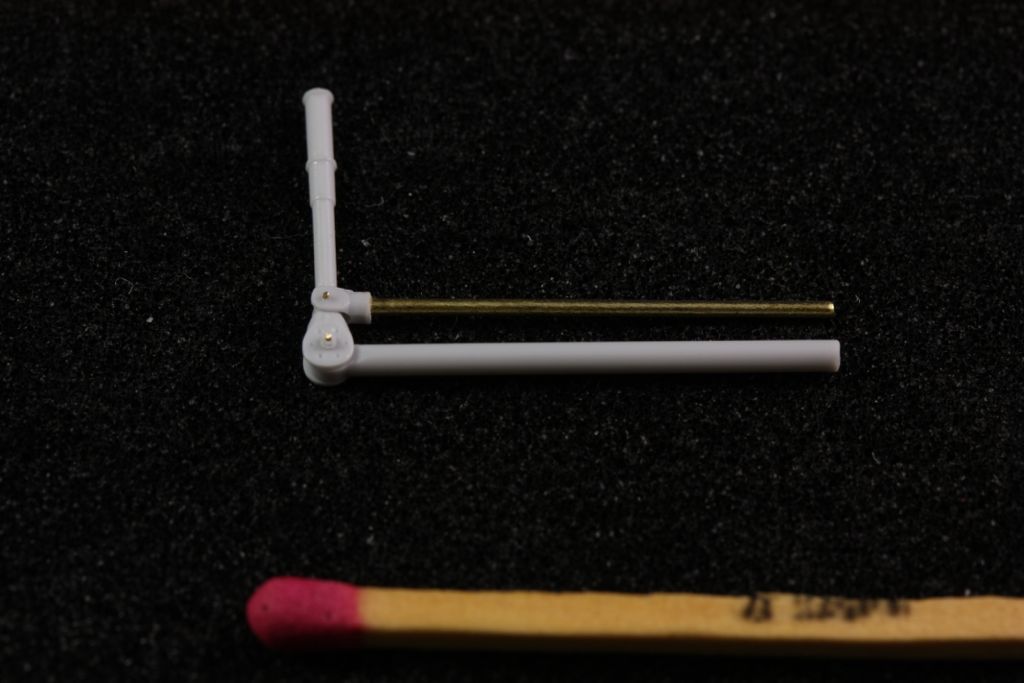

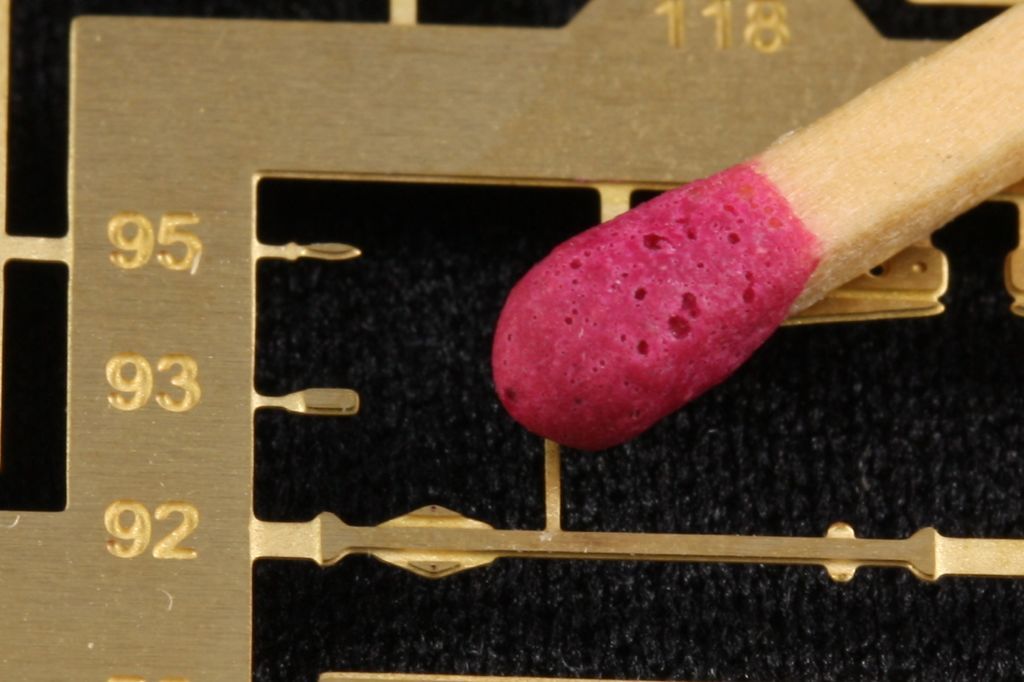
before it can be finally assembled, though, the "knuckle guard" and triggers must be added to the column. Here are the PE parts. 92 is the knuckle guard, 93 & 95 are the triggers, which you might wish to save yourself some trouble with and just directly snip them off and drop them on the floor :) :


Here it is assembled. Lower knuckle guard end fits in slot cut into control column. Upper just glues to the top. I bent it to shape (after annealing) using a simple jig made from two drill bits inserted into holes 3.5mm apart. I made the triggers from flotsam, having 'pulted part 95 into oblivion and not even wanting bother with 93...
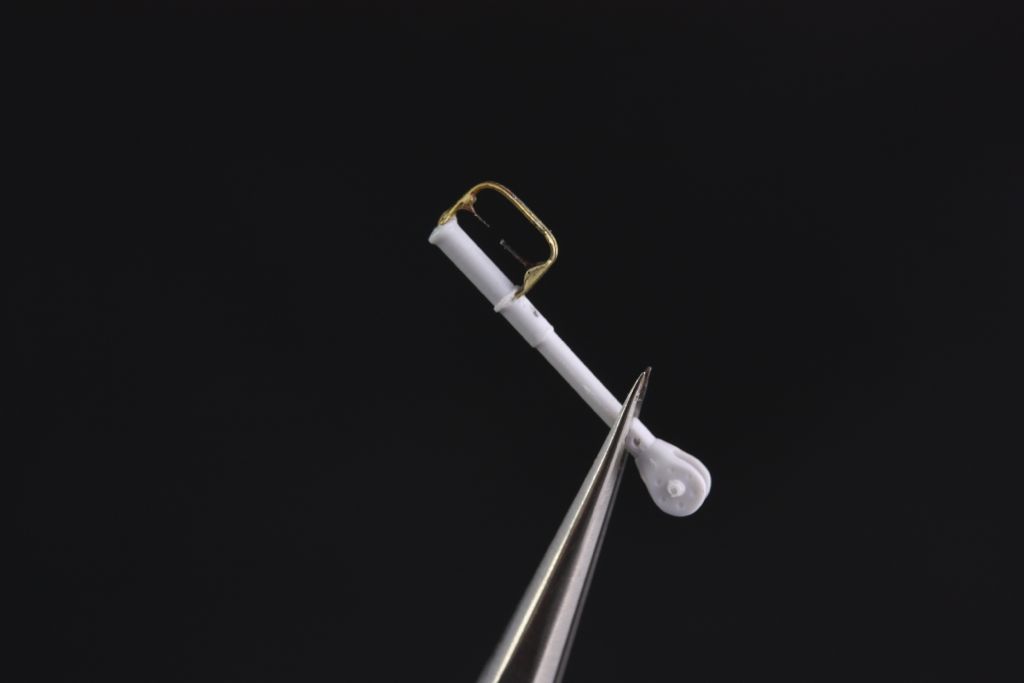

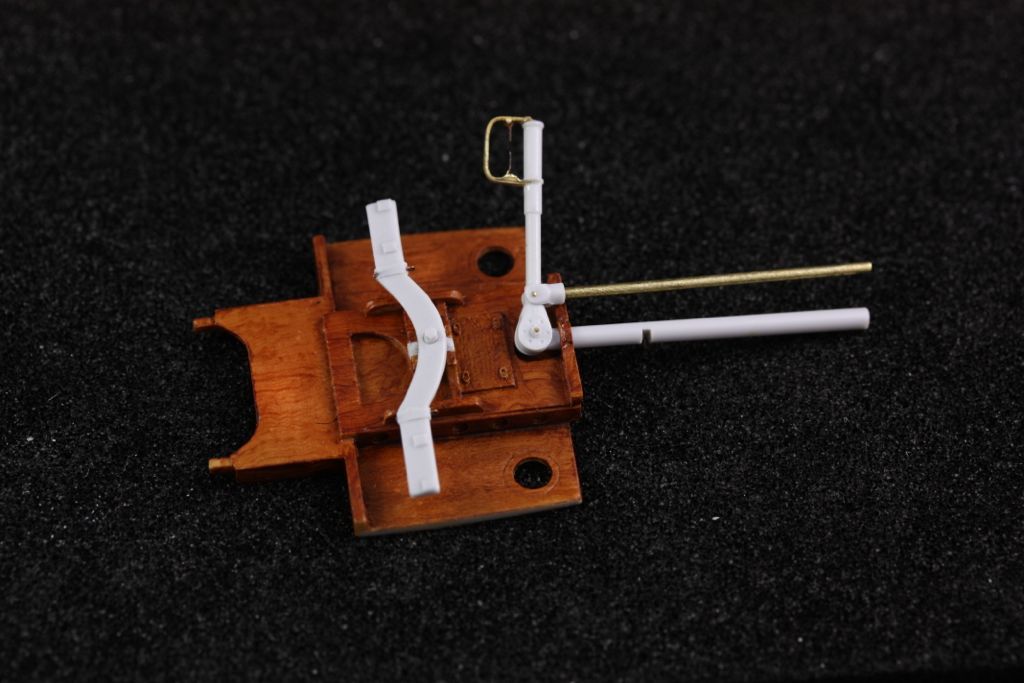
The next step is rather tough to describe, and actually not that tough to do once you understand what needs to be done. Unfortunately my photo is not very enlightening, but the control horn rocker assembly built in the last post has a stub sticking out the top of it. You need to cut a slot in the lower bar (the fatter resin piece) in order to accept that tab. To measure the position of the slot, you need to dry fit the control rocker thingy, as well as the floor and the lower control arm:

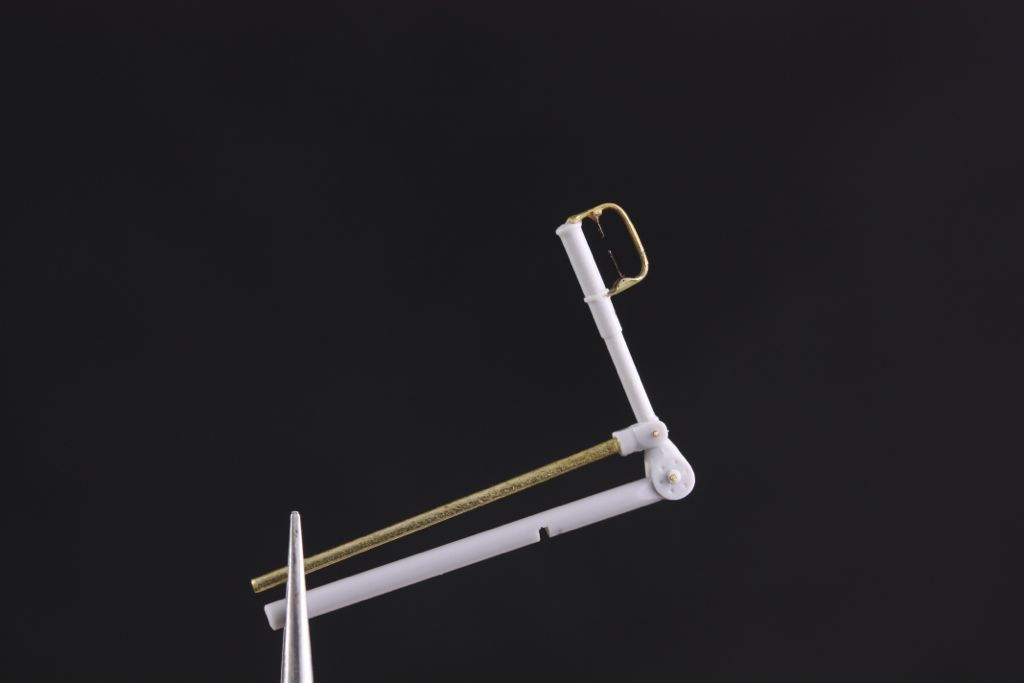
The assembled column looks like this. Note slot in lower bar, as mentioned above:

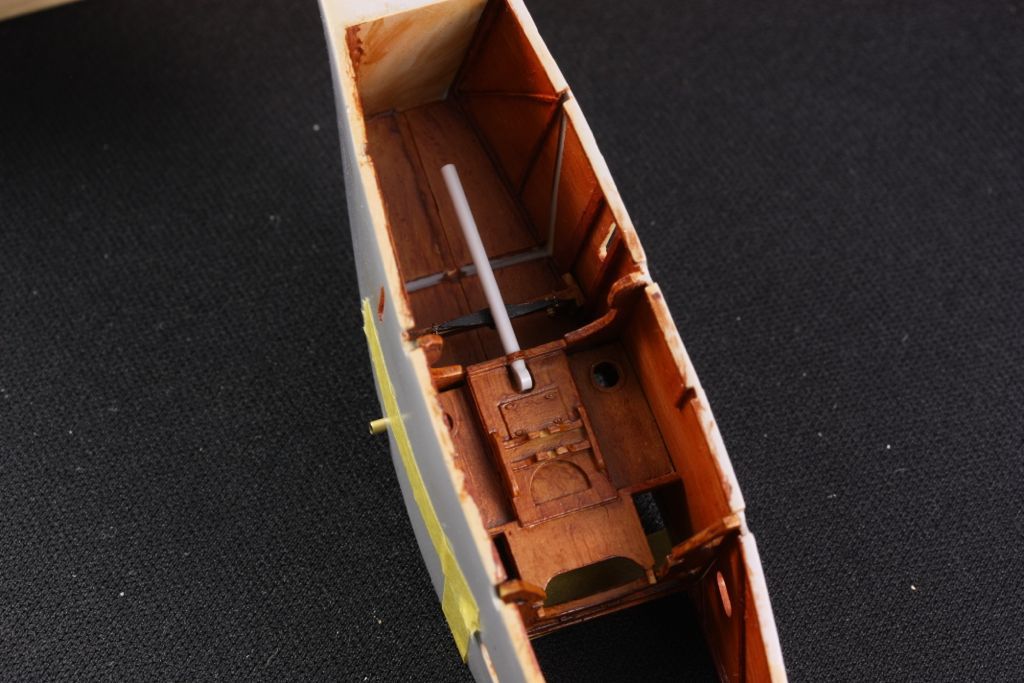
Here's how the whole thing, including rudder bar, fits into the floor. At first it seems nearly impossible to get the fat bar through the rather delicate strap without breaking something, but it can be done -- repeatedly.

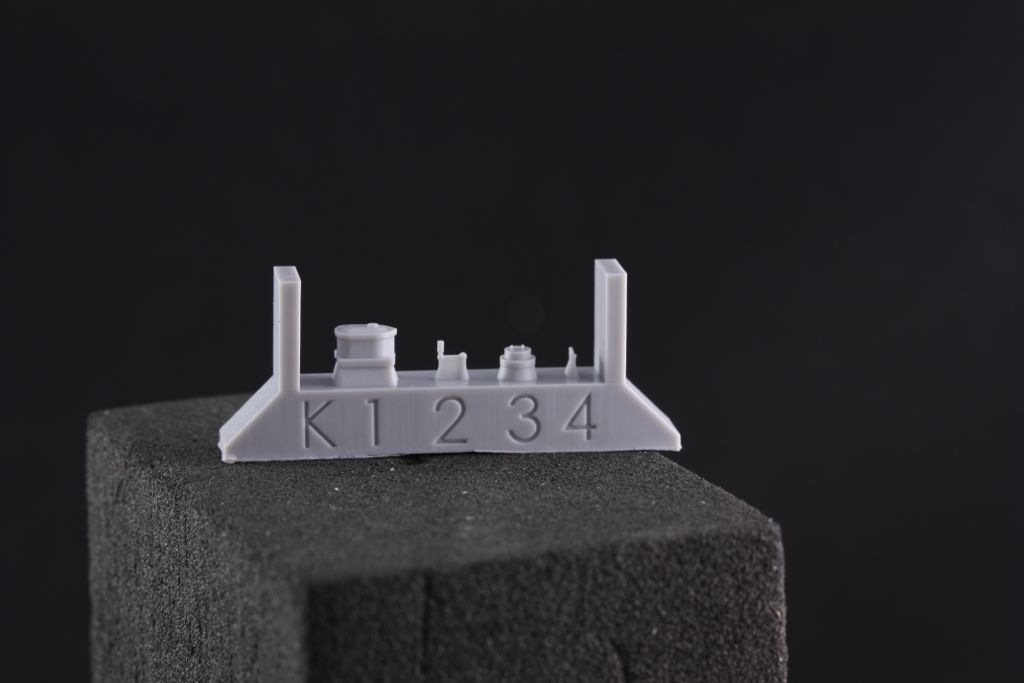
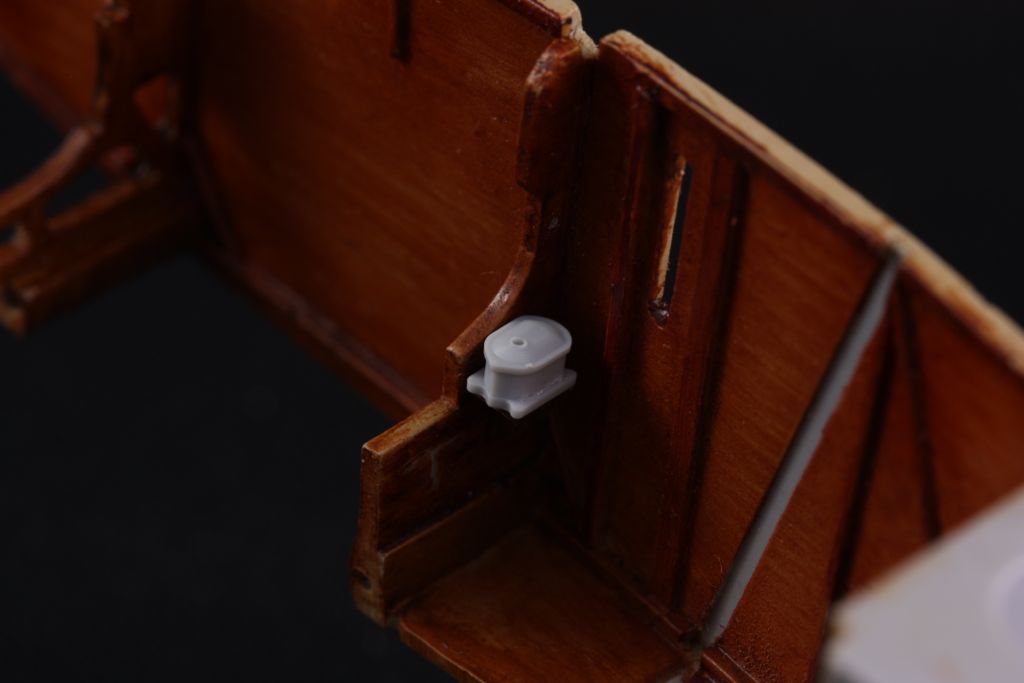
Finally, this is a good time to fit the magneto. The kit curiously supplies both Taurus and Ron K mastered versions  (same is true for the starter switches). Good news for the spares box -- everyone here know the Taurus items are exquisite, and the ones Ron mastered are lovely as well. Here are the Ron K parts, which is what I've decided to use for this project:


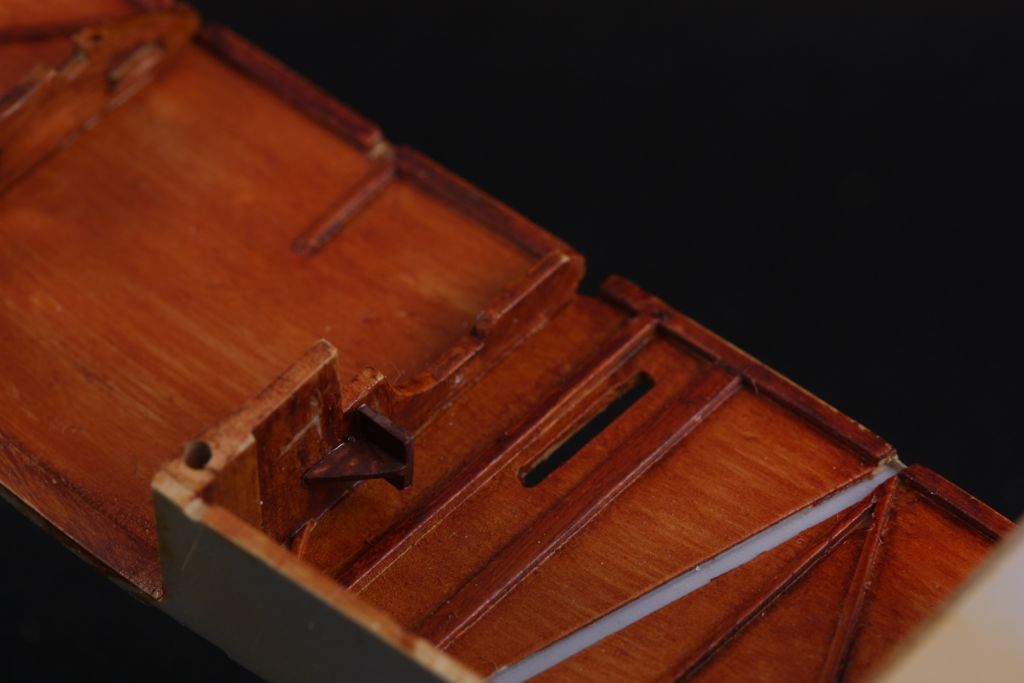
Now despite there being 2 sets included, the exact mounting of the starter magneto seems to be a bit .... notional. In fact it's not mentioned of the draft instructions I'm working off of at all. After some discussion with a couple of other early birds, I decided to fabricate a shelf out of styrene, which at least seems to jibe with the photos as to where the mag is located:

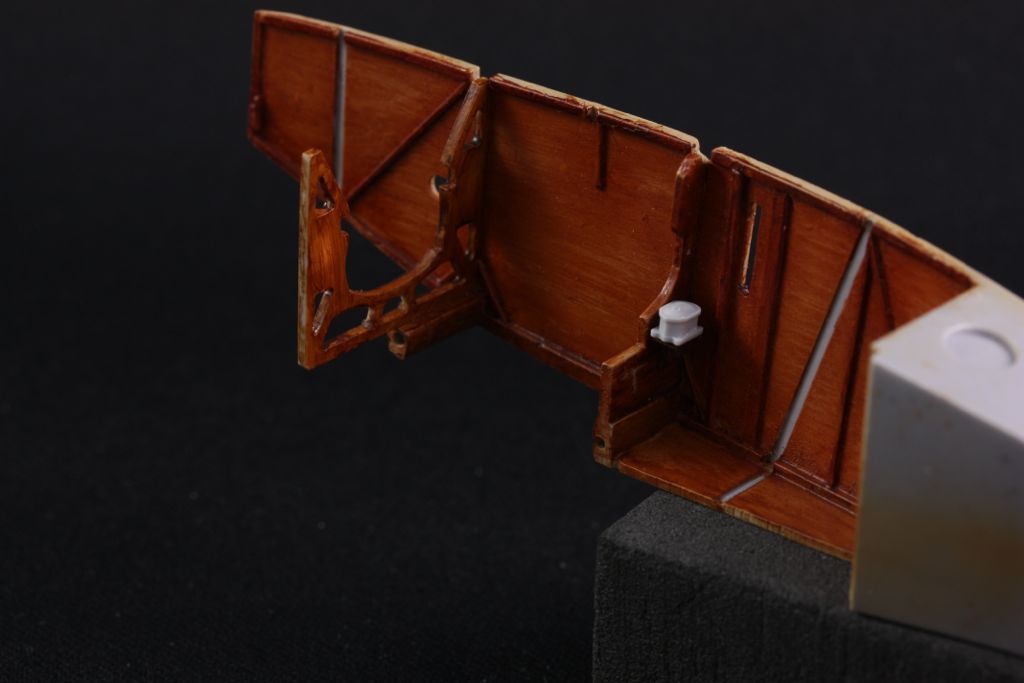
I also drilled a little hole, barely visible in these photos above the starting mag location where the main, fairly prominent wiring harness is located. Best to not do as I did, and tend to this before gluing the front frame in. Made for gymnastics...

That's it for now...!

Offline steveb

  • Full Member
  • ***
  • Posts: 237
Re: Ansaldo A.1 "Balilla" 1/32 Aviattic OOB
« Reply #143 on: January 27, 2017, 12:56:02 PM »
So cool! Love it!

Steve

Offline ondra

  • Hero Member
  • *****
  • Posts: 910
Re: Ansaldo A.1 "Balilla" 1/32 Aviattic OOB
« Reply #144 on: January 30, 2017, 03:24:33 AM »
Bo, here is my ultimate compliment to you - you have achieved what no one has achieved before. Looking at the details of this kit and this excellent step-by-step build log, I am feeling tempted to build something bigger than my usual scale.

Great job all around, mate!

Cheers

Ondra

Offline uncletony

  • Hero Member
  • *****
  • Posts: 4349
    • Aircraft In Pixels
Re: Ansaldo A.1 "Balilla" 1/32 Aviattic OOB
« Reply #145 on: January 30, 2017, 03:55:03 AM »
I am feeling tempted to build something bigger than my usual scale.

1/100th?  ;)

cheers :)

Offline lone modeller

  • Hero Member
  • *****
  • Posts: 5322
Re: Ansaldo A.1 "Balilla" 1/32 Aviattic OOB
« Reply #146 on: January 30, 2017, 03:58:25 AM »
This is out of this modelling world Bo. I was relieved to read that you too can send things into oblivion - I am not alone on that score!! Just an incredible build log and well past my pay grade!

Stephen.

Offline uncletony

  • Hero Member
  • *****
  • Posts: 4349
    • Aircraft In Pixels
Re: Ansaldo A.1 "Balilla" 1/32 Aviattic OOB
« Reply #147 on: January 30, 2017, 04:02:31 AM »
I was relieved to read that you too can send things into oblivion - I am not alone on that score!!

Oh yes, I am truly an oaf -- just perhaps a fairly patient one!  :)

cheers :)

Offline Borsos

  • Hero Member
  • *****
  • Posts: 3324
Re: Ansaldo A.1 "Balilla" 1/32 Aviattic OOB
« Reply #148 on: January 30, 2017, 06:02:52 AM »
very impressing progress on the interior. This kit really seems to be a jewel and you make the best out of it!
Borsos
"Deux armées aux prises, c'est une grande armée qui se suicide."
Barbusse.
"Ein Berg in Deutschland kann doch einen Berg in Frankreich nicht beleidigen. Oder ein Fluß oder ein Wald oder ein Weizenfeld."
Remarque.

Offline Wodehouse

  • Jr. Member
  • **
  • Posts: 65
Re: Ansaldo A.1 "Balilla" 1/32 Aviattic OOB
« Reply #149 on: January 30, 2017, 05:06:25 PM »
You have top notch abilities in both the engineering and artistic sides of this hobby.  Excellent work, and inspiring too.