Author Topic: Ansaldo A.1 "Balilla" 1/32 Aviattic OOB  (Read 33959 times)

Offline uncletony

  • Hero Member
  • *****
  • Posts: 4349
    • Aircraft In Pixels
Re: Ansaldo A.1 "Balilla" 1/32 Aviattic OOB
« Reply #105 on: January 17, 2017, 03:39:55 PM »
Exhaust pipes installed, and this closes out this chapter of the build...


Offline Edo

  • Hero Member
  • *****
  • Posts: 707
Re: Ansaldo A.1 "Balilla" 1/32 Aviattic OOB
« Reply #106 on: January 17, 2017, 04:12:21 PM »
Bo, your ingenuity is just great! that jig you made is so simple yet I had never thought of it nor I would be able enough to build one!
but what really impresses me this time is the shade of the exhaust: just wondeerful! so far better than my rust tone: what did you use?
thank you for the info and thank you for thaking the time of showing us all the procedures you use for this fantastic build!
ciao
edo

Offline Manni

  • Hero Member
  • *****
  • Posts: 1768
    • Der Militärmodellbauer
Re: Ansaldo A.1 "Balilla" 1/32 Aviattic OOB
« Reply #107 on: January 17, 2017, 04:15:02 PM »
Wow, Bo!
The engine looks great. I love the colour of the exhaust pipes. May I ask, how you have achieved this look?
Bye,Manni
"Ich hab' da mal was vorbereitet.": Jean Pütz
"Warum noch mehr Bausätze?!?": meine Frau

Online Juan

  • Hero Member
  • *****
  • Posts: 2457
  • All gave some, some gave all.
Re: Ansaldo A.1 "Balilla" 1/32 Aviattic OOB
« Reply #108 on: January 17, 2017, 11:32:51 PM »
Wow, Bo!
The engine looks great. I love the colour of the exhaust pipes. May I ask, how you have achieved this look?
Bye,Manni

As stated previously, the exhausts are beautifully finished.  Looking forward to the next chapter of this exciting/informative build.

Online RAGIII

  • Hero Member
  • *****
  • Posts: 18850
Re: Ansaldo A.1 "Balilla" 1/32 Aviattic OOB
« Reply #109 on: January 17, 2017, 11:33:10 PM »
Bo, you make these things seem so simple. Why didn't I think of something like this years ago? Simple answer, I am not Bo!
RAGIII
PS: Like the others I find the painting of those exhaust pipes very impressive!
RAGIII
"A man has to know his limitations": Harry Callahan

"Don't slop it on" Lynda Geisler

Offline GAJouette

  • Hero Member
  • *****
  • Posts: 3579
  • " Beware of the Spanish Inquisition"
Re: Ansaldo A.1 "Balilla" 1/32 Aviattic OOB
« Reply #110 on: January 18, 2017, 01:44:57 AM »
 Bo,
Your work/artistry is nothing short of amazing my old friend. Looking forward to the next installment.
Highest Regards,
Gregory Jouette
" What Me Worry"

Offline xmald

  • Hero Member
  • *****
  • Posts: 1093
Re: Ansaldo A.1 "Balilla" 1/32 Aviattic OOB
« Reply #111 on: January 18, 2017, 06:59:00 AM »
You`re a true artist Bo, this is going to be the most super detailed Balilla model built OOB  ;)
Keep up the good work - it`s such a pleasure to follow your threads!
Best regards
Filip

Offline Alexis

  • Hero Member
  • *****
  • Posts: 7947
  • Love the self
Re: Ansaldo A.1 "Balilla" 1/32 Aviattic OOB
« Reply #112 on: January 18, 2017, 10:58:42 AM »
 :) :) :)


Terri
Hurra ! , Ich Leben Noch
Body and life is a vessel we use to travel the planet . Femininity is the gift , The miracle comes from what we do with it .

Offline Gisbod

  • Hero Member
  • *****
  • Posts: 2438
Re: Ansaldo A.1 "Balilla" 1/32 Aviattic OOB
« Reply #113 on: January 18, 2017, 08:57:15 PM »
There's always a simple solution - it just takes genius to find it  ;D

Guy
“Oh! I have slipped the surly bonds of Earth -
Put out my hand, and touched the face of God.”

P.O. John Gillespie Magee 1941

Offline Ian from Doncaster

  • Hero Member
  • *****
  • Posts: 1164
Re: Ansaldo A.1 "Balilla" 1/32 Aviattic OOB
« Reply #114 on: January 18, 2017, 09:04:54 PM »
What amazes me is folks like Bo, Des, and many others turn round such craftsmanship in so little time.

The exhaust drilling jig, for example, is such a simple idea yet it would probably take me longer just to think about how to do that, than it took Bo to build it, drill, paint and attach the exhausts!!

Offline uncletony

  • Hero Member
  • *****
  • Posts: 4349
    • Aircraft In Pixels
Re: Ansaldo A.1 "Balilla" 1/32 Aviattic OOB
« Reply #115 on: January 19, 2017, 12:36:24 AM »
Thanks guys!  :)

While it's fun to get all the credit, I must point out that the drilling jig is the specified method in the instructions as the way to accomplish this. In fact I was quite dubious that it would work satisfactorily but decided to try it before casting about for a substitute -- that was meant to be the point of the post (I actually ordered the correct diameter brass tubing to replace the stubs). Ron made the example jig from a brass billet; my small contribution is showing how it can be made from simpler stuff most modelers might have on hand.

Offline lone modeller

  • Hero Member
  • *****
  • Posts: 5322
Re: Ansaldo A.1 "Balilla" 1/32 Aviattic OOB
« Reply #116 on: January 19, 2017, 03:31:04 AM »
What can I add Bo? This is by far the most impressive tutorial that I have read - and there are some truly impressive tutorials on this site. It just gets better with each post.

Stephen.

Offline Ronkootje

  • Full Member
  • ***
  • Posts: 229
Re: Ansaldo A.1 "Balilla" 1/32 Aviattic OOB
« Reply #117 on: January 19, 2017, 08:54:03 AM »
Thanks guys!  :)

While it's fun to get all the credit, I must point out that the drilling jig is the specified method in the instructions as the way to accomplish this. In fact I was quite dubious that it would work satisfactorily but decided to try it before casting about for a substitute -- that was meant to be the point of the post (I actually ordered the correct diameter brass tubing to replace the stubs). Ron made the example jig from a brass billet; my small contribution is showing how it can be made from simpler stuff most modelers might have on hand.

True its a real simple methode and yours is the same priceble but easy to make I made it on my lathe and know that not every one has that so thanks for showing this methode.

Want to point out also that you cut the pipes of at the angel and then drilling it, works fine whit the drills you use got the same ones they are real sharp but many modelers have the normal HSS drills so it might be wise to keep it cut it 90 degrees and then drill it to prevent the drill from slipping and then sand the angel on when the drilling is complete

Ron

Offline uncletony

  • Hero Member
  • *****
  • Posts: 4349
    • Aircraft In Pixels
Re: Ansaldo A.1 "Balilla" 1/32 Aviattic OOB
« Reply #118 on: January 19, 2017, 12:32:49 PM »
Want to point out also that you cut the pipes of at the angel and then drilling it, works fine whit the drills you use got the same ones they are real sharp but many modelers have the normal HSS drills so it might be wise to keep it cut it 90 degrees and then drill it to prevent the drill from slipping and then sand the angel on when the drilling is complete

This is a good point -- I am using very sharp carbide bits (Drill Bits Unlimited); I tried it both ways and I found cutting first was much easier -- it was hard to make out the exact angle to cut the pipe when boring first. However, as Ron says, if you are using HSS bits it might be easier to cut the angle after boring them out.

Offline uncletony

  • Hero Member
  • *****
  • Posts: 4349
    • Aircraft In Pixels
Re: Ansaldo A.1 "Balilla" 1/32 Aviattic OOB
« Reply #119 on: January 19, 2017, 12:53:47 PM »
On to the fuselage

The next chapter is all about prepping the fuselage and fitting the fuel tank.

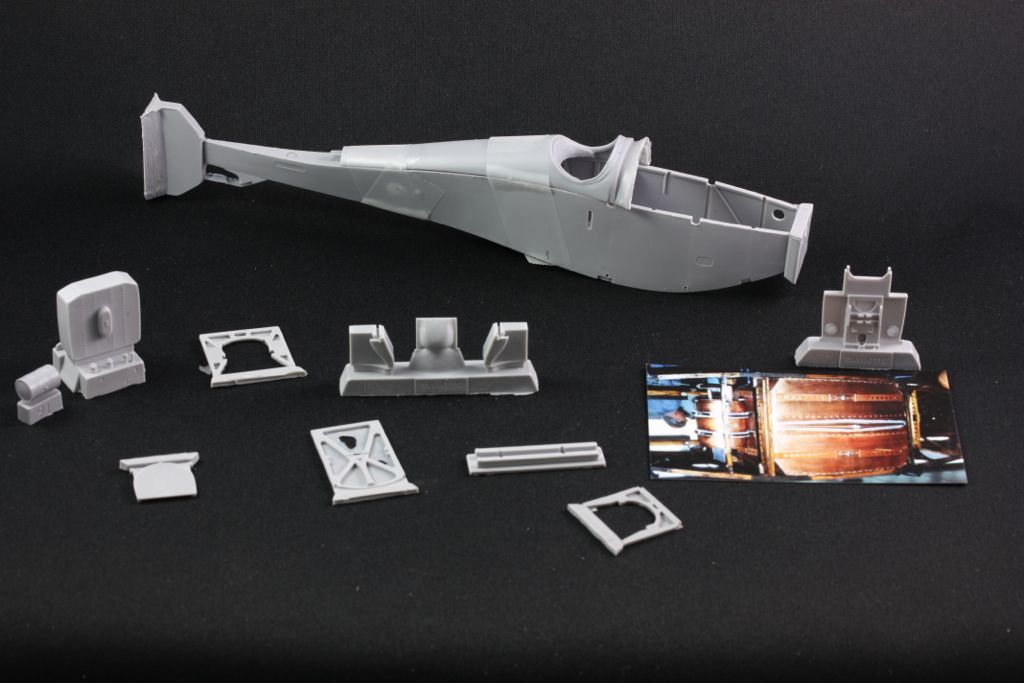
Here are the parts needed -- the fuselage in two parts and the contents of the baggie that contains the card with fuel tank images. (You can set aside the upper part of the fuselage for now -- it won't be needed for quite a while)


The fuselage needs some trimming and prep. The trimming required at the tail end should be obvious, but the nose end is a little more involved. When you cut off the casting block from the nose, you are left with something like this:
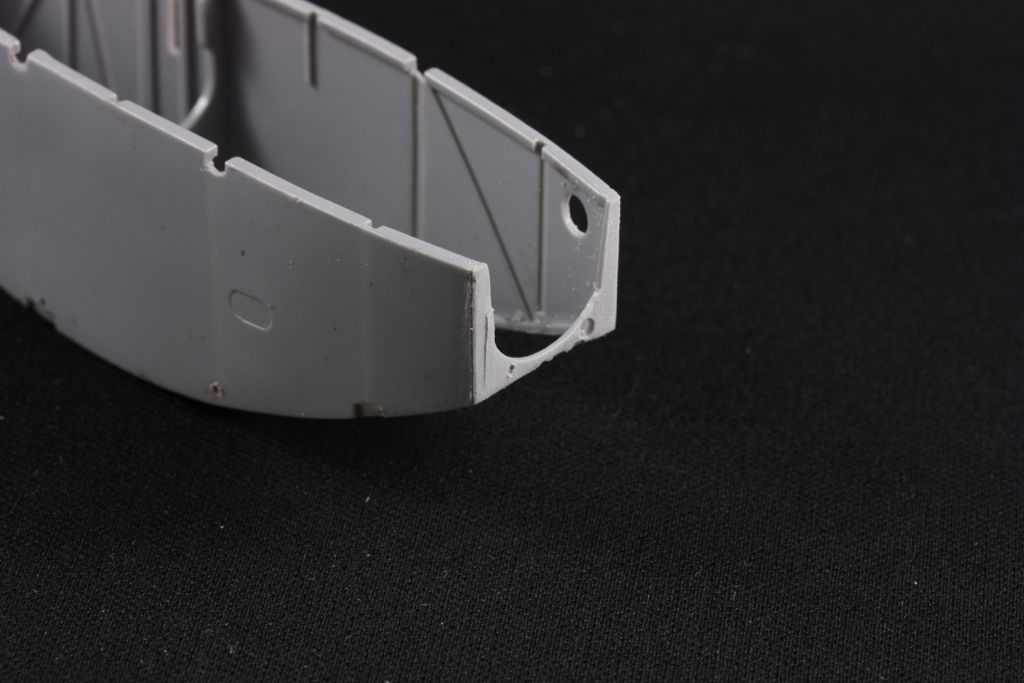


This actually somewhat closely resembles what you see when the radiator is removed from the real thing, and I think maybe at one time that was as far as Ron was going to go -- but it turns out they have provided a much more realistic PE part... :
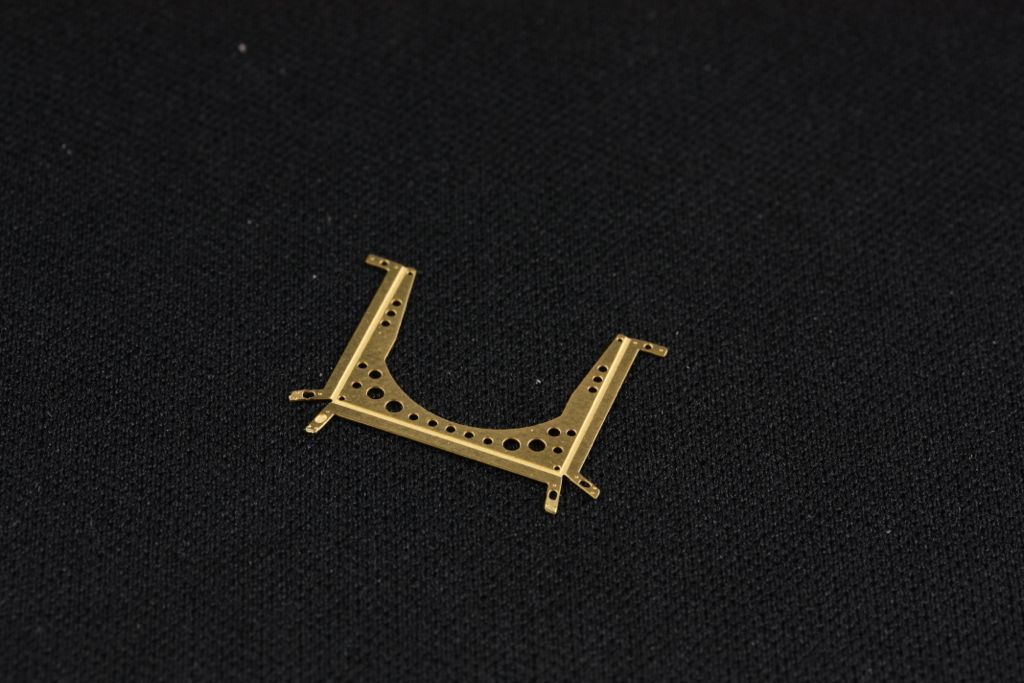


(bent to shape)
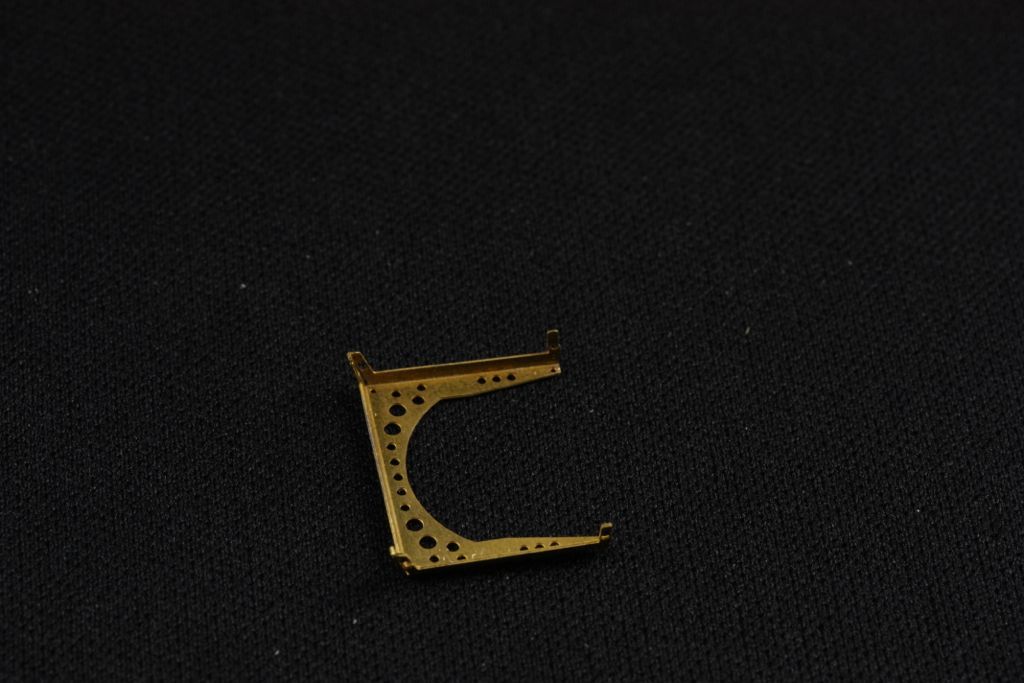


... which requires a bit of fiddling to fit:
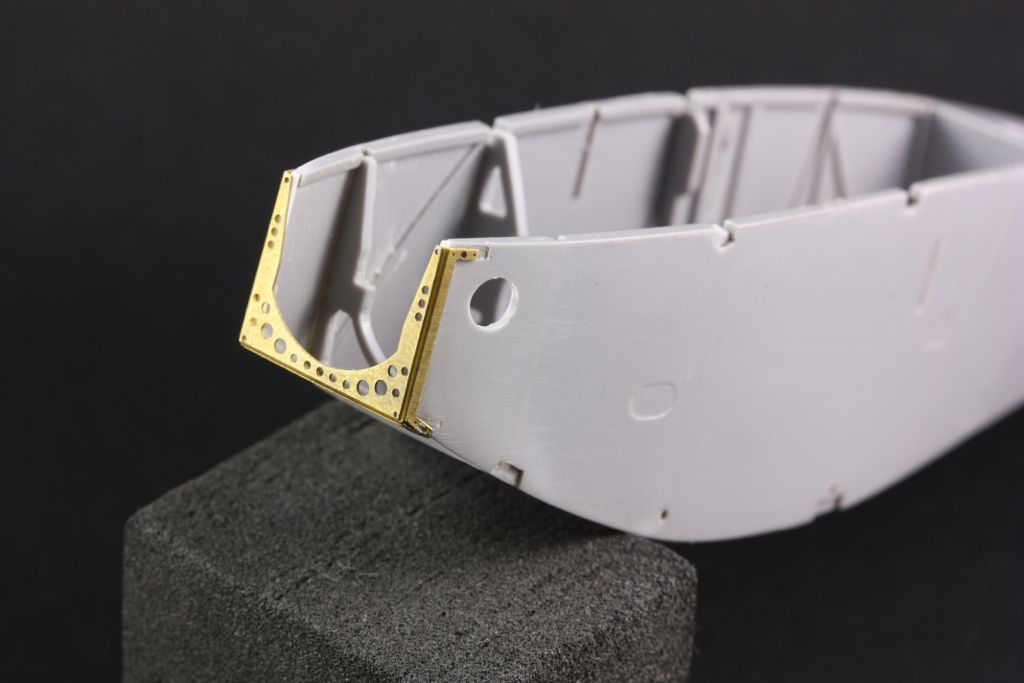

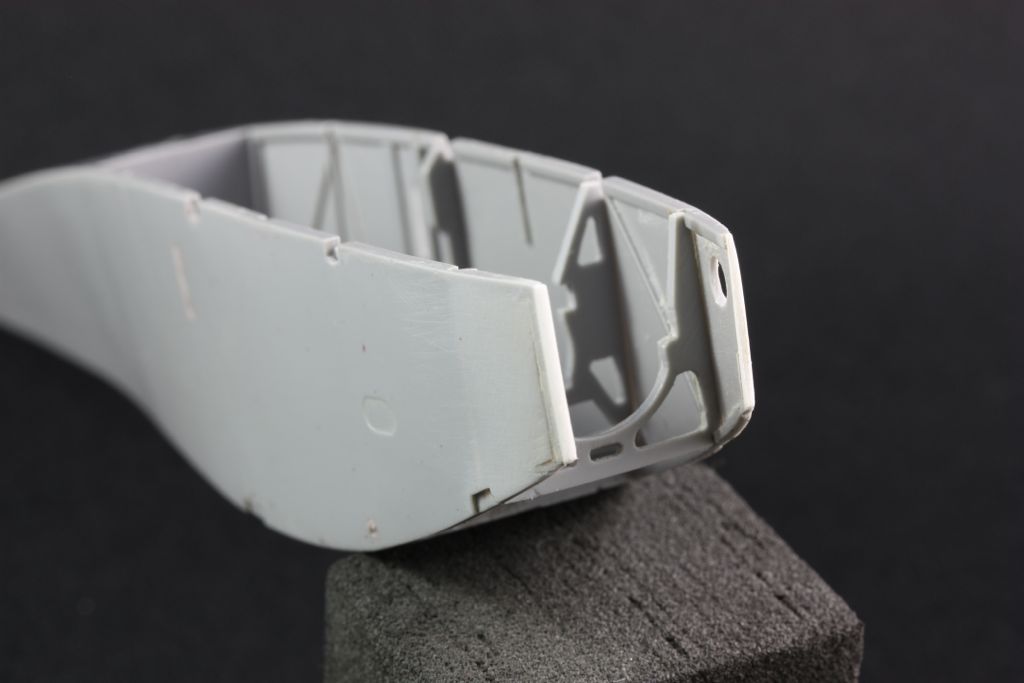
Basically, you need to trim the nose back a bit further, so that it is ~9.1mm from the second former. And you need to thin it a little bit to get the PE part to fit. As you can see, I went a little too far and had to build the nose back up with some strips of styrene. At any rate it's mostly a game of fit'n'try until it all goes together nicely...
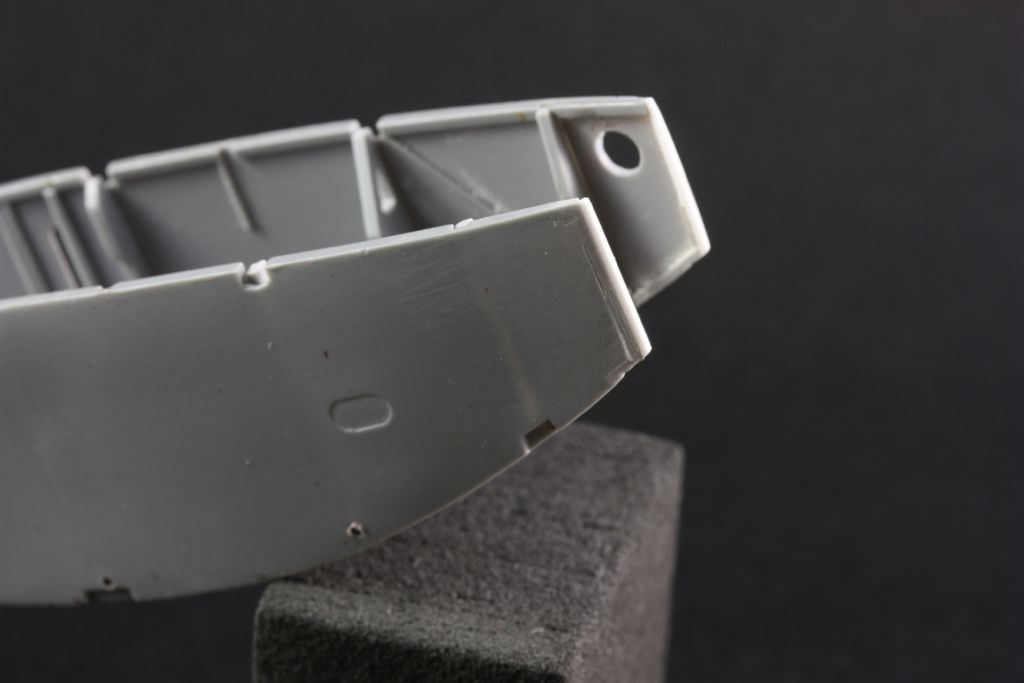


The trenches visible in the photos have since been filled in with SupaFilla and smoothed over...
« Last Edit: January 20, 2017, 10:25:53 AM by Bo »