Author Topic: 1:72 Maquette Ilya Muromets  (Read 49408 times)

Offline RAGIII

  • Hero Member
  • *****
  • Posts: 18842
Re: 1:72 Maquette Ilya Muromets
« Reply #195 on: March 26, 2017, 08:24:28 PM »
Sorry Ian I have been away and missed some of this. This is looking terrific - those engines are great. This is going to be more scratch build than kit when finished methinks!

Stephen.

I agree with Stephen!
RAGIII
"A man has to know his limitations": Harry Callahan

"Don't slop it on" Lynda Geisler

Offline IanB

  • Hero Member
  • *****
  • Posts: 2439
Re: 1:72 Maquette Ilya Muromets
« Reply #196 on: March 31, 2017, 11:58:06 AM »
I finished repainting the national insignia today, and although I'm much happier with the colours (the blue is Modelmaster Acryl Blue Angels blue) my masking is apparently not up to par.....some touching in to do!


 A huge improvement though, the more I looked at the pale blue the more I didn't like it!

Ian

Offline andonio64

  • Hero Member
  • *****
  • Posts: 1685
  • There's no hurry
Re: 1:72 Maquette Ilya Muromets
« Reply #197 on: March 31, 2017, 04:42:26 PM »
Hi Ian, good job as usual.
I agree with you in appreciating the blue tone, the touch up is not a big effort I think...

I love following your build log!

Antonio

Offline RAGIII

  • Hero Member
  • *****
  • Posts: 18842
Re: 1:72 Maquette Ilya Muromets
« Reply #198 on: March 31, 2017, 09:57:46 PM »
Ian,
The new blue shade looks great! I am sure you will accomplish the touch up with no issues!
RAGIII
"A man has to know his limitations": Harry Callahan

"Don't slop it on" Lynda Geisler

Offline IanB

  • Hero Member
  • *****
  • Posts: 2439
Re: 1:72 Maquette Ilya Muromets
« Reply #199 on: April 01, 2017, 11:07:11 AM »
Thanks Rick...
 I was a little worried, and was prepared to sand it all off and start again, mainly because I didn't know whether the circles would be concentric after touching in parts of the edges. It turned out ok though and I think I'll leave it as is!


Ian
« Last Edit: September 02, 2017, 10:58:45 AM by IanB »

Offline RAGIII

  • Hero Member
  • *****
  • Posts: 18842
Re: 1:72 Maquette Ilya Muromets
« Reply #200 on: April 01, 2017, 11:23:08 PM »
It looks excellent to my eyes!
RAGIII
"A man has to know his limitations": Harry Callahan

"Don't slop it on" Lynda Geisler

Offline lone modeller

  • Hero Member
  • *****
  • Posts: 5317
Re: 1:72 Maquette Ilya Muromets
« Reply #201 on: April 02, 2017, 05:54:10 AM »
Ian if it is any help I paint the roundels on my models and believe me what you have done is very good indeed. They are extremely tricky things to do and I think that it is unlikely that you could improve much on those. My advice - leave them while you are winning!

Stephen.

Offline Juan

  • Hero Member
  • *****
  • Posts: 2456
  • All gave some, some gave all.
Re: 1:72 Maquette Ilya Muromets
« Reply #202 on: April 02, 2017, 06:06:31 AM »
Awesome Ian, truly impressed by you have done thus far.

Offline IanB

  • Hero Member
  • *****
  • Posts: 2439
Re: 1:72 Maquette Ilya Muromets
« Reply #203 on: August 31, 2017, 06:33:47 AM »
Well, folks...as promised, the beast is back!

 Before I attach the lower wings there are still a couple of things that need doing. The first of those was tackled today.

Exhausts. 24 of them. I bought some Albion Alloys aluminium tube of 0.6mm od and 0.4mm id specifically for this job. All I had to do was find a way to cut it into 4mm lengths, with one end cut at an angle....and keep them all the same!

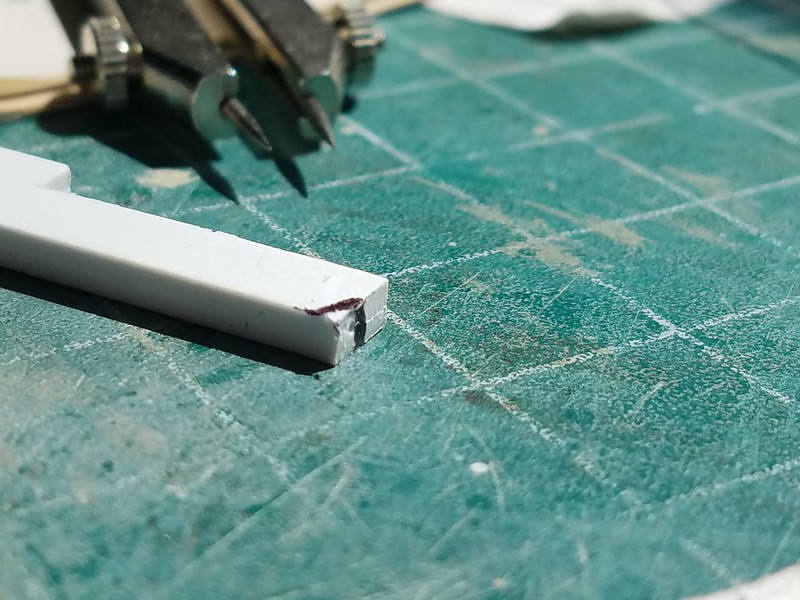
 After thinking a while, I remembered Des' tip for cutting lengths of rod so I decided to make a little jig. I first marked a drill bit with tape so I knew how deep to drill....


 Then I found a piece of scrap suitable for the jig and drilled the hole. The angle I needed was marked with a permanent marker, and the corner of the piece of scrap was carefully sanded back to the mark....


Insert tube, cut with a PE saw, and see if it works......


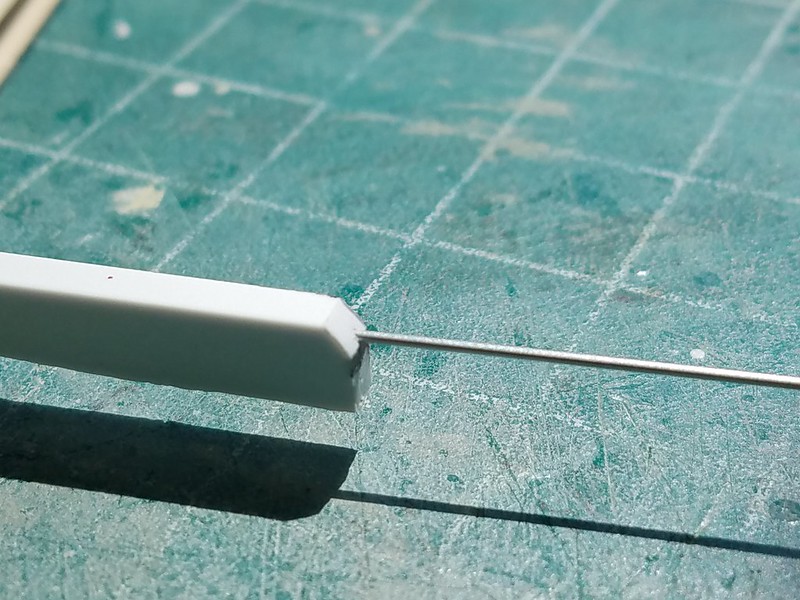
 After a bit of fine tuning, and making sure the tube was fully inserted every time, it was actually a fairly quick process once I got going.


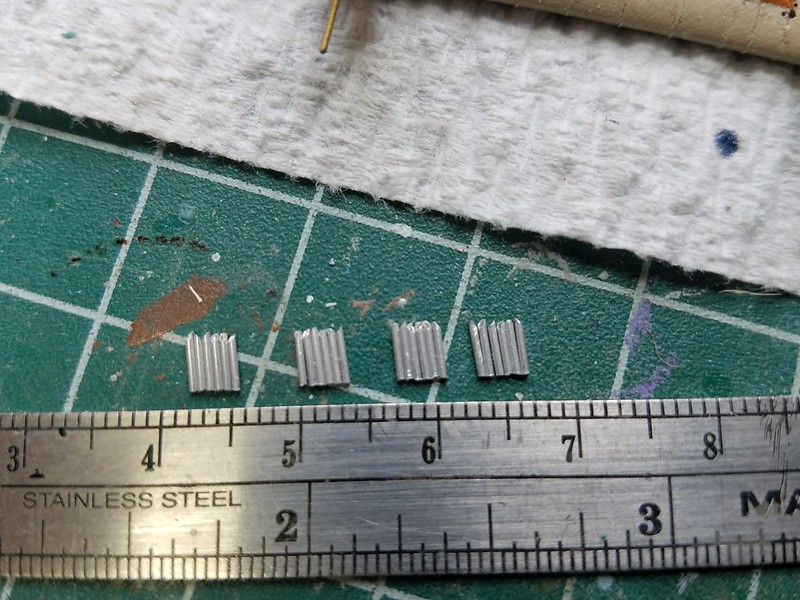
24 exhausts! Not all absolutely identical, but I sorted out the longest and the shortest and put them together so the differences won't show once they're all mounted.

 After that I realised that the inner engines had been mounted slightly too far back, so those were removed and positioned correctly. They have to be spot on as the middle pair of exhausts bracket the struts, and the exhausts are longer than the gap between the engine and the struts so if it's wrong, the exhausts won't fit, they'll hit the strut!

 Here's hoping it's now correct.

 The next task is to finish the cooling systems, which means fabricating the 4 radiators (the ones I made earlier are too small so I'll make new ones), and the reservoir tanks and fittings.

See you soon!

Ian

Offline Des

  • Administrator
  • Hero Member
  • ******
  • Posts: 9325
    • ww1aircraftmodels.com
Re: 1:72 Maquette Ilya Muromets
« Reply #204 on: August 31, 2017, 06:48:01 AM »
You are moving along very well with this build Ian, you did a great job with the exhaust pipes.

Des.
Late Founder of ww1aircraftmodels.com and forum.ww1aircraftmodels.com

Offline RAGIII

  • Hero Member
  • *****
  • Posts: 18842
Re: 1:72 Maquette Ilya Muromets
« Reply #205 on: August 31, 2017, 08:32:56 AM »
Nice work on the exhaust Ian! Great to see this one back on the bench!
RAGIII
"A man has to know his limitations": Harry Callahan

"Don't slop it on" Lynda Geisler

Offline IanB

  • Hero Member
  • *****
  • Posts: 2439
Re: 1:72 Maquette Ilya Muromets
« Reply #206 on: September 02, 2017, 06:18:39 AM »
Thanks Des and Rick for the comments. I spent most of today going crosseyed  - the exhausts were fitted!
 
 I made up a simple little jig to keep them level and held that in place with a piece of blu-tack while I attached each one. The trickiest part was actually trying to ensure that the cutouts at the ends were pointing the same way!


One done...


 I left each one for about 30 minutes before sliding the jig out and starting the next one, which gave my eyes a bit of a rest too!

 Two down...


I'm pretty happy with that, so on to the second wing....


All done! I want to give each of them a little shot of thin CA to ensure they're secure before trying to paint them, but my bottle has thickened up too much so I need to go and get some more.

 The last job for today was cutting some blanks for the radiators out of 1mm sheet.


 Now I just need to figure out what I'm going to do about getting a decent radiator "look" to them...cladding with brass rod is one option but is very tedious....

Any suggestions?

Thanks for looking in!

Ian

Offline RAGIII

  • Hero Member
  • *****
  • Posts: 18842
Re: 1:72 Maquette Ilya Muromets
« Reply #207 on: September 02, 2017, 06:48:53 AM »
The exhaust turned out beautifully! All four engines are awesome!
RAGIII
"A man has to know his limitations": Harry Callahan

"Don't slop it on" Lynda Geisler

Offline RLWP

  • Hero Member
  • *****
  • Posts: 1494
  • Bodger
Re: 1:72 Maquette Ilya Muromets
« Reply #208 on: September 02, 2017, 07:16:58 AM »
That is a great jig!

Richard
Hendon for flying - the fastest way to the ground!

Offline Nigel Jackson

  • Hero Member
  • *****
  • Posts: 2608
Re: 1:72 Maquette Ilya Muromets
« Reply #209 on: September 02, 2017, 08:19:14 AM »
Blimey, Ian, those engines are mighty impressive. What a fascinating build this is.

Best wishes
Nigel